If you’ve been downloading WWE 2K24‘s community created wrestlers, you might have noticed that some fans have added their own signs or images. If you’re wondering how to go about that, here’s how to upload images in WWE 2K24.
How to Upload Images in WWE 2K24
To upload images in WWE 2K24 you actually need to go through 2K’s web page. And then there are several other hoops you need to jump through, all to get your image into your game. So, here’s how to go about it.
1. Create a 2K account.
You’ll first need to create a 2K account and link it to your console/PC account, whether that’s Steam, Xbox, or PlayStation. You can create an account for free, and it is essential for this process.
2. Go to the WWE 2K24 image uploader page.
Even though WWE 2K24‘s CAW/sign menus mention ‘custom image’, you can’t upload an image from within the game. Instead, go to the WWE 2K uploader page here. You’ll need to log in using the account you’ve just created, and you’ll then have the option to upload an image of your choice, whether it’s for a sign, wrestler image, or so on.
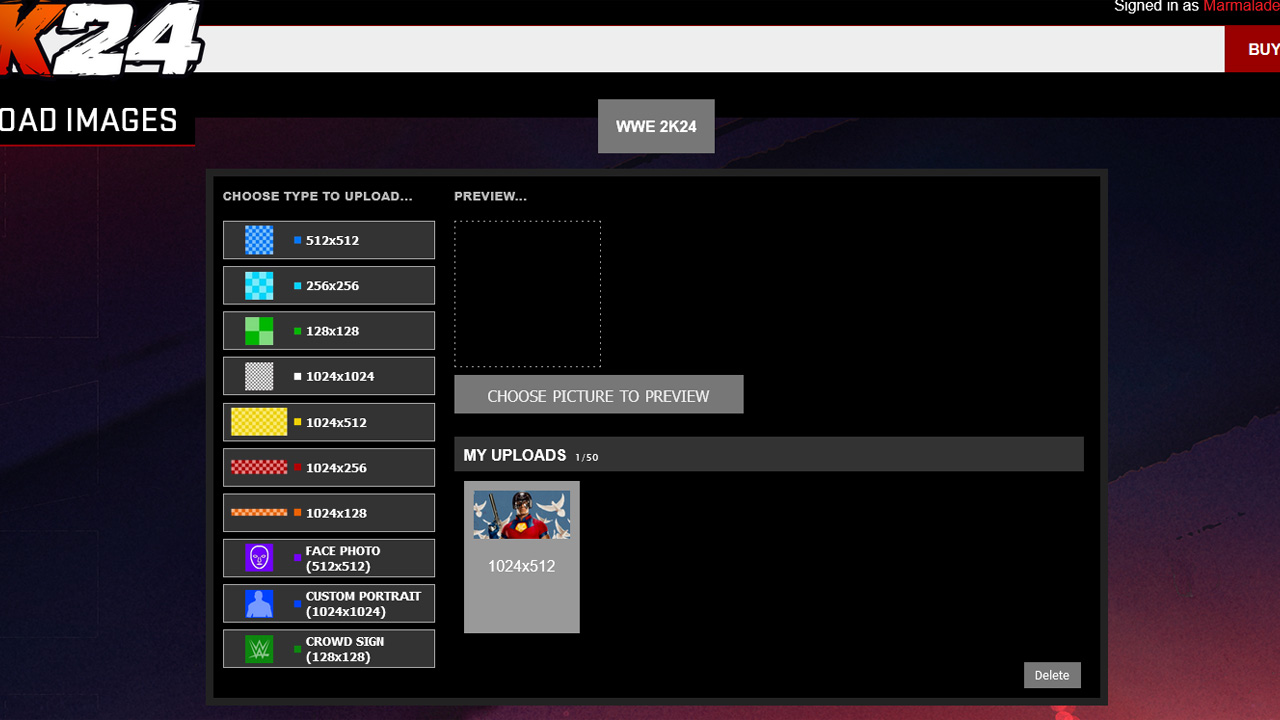
The uploader specifies several image sizes but it will resize them for you. So if you have an image that’s 512 x 512 but it wants 128 x 128 don’t worry. Just be aware that it doesn’t crop images, so if you try putting a rectangular image where it’s asking for a square image, it’ll squash it. You’re best off using your preferred image editing software to crop your images as appropriate.
3. Download the image within WWE 2K24
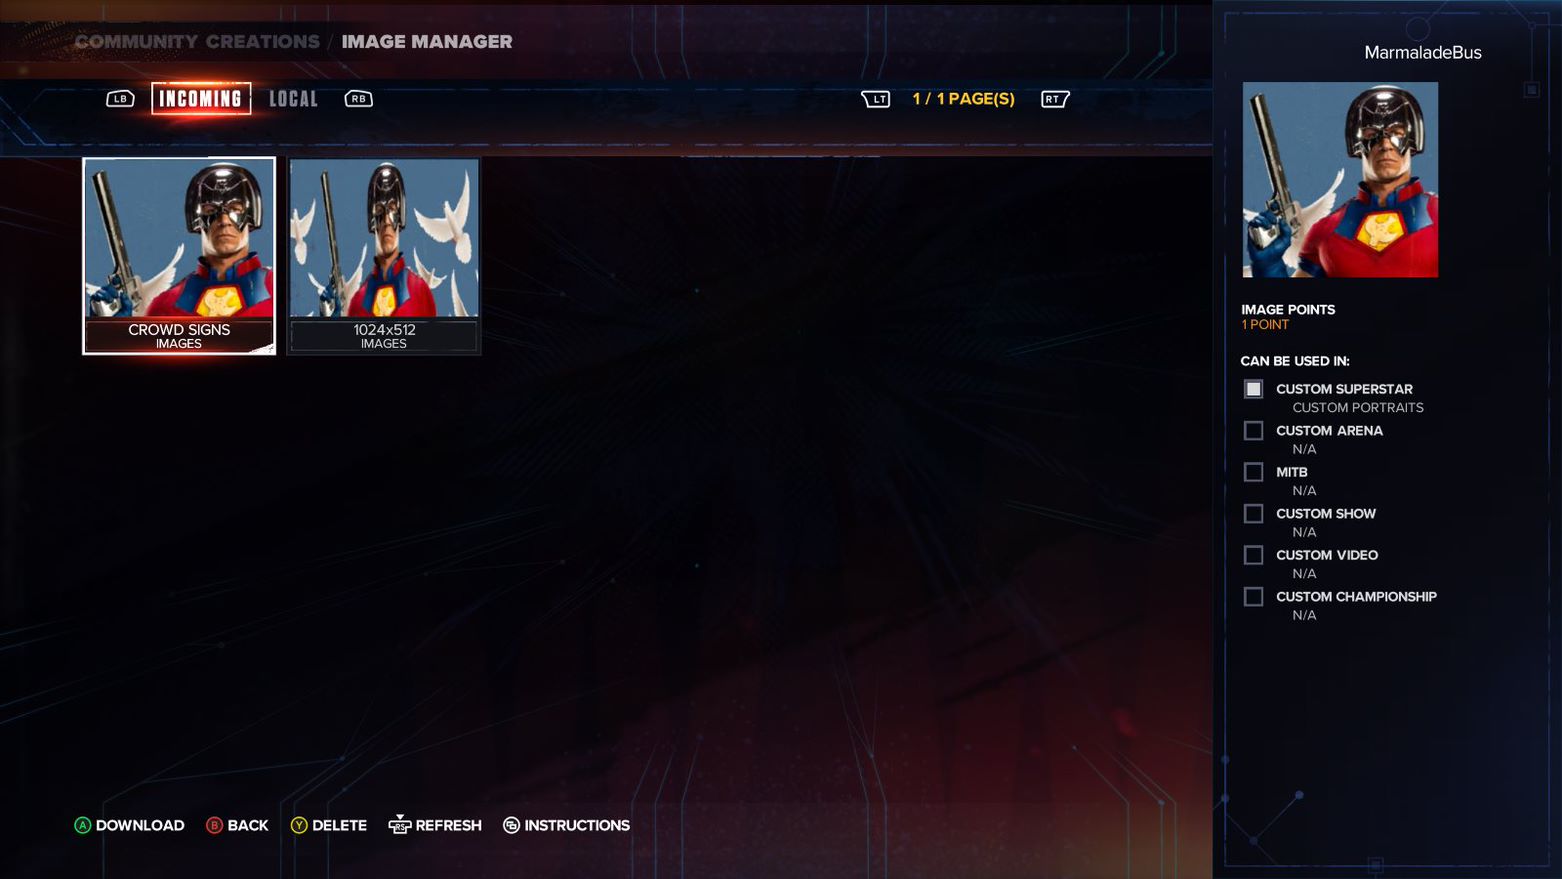
You now have to download the image manually inside WWE 2K24. It won’t just pop up inside custom images. So, fire up the game, go to the online tab, then to community creations and then the box that says ‘Image Manager’.
You’ll have two windows, Incoming and Local. Incoming are the images waiting to be downloaded, and Local are the ones already on your PC/console. Select the one you want from Incoming and Downloading Content will appear. When the image disappears, you’ll find it in Local. It means that’s now in your game.
4. Add the image to your custom wrestler/sign, etc.
Now, just go back to creations, find or create your superstar, and edit/add your sign. When you go to Custom Images, your image should be there.
And that’s how to upload images in WWE 2K24. Bear in mind that people can report your images, so anything too seedy/contentious could be pulled.










Published: Mar 19, 2024 08:41 pm