
There’s no shortage of puzzles in Wuthering Waves. But some can be trickier than others. Here’s how to solve the Misty Coast Encryption Puzzle in Wuthering Waves.
How to Solve the Wuthering Waves Misty Coast Encryption Puzzle
Wuthering Waves is all about chain combos and capturing the souls of the enemies you defeat. But here and there, you may across a puzzle that promises some sweet loot if you can unravel its mysterious. That’s certainly the case for the encryption puzzle tucked away to the north of the Huanglong-Desorock Highland-Misty Coast resonance beacon. Fortunately, this puzzle isn’t as difficult as it might first appear.
Here’s how to solve the Misty Coast encryption puzzle. First, you must have your levitator equipped, which you’ll get by completing the main quest. You can equip your Levitator by opening your tool menu by pressing the ‘tab’ button. The Levitator menu will then appear on the tool wheel, and you can hover over it to select it.
Next, you’ll want to pick up the four relics situated along the board. Each relic has two prongs which indicate the direction it will light up the board. Each relic can be rotated by pressing the ‘t’ button. This is essential, and it’s what tripped me up at first.
Related: How to Find Hidden Chests in Wuthering Waves
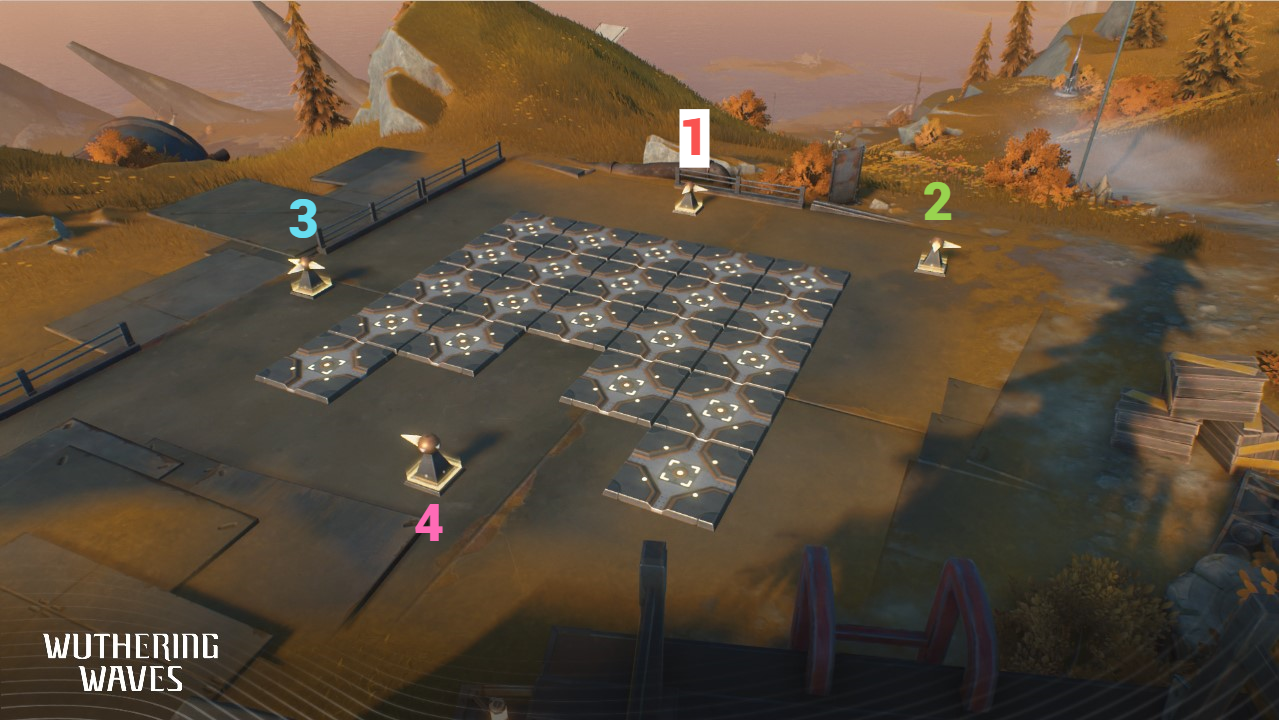
You’ll want to select a relic with two prongs creating an L-shape, and put it in the top right corner. Then, repeat this with the second L-shaped relic, but one row in. Finally, select the relic with three prongs to create a ‘T’ in the nook of the second relic. And, finally, we’ll select the relic with one prong to fill out the last line.

Related: How to Find the Exile Seeking Help Treasure in Wuthering Waves
I’ve outlined this in the image above, in the order you should put them in. If you’ve done this correctly, you can hop onto the nearby stand and open the chest, which will give you an assortment of loot. Including some experience boosting items and two Wooden Shards. Wooden Shards are pretty essential, especially as you grind your way to late game. So, it’s well worth the effort! But beyond that, completing this puzzle will also give you a 1% increase to the completion of the region.
Wuthering Waves is available now.


Published: May 29, 2024 04:51 pm