
By exploring the maps in Visions of Mana in its entirety, you’ll be able to find powerful foes known as Nemeses, which will offer you a bigger challenge compared to other enemies in the zone. Here’s where you can find all of them.
Where To Find All Nemeses in Visions of Mana
You are properly introduced to Nemeses at the beginning of Visions of Mana in the Charred Passage, where one of them is located right in front of a Meridian. Nemeses have a blue health gauge and don’t respawn, and are also some of the toughest enemies you can find in the game. They offer better experience rewards and sometimes even a few items if you’re able to beat them.
It’s advised to be at least on the same level as the Nemeses you’re fighting. If you cannot tackle a Nemeses when you find them, return later when you’re stronger. You’ll need to backtrack a lot in this game, so don’t worry about leaving them for later.
Some Nemeses are also higher-leveled monsters placed in the initial zones, so you’re forced to return for those anyway. Finally, there’s always a hidden Nemeses inside the Ancient Ruins once you defeat all of the surrounding enemies. They are all Level 50 or higher, so it’s more of a late-game objective too.
Charred Passage
Tricky Buju
- Weak to: None
- Resistant to: Wind
- Nulls: None

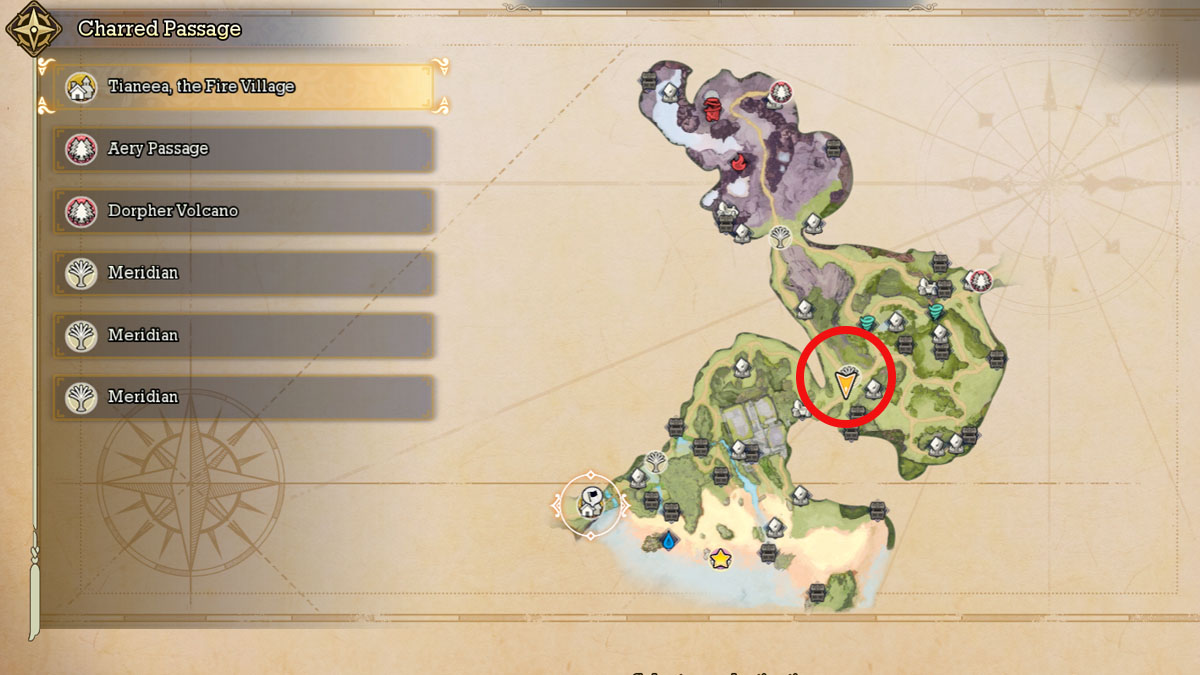
The first Nemeses you’ll find, serving as your introduction to them in lower levels. The small Rabite likes to jump in your direction and create dangerous zones with smaller Rabite rains that persist for a while. But their patterns are very simple, so you won’t be locked in here for too long.
Hoarding Blosslay
- Weak to: Slash, Earth
- Resistant to: Wood
- Nulls: Wind


Found next to the entrance to the Aery Passage. This plant-like monster has various poison-inflicting attacks in its kit, so beware. The poison puddles are telegraphed before they fall, just like its lunge attacks, so do your best to avoid them and slowly chip out its health.
Brutal Guri
- Weak to: Wind, Light
- Resistant to: Earth
- Nulls: Darkness


Despite not being particularly strong, the Brutal Guri can surprise you with its Silence status, so use Abilities to avoid this. In any case, it’s pretty easy to juggle it with the Sylphid Boomerang and/or powerful spells.
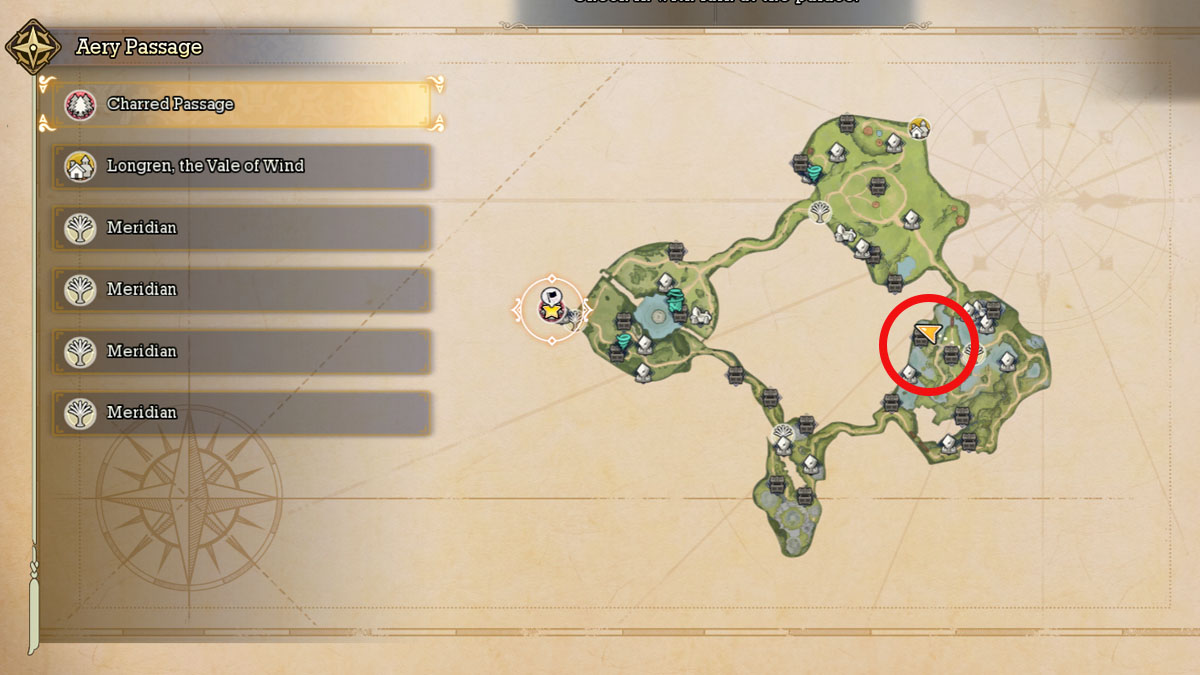
Aery Passage
Tangoing Matsootaken
- Weak to: Slash, Fire
- Resistant to: Wood
- Nulls: Water


This Nemeses is your introduction to the Sleep status, which can be deadly. Be careful whenever it inhales air, as it’ll throw some sleeping powder around it. You can defeat it with Val alone, but it wouldn’t be bad to wait a bit to get Careena at your party to help.
Grave Picus
- Weak to: Earth, Darkness
- Resistant to: Wind
- Nulls: Light
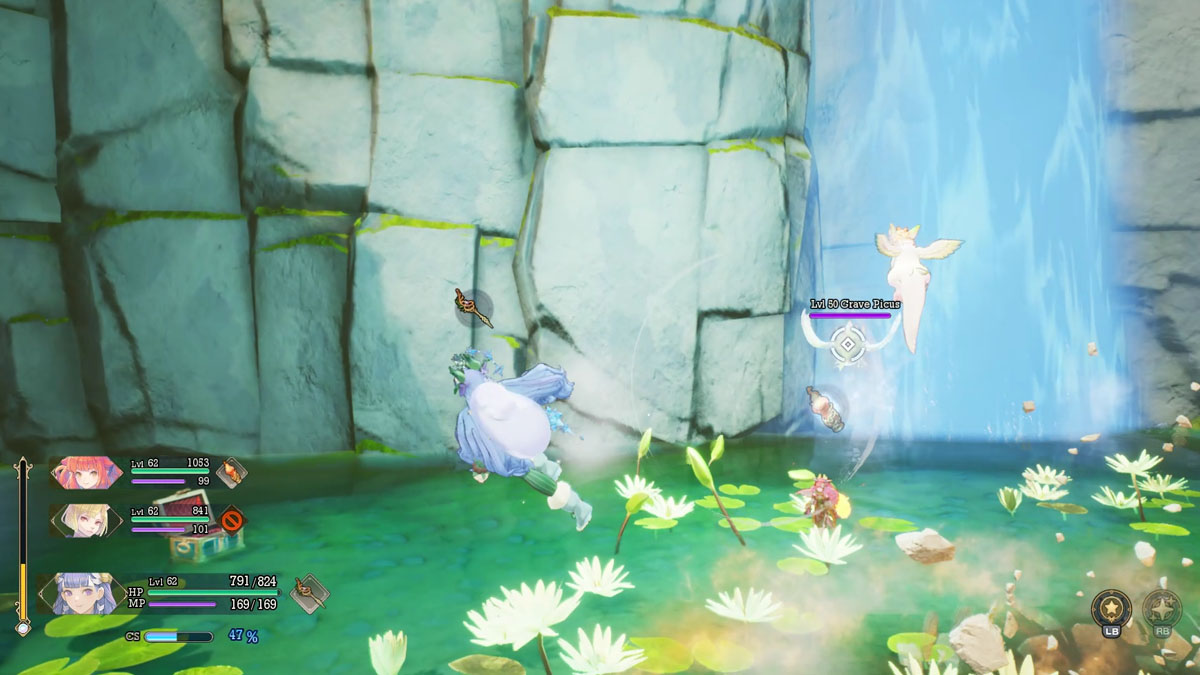
A late-game Nemeses you’ll find next to a Meridian. You’ll need to hunt it for the Death’s Portent side quest, so don’t worry about going for it unless you already have the quest. It can inflict the Moogle status effect, so equip some resistance Abilities beforehand to be safe.
Deft Chitto
- Weak to: Wind
- Resistant to: Wood
- Nulls: Wind


Another late-game opponent, coincidently also near one of the Meridians. It’s relatively easy to deal with it by using Earth skills, but its Paralyze status effects can be annoying, so bring some protection against it. Nevertheless, the Earth Elemental Break will be enough to deal with it before it becomes a problem.
Bolt Usus
- Weak to: Strike, Wind
- Resistant to: None
- Nulls: Earth, Wood


Brute force is all that this Ancient Ruin guardian has to offer. But fortunately, its attacks are still too slow to be a menace to you. You can deal with it with both the physical or magical approaches, so go as you prefer.
Lefeya Drifts
Plundering Tytonrik
- Weak to: Fire, Earth
- Resistant to: Wind
- Nulls: Water

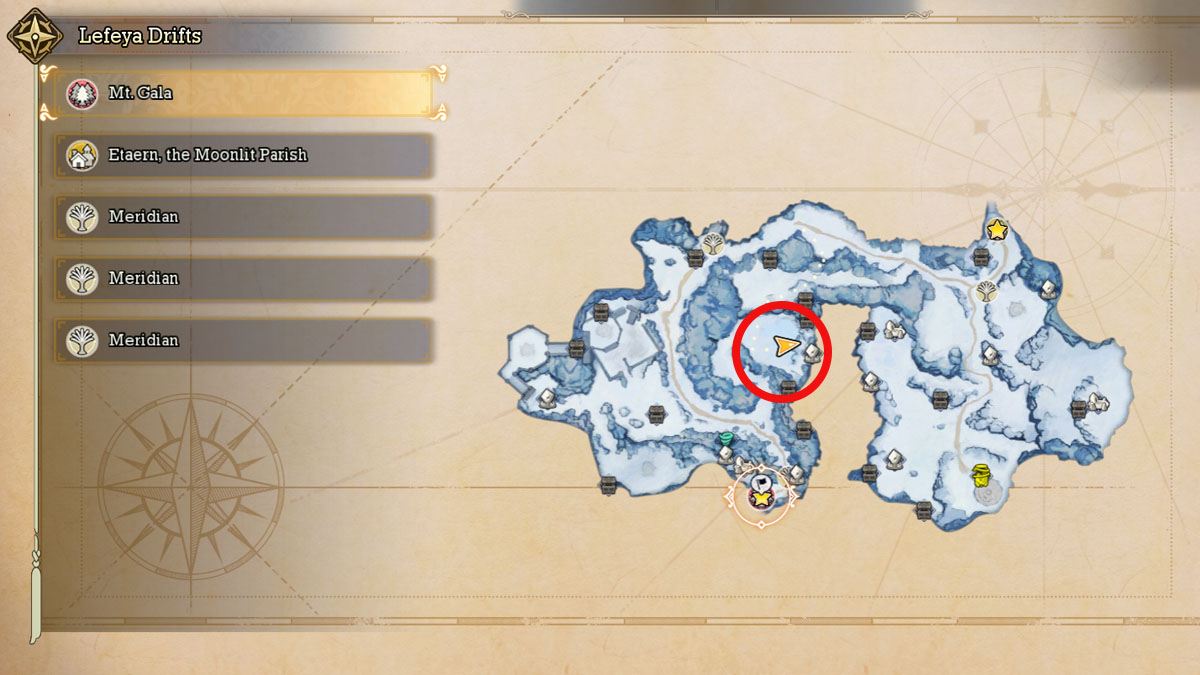
This small owl can be dangerous as it can hang you in the air before dropping you for a big chunk of damage. If that happens, switch to another character to free your ally. This fight is best done after Morley joins the convoy. If you got the Flame Saber from a chest in this area, use it here to make quick work of this beast.
Armed Griv
- Weak to: Wind, Fire
- Resistant to: Water
- Nulls: Earth


Despite its innocent look, this creature can be deadly if you don’t dodge its various bubble hits. His other attacks are easy to grasp, but once again, it’s recommended to wait until Morley joins the party to fight it. The Flame Saber strategy works very well here too.
Jointed Tikkle
- Weak to: Fire, Light
- Resistant to: Water
- Nulls: Darkness


Jointed Tikkle acts pretty much as a stronger Armed Griv, but you shouldn’t underestimate it. The Flame Saber strategy is, again, the best option for him, but Lucent Saber can also work this time around.
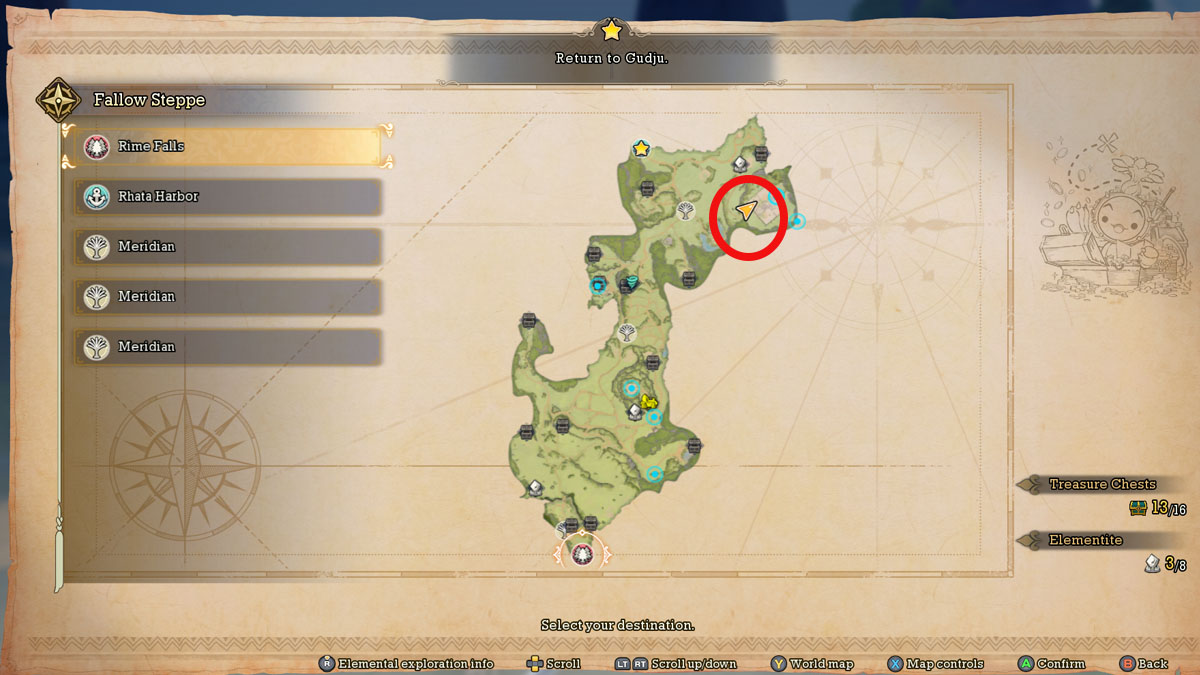
Fallow Steppe
Gem Valley Ochoro
- Weak to: Wind, Darkness
- Resistant to: None
- Nulls: Earth, Light

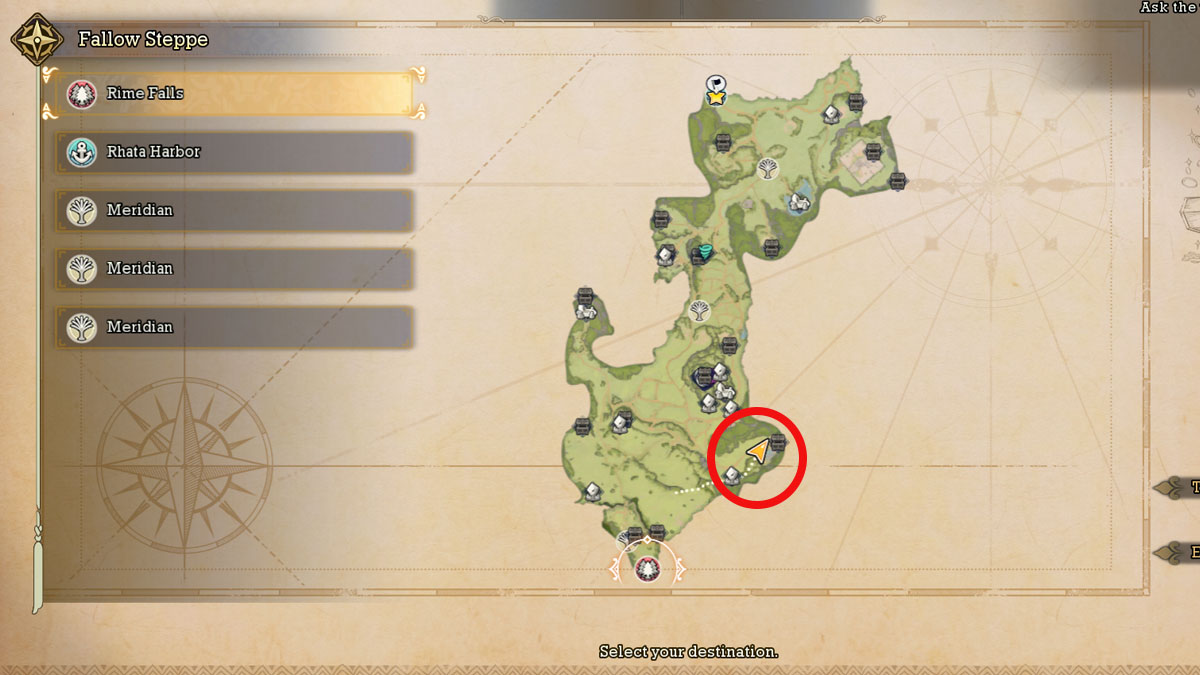
You can juggle this hedgehog with the Sylphid Boomerang to avoid its spinning attacks. Whenever it goes for those, take your distance before counterattacking. Morley is a great user of the Wind Vessel here, so I recommend using him.
Floret Triffid
- Weak to: Slash, Wind
- Resistant to: Wood
- Nulls: Earth
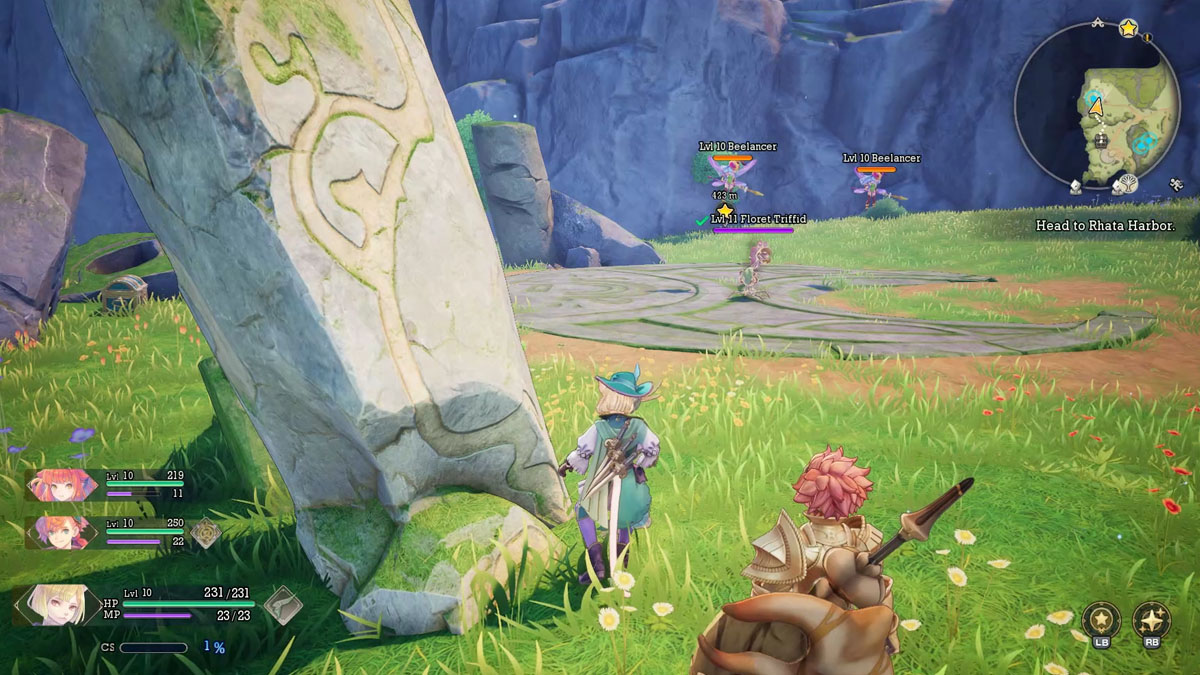

The same strategy from the previous Nemeses also applies here. However, the Floret Triffid is much weaker and should die much earlier thanks to its Slash weaknesses. Don’t forget to use experience enhancing items here!
Puppet Meriska
- Weak to: Strike, Darkness
- Resistant to: Grass
- Nulls: Light


The main target of the Queen Bee side quest, Puppet Meriska is a relentless bee that you’ll be facing at later stages. Her quick hits and wind slashes can be deadly, but she’s quite susceptible to status effects, so you can use those alongside Darkness-oriented attacks to make quick work of her.
Manipulated Bruiser
- Weak to: Strike, Darkness
- Resistant to: Moon
- Nulls: Light

This golem hits very, very hard, so be careful with it at all times. You’ll rarely have time to cast some Darkness spells, so going physical may be a good option. However, you’ll need tons of defenses to survive its hits in higher difficulties, so be careful.
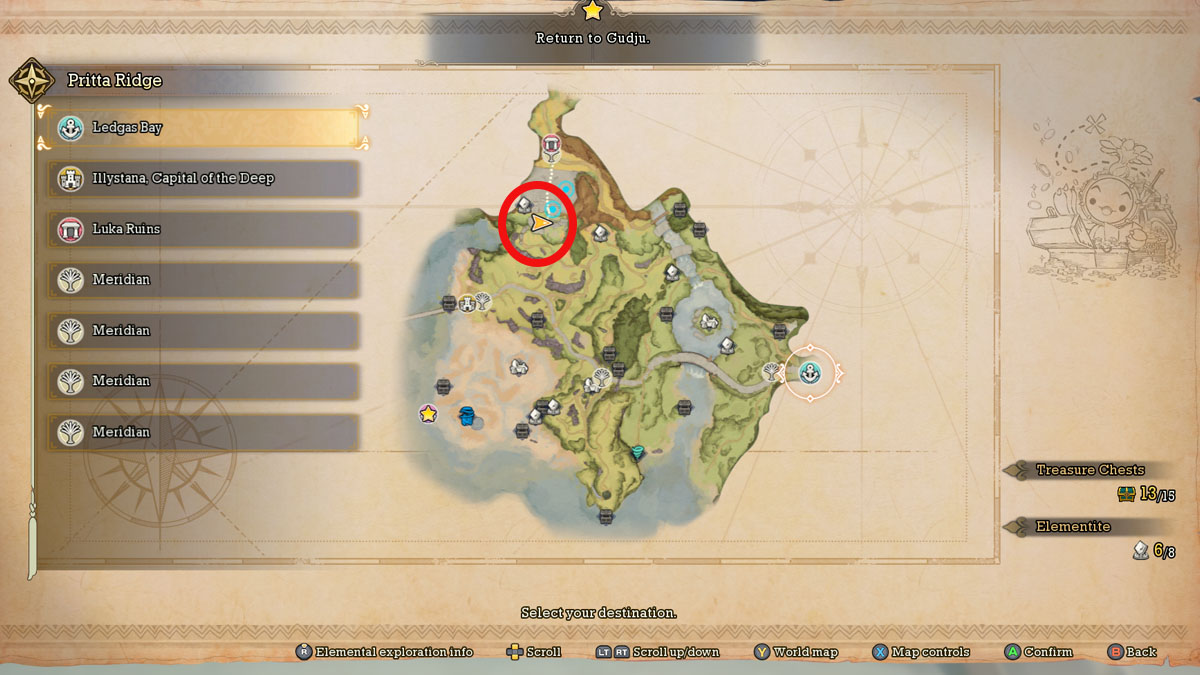
Pritta Ridge
Greedy Tummsect
- Weak to: None
- Resistant to: Wood
- Nulls: Moon


Another poison-themed Nemeses. However, this one doesn’t hit as hard as others, so you should have an easy time even during early Chapter 2. The biggest difficulty is it being immune to Moon, which makes the slowing effect from the Luna Globe useless here, but nothing that makes the fight impossible.
Sizzled Creepillar
- Weak to: Strike, Water
- Resistant to: Wood
- Nulls: Fire


Poison, once again. Fire won’t do you any good here, so forget about it. While this one isn’t particularly strong, you might wanna wait until you get the Undine Flask in Illystana to return here with a Water class to turn this fight into a joke.
Nocturnal Droon
- Weak to: Strike
- Resistant to: Wood
- Nulls: Moon


Another enemy immune to Moon attacks. You won’t have access to Strike Hits until Palamena joins the party (at least during early Chapter 2), so you could also wait until completing your first Illystana visit to fight it.
Astral Thrace
- Weak to: Earth
- Resistant to: Wind
- Nulls: Moon

The easiest way to deal with the Astral Thrace is by bringing it down once with a Class Strike, and then don’t let it have another chance to get up with successive spells and combo mixes. It’s easier to pull off than it seems, and Earth Spells are also particularly strong, which makes it even better to achieve.
Ahrvet’s Pasture
Fortune Guesser Popple Pupil
- Weak to: None
- Resistant to: Wind, Water, Fire, Earth, Light, Darkness
- Nulls: Moon


Found in the middle of the bridge to the ruins, this magus opponent can be quite annoying if you keep getting Paralyzed from it. Bring a few items to remove the status effect and keep pressing your Physical attacks. It might be a good option to keep one character without Elemental Vessels and have it use its Class Strike to avoid resistances.
Inexplicable Gunk
- Weak to: Earth
- Resistant to: Strike, Slash
- Nulls: Wind
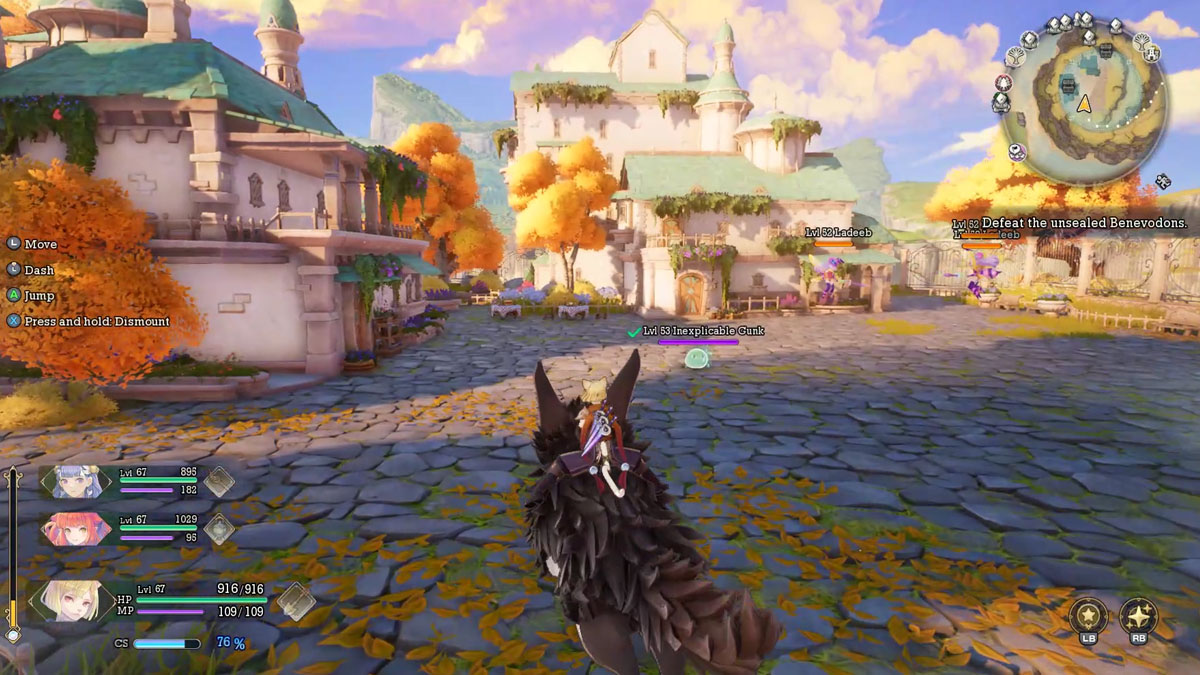

Spawns with the quest Menaces by the Manor in Chapter 7. Aside from the expected Poison hits, the Inexplicable Gunk can also paralize your characters, so bring some immunity Abilities beforehand. Earth magic and Elemental Breaks can be very powerful here as the slime is not very quick in its movements, making it an easy target for multiple AoEs.
Gluttonous Tirpel
- Weak to: Strike, Light
- Resistant to: Wood
- Nulls: Darkness
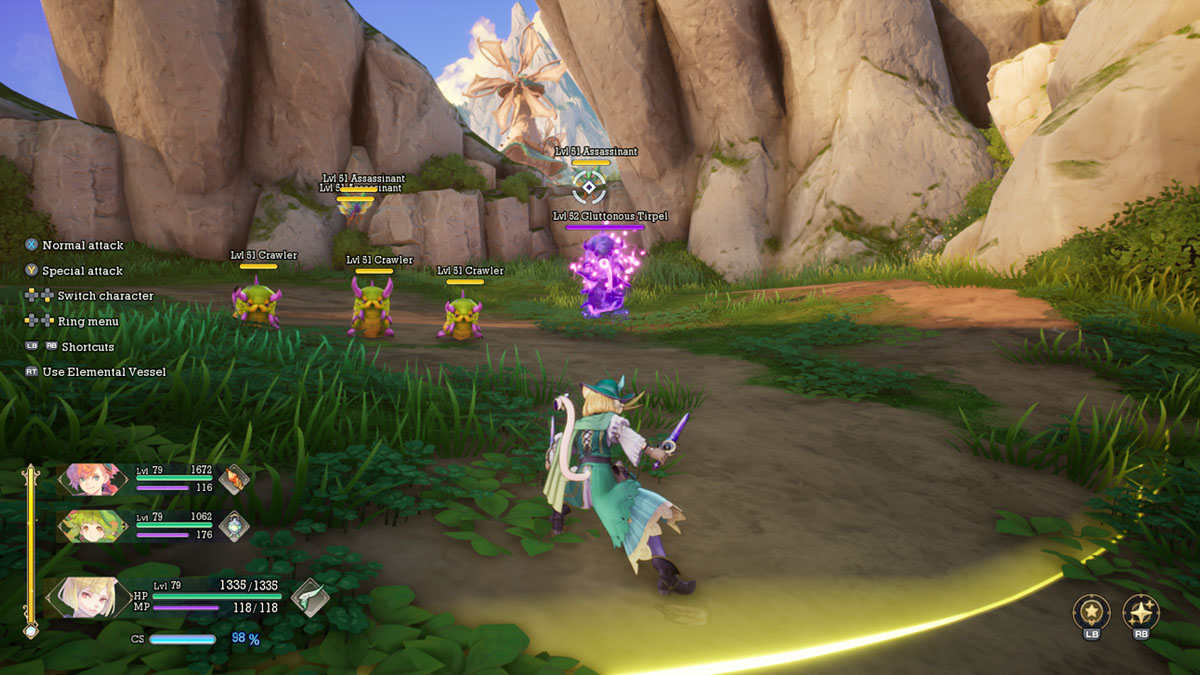

Much like any other caterpillar-like monsters in the game, Gluttonous Tirpel comes with lots of poison but a very slow speed overall, making it easy to dodge. Light attacks from Palamena are a great call during this fight, but you can also bring Julei to dispel the Poison to be safe.
Custodial Truffle
- Weak to: Wind, Slash
- Resistant to: Wood
- Nulls: Earth
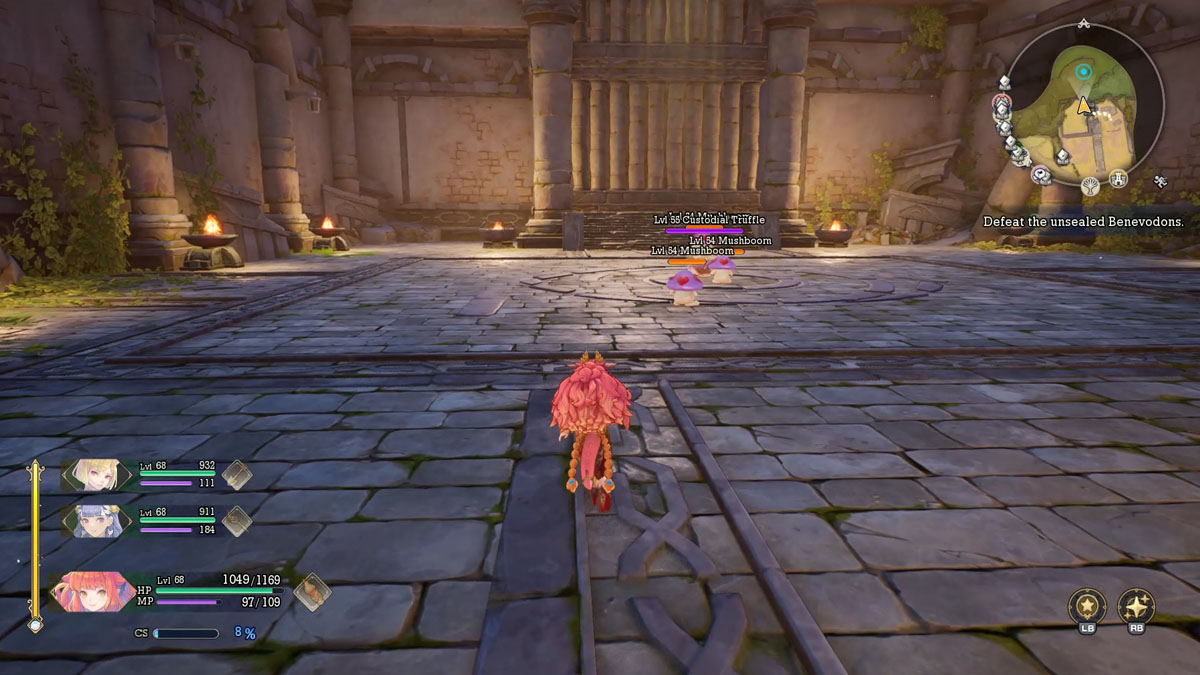

Whenever the Custodian Truffle emits its poison powder, get away or you’ll be caught asleep. You can use items to avoid it, but this is one of the weakest Guardians overall, and you should be able to beat it even if some of your characters end up sleeping during combat.
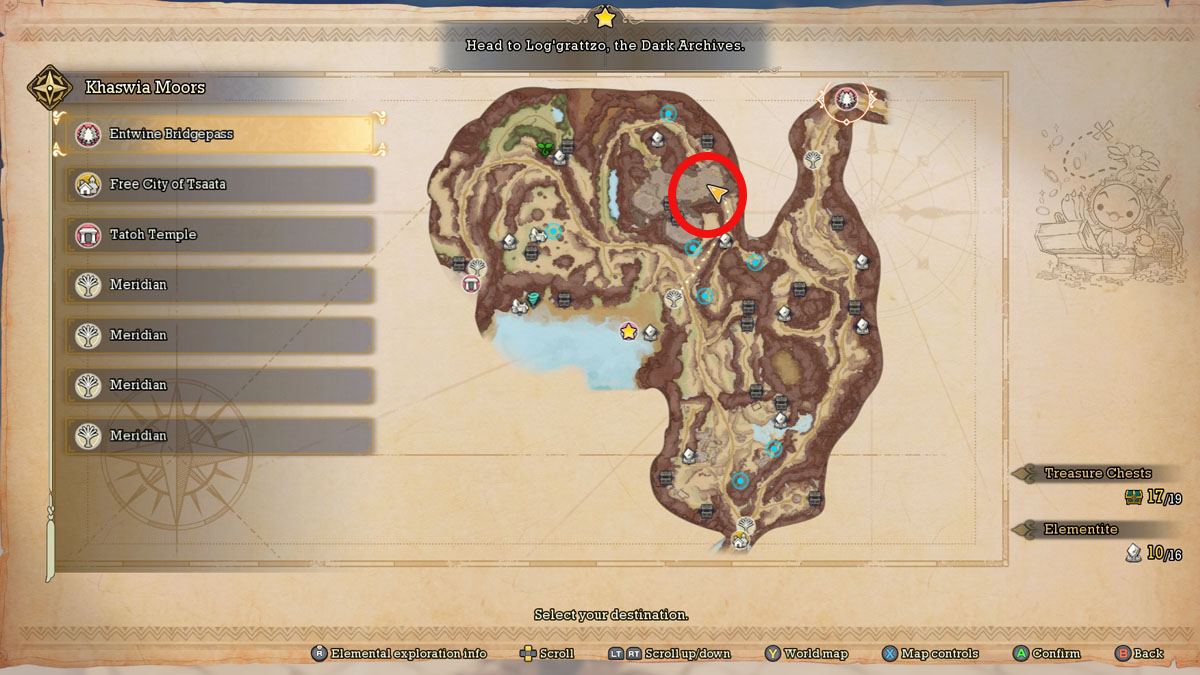
Khawsia Moors
Beguiling Celaeno
- Weak to: Fire, Earth
- Resistant to: Wind
- Nulls: Water


Jump through the stones to reach its arena. Another opponent that can be made very easy with the Flame Saber strategy. However, two of your early Vessels may be useless here, so be careful with that. It can also grab your allies, so try to set them free if they’re captured.
Phantom Bedditear
- Weak to: Wind
- Resistant to: None
- Nulls: Earth, Wood


A fast opponent, but with a very exploitable weakness. Palamena can make quick work of it with powerful wind spells, but wait until it becomes safe to attack before trying to cast them, or you’ll just get one of its spins/spikes directly to your face.
Pawn Caruma
- Weak to: Strike, Light
- Resistant to: Moon
- Nulls: Darkness


Despite being powerful, the Pawn Caruma Nemeses in Visions of Mana is very slow, which makes it easy to find openings and use spells against it. Don’t be afraid to cast away and make quick work of this golem.
Magic User Ambrose
- Weak to: None
- Resistant to: Wind, Moon, Water, Earth, Light, Darkness
- Nulls: Fire

Ambrose can be annoying with its constant Paralyze status effects, but even if it’s resistant to most elements, it’s still vulnerable to the Elemental Vessel effects such as Slows from the Luna Globe. Use this to your advantage, and also bring an offensive Wood character such as Morley.
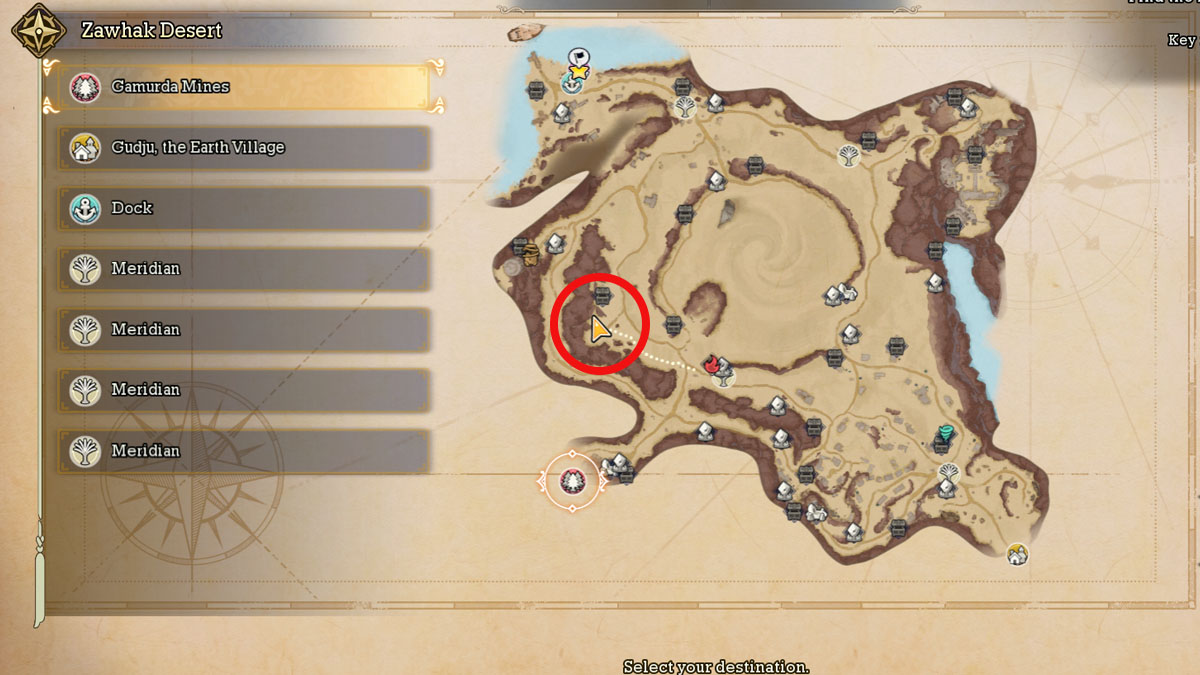
Zawhak Desert
Charging Propul
- Weak to: Strike, Wind, Darkness
- Resistant to: None
- Nulls: Earth, Light

One of the easiest Nemeses to fight in Visions of Mana due to its exploitable weaknesses and very slow movements, especially for a high-grade enemy. It is also located conveniently next to the village, so it isn’t hard to reach at all.
Char Tamulus
- Weak to: Strike, Wind, Water
- Resistant to: Earth
- Nulls: Fire


Its various weaknesses also make it an easy target, especially if you have the Undine Flask ready at your disposal. Fire won’t do you any good here, but you have plenty of other options to deal with this opponent.
Scorched Pavlov
- Weak to: Strike, Wind
- Resistant to: Moon, Water, Earth, Wood, Light, Darkness
- Nulls: Fire


This Nemeses is the target for the Devil in the Dunes side quest, also from Chapter 7 in Visions of Mana. Despite hitting hard, this Golem isn’t as menacing as it looks, and you can easily dodge most of its attacks. The problem lies with dealing damage to it if you don’t have Thunder Saber or any other powerful wind attacker on your team. But if you do, you shouldn’t have much trouble here.
Extract Miasopia
- Weak to: Fire
- Resistant to: None
- Nulls: Slash, Strike, Water


The Ancient Ruin guardian from this map is one of the most obnoxious opponents in the game, but you can deal with it by setting up some Ice Shields and keeping Flame Saber up at all times. Aside from this, it’ll still take a while until you bring it down.
Fighting Nemeses is completely optional in Visions of Mana, but locating them and beating them is one of the quickest ways to level up. Keep fighting them whenever you can to maintain some good levels of advantage over your foes, as well as getting some rewards eventually.
Visions of Mana is available for PC, Xbox and Playstation.


Published: Aug 29, 2024 12:05 pm