
There are ton of Specs and Stands in Sakura Stand and I wanted to create your go-to place for them all. Whether you’re a new player or getting back to the game after a while, this list will help you hit the ground running. So, without further ado, let’s see all the Sakura Stand specs listed.
Table of contents
- Full List of Sakura Stand Specs
- 1. Standless/No Spec
- 2. Hamon
- 3. Vampire
- 4. The Spin
- 5. Stop Sign
- 6. Mochi Mochi no Mi
- 7. Bomu Bomu no Mi
- 8. Bari Bari no Mi
- 9. Nikyu Nikyu no Mi – The Paw-Paw Fruit
- 10. One For All (Stages)
- 11. One For All (Green Boy)
- 12. Padoru
- 13. Herrscher of Human (Elysia)
- 14. Cid Kagenou (Shadow)
- 15. Kaiju No. 8
- 16. Yuji Itadori (Shinjuku Showdown Arc)
- 17. Herrscher of Flamescion
- 18. Shinra
- 19. Sakuya
- 20. Astolfo (Saber)
- 21. Toji Fushiguro
- 21. Satoru Gojo
- 22. Ryomen Sukuna
- 23. Geto Suguru
- 24. Okkotsu Yuta
- 25. Sandevistan
- 26. Sandevistan: Cyberskeleton
- 27. Coyote Starrk
- 28. Kurosaki Ichigo (Substitute Shinigami)
- 29. Kurosaki Ichigo (Shikai)
- 30. Kurosaki Ichigo
- 31. Roland (Black Silence Spec)
- 32. The Arbiter (Binah)
- 33. Red Mist (Gebura)
- 34. Baiken
- New Sakura Stand Specs from the 2025 Winter Update
Full List of Sakura Stand Specs
I’ll cover all Sakura Stand specs below as well as their moves, keybinds, and how to get them. If you don’t feel like digging through the Sakura Stand Trello board or Discord, keep on reading. There’s a massive variety so I highly recommend using the Table of Contents to navigate to the ones you’re intrested in.
1. Standless/No Spec
The real “no tricks, just hands” experience. This is the starter ability in Sakura Stand, but don’t underestimate it—sometimes, simplicity is all you need. And maybe a little kitchenware. You’ll be able to use moves like:
| LMB | M1 Combo keeps it classic with a series of punches that end in a kick, racking up 28 damage in total. |
| E | Barrage goes all in, starting with an uppercut before unleashing a flurry of fists, finishing with a heavy punch that knocks your opponent away. |
| R | Fist to Fist is exactly what it sounds like—a strong right hook straight to the face. No gimmicks, just pain. |
| T | Kitchen Assault takes a more… culinary approach. You pull out a kitchen knife and stab forward four times, because why not? |
| Y | Hell’s Kitchen brings out the real firepower—a non-stick frying pan. You can swing it for a solid 25 damage or charge it up and throw it, capping out at 34 damage for maximum disrespect. |
| G | Counter lets you catch your opponent’s arm, break it, and toss them away if they dare hit you. Brutal and effective. |
| H | Kick sends anyone in your way flying with a swift strike. |
| P | Pose makes the user strike a pose while the song “Everything Will Freeze” plays |
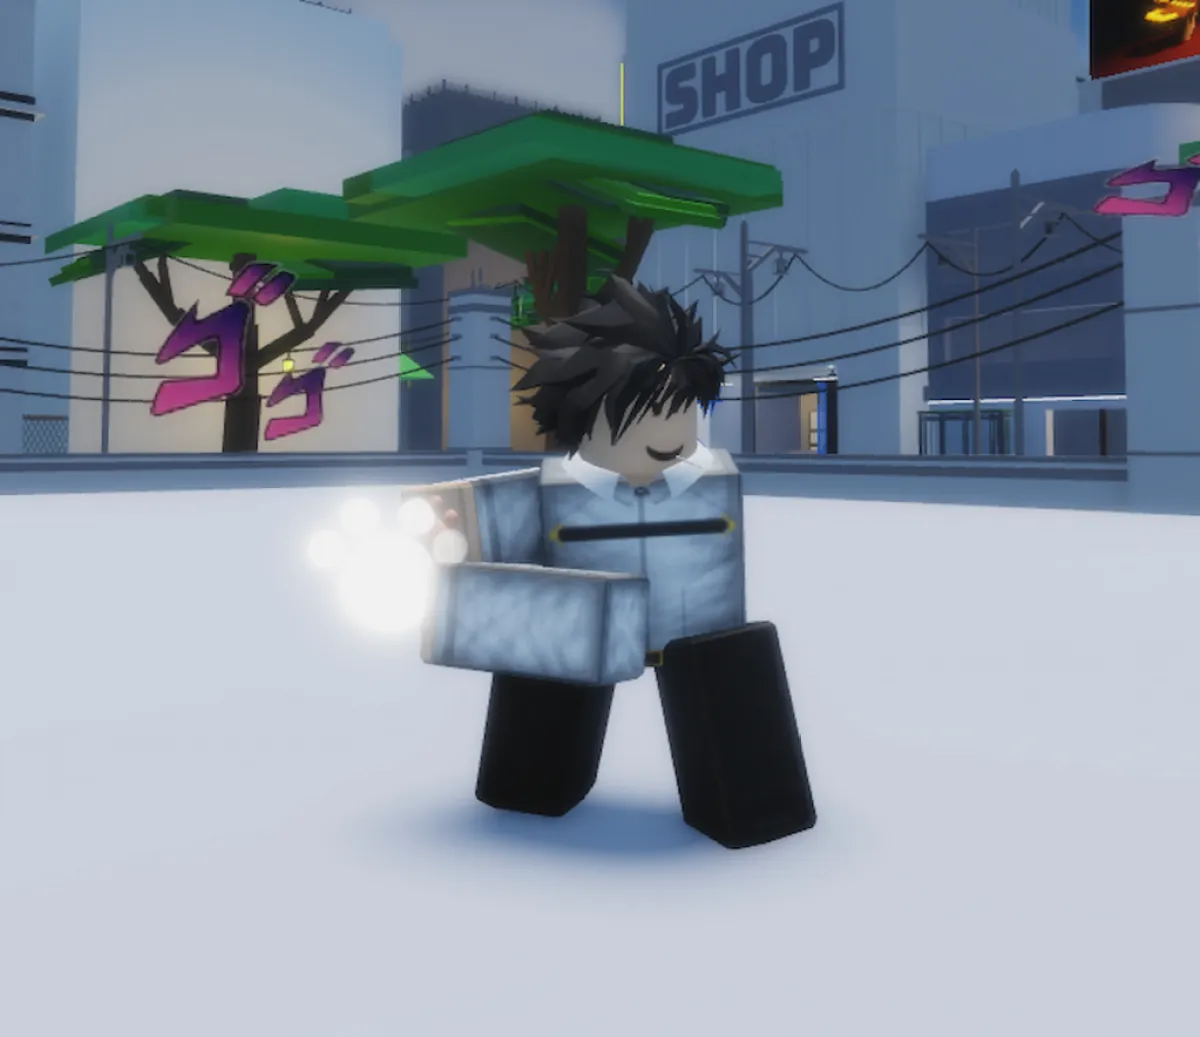
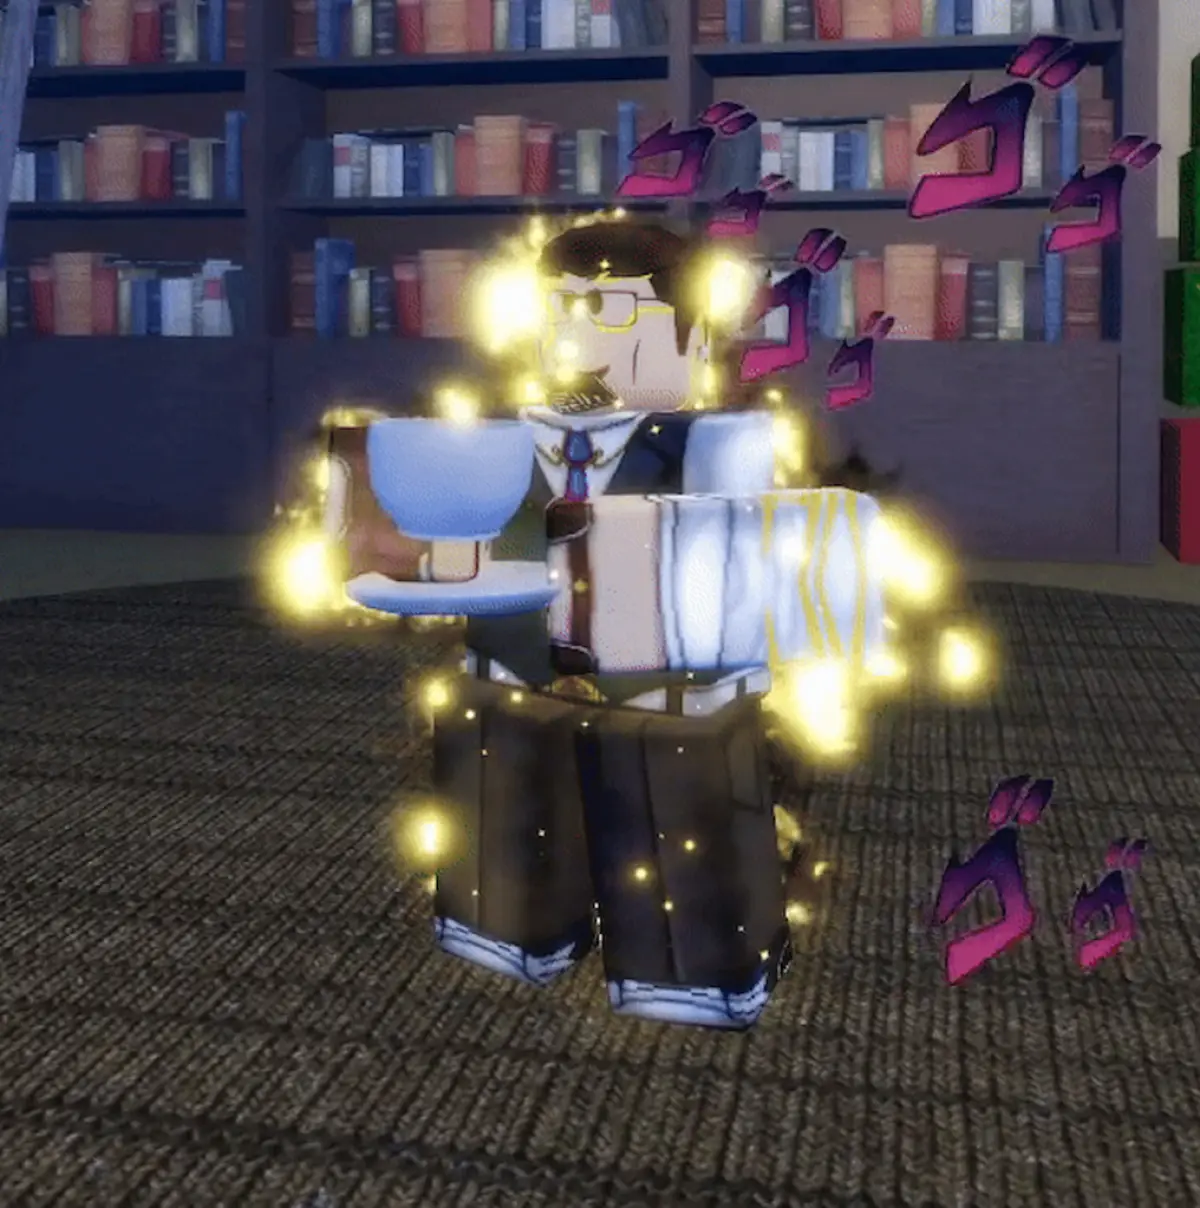
2. Hamon

Hamon lets you channel energy through your body, turning your strikes into sun-powered attacks that can stun, burn, and knock enemies away. If you’ve got Hamon, you have the pleasure of playing with one of the best Sakura Stand specs. His moveset is:
| LMB | Hamon Fist is your basic four-hit combo, but with Hamon enhancing every strike. The last hit sends your opponent flying. |
| E | Sunlight Yellow Overdrive is a quick-time event where you unleash a rapid barrage of Hamon-infused punches, dealing anywhere from 30 to 35 damage. |
| R | Zoom Punch lets you dislocate your arm with Hamon, extending your reach to land a surprise long-range punch. It deals 13 damage. |
| T | Sendo Hamon Overdrive sends a surge of Hamon into the ground, stunning anyone in range and dealing 20 damage. Perfect for stopping enemies in their tracks. |
| Y | Turquoise Blue Overdrive creates a powerful Hamon-fueled tempest that blasts opponents away, dealing 14 damage. |
| G | Thunder Cross Split Attack is your counter move. If your enemy falls for it, you strike back with 23 damage. Classic trick, devastating results. |
| H | Scarlet Overdrive ignites your attack with flame-hot Hamon energy, burning anything it touches and dealing 16 damage. |
| P | Pose lets you strike an iconic stance while the song “Jonathan” plays |
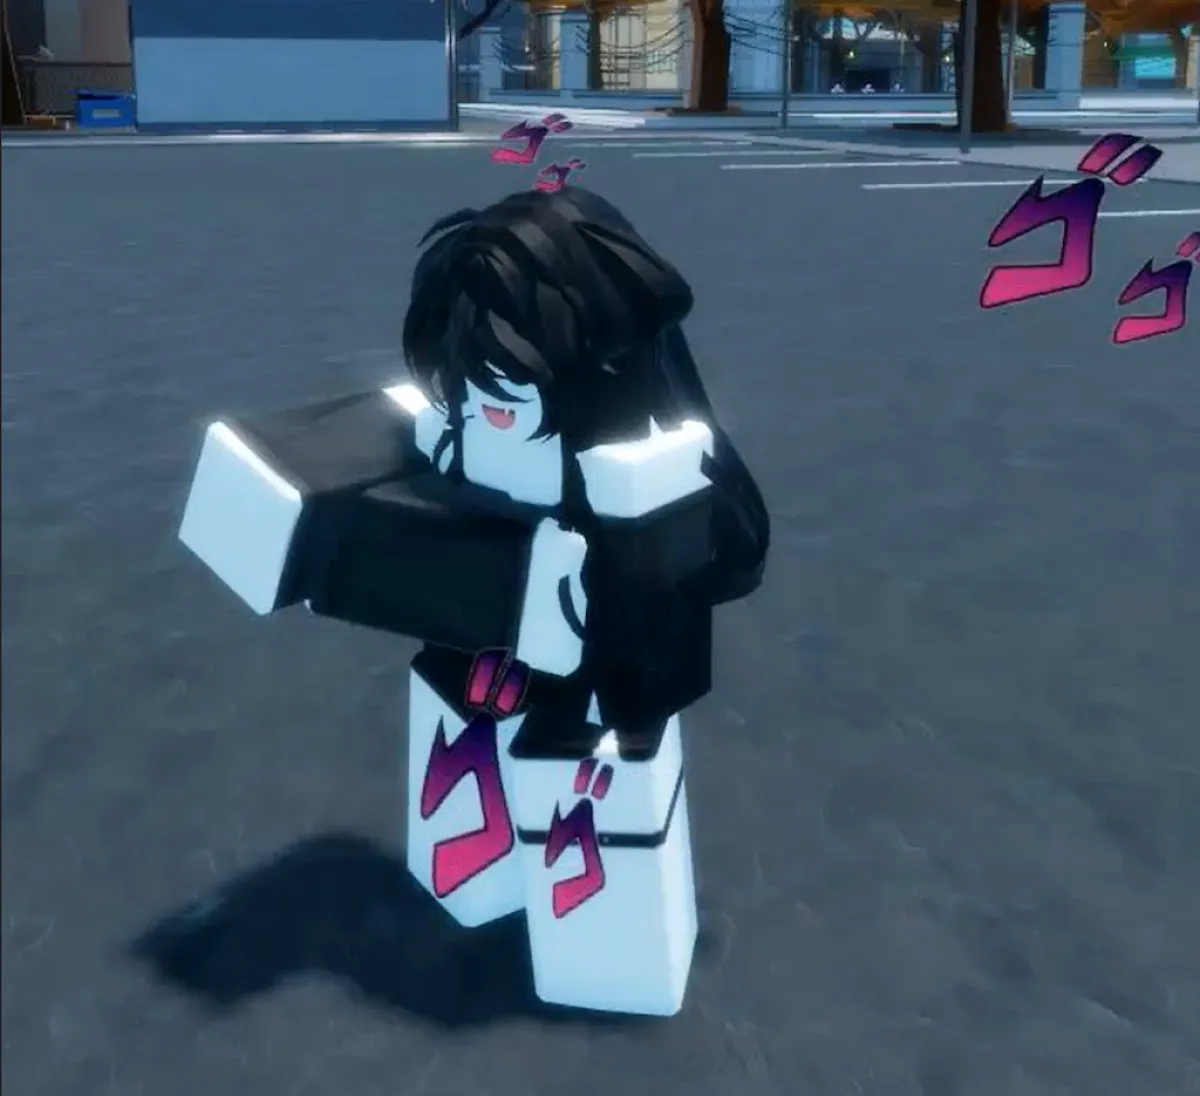
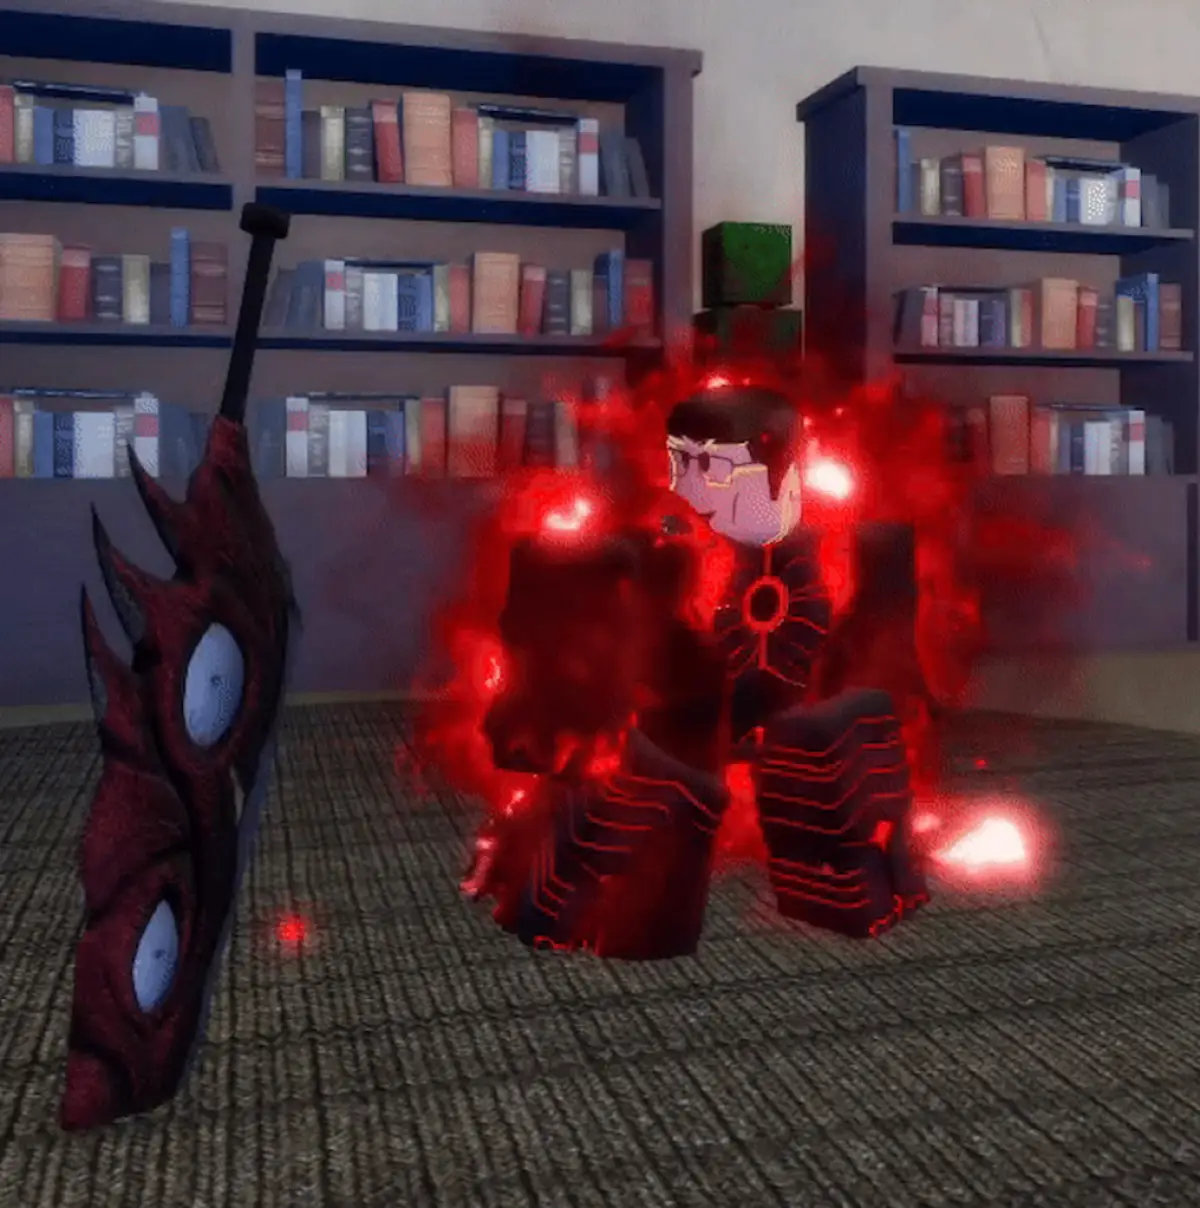
3. Vampire

As a Vampire, you gain incredible strength, unique abilities, and the power to regenerate by draining your enemies’ blood.
With a mix of brutal melee attacks and deadly ranged abilities, you become a true nightmarish force. The moveset? It’s:
| LMB | Vampiric Combo is a four-hit sequence where you swing your right arm, then your left, followed by both together, and finish with a push that sends enemies flying. Each hit deals 6 damage, with the final hit doing 10, totaling 28 damage. |
| E | Vampire Strike lets you grab your opponent and deliver a crushing knee strike to their body, dealing 18 damage. |
| R | Stab Throw is a vicious attack where you stab an enemy in front of you before tossing them away. This move deals 20 damage. |
| T | Space Ripper Stingy Eyes fires a laser beam from your eyes straight ahead, slicing through anything in its path for 14 damage. |
| Y | Ice Freeze is a quick-time event where you grab an enemy, freeze them solid, and finish with a powerful kick, dealing 24 damage. |
| G | It’s Useless is your counter move. If an enemy attacks while you’re posing, they instantly freeze and shatter into pieces. |
| H | Blood Suck lets you stab upward and drain your opponent’s blood, dealing 16 damage while healing yourself for the same amount. |
| P | Pose makes you strike a dramatic stance as the song Sono Chi no Sadame plays, because every vampire needs a moment of flair. |
4. The Spin
The Spin is one of the most intriguing Sakura Stand specs, mainly because it harnesses controlled rotation to enhance attacks and create devastating effects.
Whether you’re using steel balls or your own fists, the Spin gives you precise and overwhelming power in battle. Here’s the Spin moveset in Sakura Stand:
| LMB | M1 Combo is a basic punching sequence that delivers quick and reliable damage. |
| E | Spin Punch lets you throw a punch infused with the power of the Spin, increasing its force and effectiveness. |
| R | Rotation Force Punch takes it a step further, using the Golden Ratio to enhance a heavy punch, making it even more devastating. |
| T | Rotating Steel Ball allows you to throw a steel ball imbued with Spin, making it a deadly ranged attack. |
| Y | Steel Ball Trap places a steel ball on the ground, which then locks onto and seeks out the nearest enemy before striking them. |
| G | Spin Leap applies Spin to your legs, propelling you forward a short distance with speed and momentum. |
| H | Golden Rotation is a quick-time event where you charge a steel ball with the ultimate form of Spin. If it lands, the opponent will be trapped in an infinite rotation. |
| P | Pose makes you strike an iconic stance while Gyro’s Theme plays. |
Tip: If you’re hit by a Golden Rotation, you can remove the debuff by throwing another Golden Rotation at yourself—though this comes at the cost of taking double damage.
5. Stop Sign
Wielding nothing but a Stop Sign, you turn an everyday object into a brutal weapon.
With powerful slashes, spins, and even reality-bending tricks, you make it clear that it’s time to stop—permanently. The moveset is:
| LMB | Sign Combo starts with a punch, followed by a kick, then a jab with the stop sign, and finishes with a powerful slash. |
| E (Hold) | Sign Spin makes you rapidly spin in place, dealing continuous damage to anyone caught in the radius. |
| R | Sign Attack is a straightforward but effective slash with your stop sign, cutting down anything in front of you. |
| T | Sign Slashes delivers four rapid slashes with the sign, overwhelming your opponent with a flurry of strikes. |
| Y | Sign Slam brings your stop sign crashing down onto the ground, dealing significant damage in a single powerful hit. |
| G | Sign Teleport is a quick-time event where you poke your stop sign into a wormhole, causing it to appear beneath your closest target and strike them from below. |
| H | IT’S TIME TO STOP! freezes all enemies within range for four seconds, making them completely vulnerable to follow-up attacks. |
| P | Pose makes you strike a dramatic stance while It Has to Be This Way from Metal Gear Rising: Revengeance plays. Baller, ain’t it? |
6. Mochi Mochi no Mi
By applying Conqueror’s Will to the normal Mochi Mochi no Mi, you unlock its true potential, gaining access to devastating moves like Buzzcut.
With enhanced speed, durability, and overwhelming attacks, you become a near-unstoppable force on the battlefield. If you’re wondering about the moveset, here goes:
| Passive | Mochi Trap stuns enemies after inflicting the status twice. The first stack lasts four seconds and has a ten-second cooldown. |
| Q | Kenbunshoku Haki lets you predict enemy attacks, allowing you to dodge or counter with precise timing. |
| Z | Mochi Roll! transforms you into a rolling doughnut for a short time. While in this form, you can damage enemies by running into them. |
| LMB | Mochi Combo delivers a three-punch combo, finishing with an extended mochi-arm swing. The final hit applies one stack of Mochi Trap. |
| E | Mochi Swipe turns your leg into a viscous mochi sweep, knocking down anyone in its path. This move also applies one stack of Mochi Trap. |
| R | Mochi Strike forms a mochi ring that extends outward, striking anyone in a straight line. |
| T | Mochi Slam summons consecutive rings of mochi that unleash a barrage of fists at the ground, crushing enemies caught in the attack. |
| Y | Fire Mochi builds up power in both hands before launching a heated mochi fireball at your target, dealing heavy damage. |
And once you complete [The Conqueror] quest, you can unlock the Conquerer version of Mochi Mochi no Mi and gain the following abilities:
| G | Buzzcut unlocks after completing The Conqueror quest. This cinematic move unleashes a devastating spinning attack that shreds anything in its path. |
| H | Mogura Jabs delivers three precise stabs with the Mogura spear. The third hit applies one stack of Mochi Trap. |
| P | Pose makes you strike an imposing stance while WANOKUNI plays, cementing your dominance as the true Mochi Conqueror. |
7. Bomu Bomu no Mi
Despite being overlooked, the Bomu Bomu no Mi is one of the most interesting Sakura Stand specs, as it turns your entire body into a walking explosive, making you a chaotic force of destruction.
From detonating your own limbs to weaponizing snot, this fruit is pure mayhem. The moves are:
| LMB | Combo is a standard four-hit sequence, where you land three punches before finishing with an explosive kick. |
| E | Nose Fancy has you casually pick your nose before flicking a snot bomb forward. It detonates on contact with an enemy, proving that even the smallest things can be deadly. |
| R | Bomu Kick lets you launch a powerful kick, detonating your leg on impact for an explosive strike. |
| T | Double Nose Fancy takes Nose Fancy to the next level by using both hands, doubling the devastation. |
| Y | Breeze Breath Bomb makes you blow into the chambers of a revolver before firing explosive bullets made of your own breath. |
| G | Zenshin Kibaku is a high-risk, high-reward move. You curl down to the ground, charge up, and detonate a massive explosion—at the cost of half your HP. |
| P | Pose makes you strike a bold stance while Overtaken plays, embodying the underrated power of the Bomu Bomu no Mi. |
By the way, did you know that Bomu was only the second fruit added to the game? The fact that it’s still one of the most played Sakura Stand specs and relevant speaks volumes.
8. Bari Bari no Mi

With the Bari Bari no Mi, you gain the ability to create impenetrable barriers in various shapes and forms, turning defense into offense.
Whether you’re blocking attacks, trapping enemies, or slamming barriers into foes, this fruit makes you a walking fortress.
| Passive | Barrier Transform Chain lets you change the form of your barrier between different moves without needing to re-summon it. You can seamlessly switch between E, R, T, and Y moves without constantly clicking LMB. |
| LMB | Barrier creates a barrier that serves as the foundation for your other moves. It also blocks incoming projectiles, making it a solid defensive tool. |
| Q | Release Barrier removes any existing barrier. If left alone, the barrier will remain for a short period before disappearing on its own. |
| LMB → E | Barrier Crash hurls a barrier forward at high speed, smashing it into enemies with force. |
| LMB → R | Barrier Slam reshapes the barrier into a massive flat cone before slamming it onto the ground, dealing damage to anything caught underneath. |
| LMB → T | Barrier Sphere creates a spherical barrier that traps anything inside and prevents anything outside from penetrating it. Perfect for isolating enemies. |
| LMB → Y | Barrier Aircraft transforms the barrier into a paper-plane shape before launching it forward, knocking away anything in its path. |
| G | Bari Bari no Pistol coats your fist with a barrier, amplifying the power of your punch. When slammed into the ground, it creates a small shockwave. |
| H | Barrier Racket forms a giant tennis racket out of barriers, which you use to smack your opponent away with force. |
| B | Strike a bold stance while We Are! plays—even the strongest barriers deserve a dramatic moment, right? |
9. Nikyu Nikyu no Mi – The Paw-Paw Fruit
The Nikyu Nikyu no Mi grants you the power to repel anything you touch, whether it’s enemies, projectiles, or even pain itself.
With the iconic paw prints on your hands, you can send other Sakura Stand specs flying, deflect attacks, and unleash devastating shockwaves.
| LMB | Shinra Tensei causes any opponent you hit to be instantly teleported away from you, making close combat a nightmare for your enemies. |
| E | Pad Ho fires a powerful shockwave of compressed air toward your opponent, launching them backward with immense force. |
| R | Pad Ho: Pressure Cannon has you rush forward and slam a paw print into your opponent’s chest, blasting them away with a direct impact. |
| T | Tsuppari Pad Ho begins with a sumo-style stomp to stabilize yourself before unleashing rapid palm strikes, firing multiple pressure shots at your enemy. |
| Y | Puni [Counter] puts you in a defensive stance, using your paw pads to repel and counter incoming attacks. This move also reflects projectiles, making it a perfect defensive tool. |
| G | Ursus Shock gathers air into your palm, compressing it into a massive paw-shaped bubble. Once released, it explodes in a wide area, dealing massive damage. You can also trigger the explosion early if needed. |
| H | Pain Repulsion allows you to heal an ally by removing their pain and fatigue, restoring 50 HP. However, the expelled pain is then turned into an attack, damaging enemies nearby. |
| P | Pose lets you strike an ominous stance while One Piece Soundtrack – Terrifying plays, as nothing is more intimidating than an enemy who can repel anything. |
10. One For All (Stages)

True strength isn’t just about what you can achieve alone—it’s about passing on your will to the next generation. With this ability, you can transfer your One For All (OFA) to another user, helping them reach even greater heights.
G – Passdown allows you to pass your OFA [stage] to another player who has the same stage as yours. This transfer upgrades their OFA to the next stage, pushing them further on their path to greatness.
11. One For All (Green Boy)
One For All grants you the strength of past generations, combining multiple quirks into one devastating force.
As the inheritor of this power, you wield incredible speed, strength, and precision, making your enemy find out about Green Boy’s power the hard way. The moveset for the Green Boy Sakura Stand spec is:
| LMB | Wyoming Smash charges an unstoppable downward punch, slamming into the ground with immense force. |
| Q | Saint Louis Smash enhances your attack with OFA energy, delivering a devastating roundhouse kick. |
| E | Pinpoint Focus uses Black Whip to pull yourself at high speeds, with up to three uses before cooldown. |
| R | Float Leap allows you to soar through the air for a short period. |
| Y | Full Blast deploys a massive smoke screen, blinding enemies while boosting your speed. |
| G | Danger Sense lets you become an unhittable blur for 10 seconds, auto-dodging all attacks. |
At the same time, you’ll also have access to a series of devastating combo moves:
| Q + E | 45% Detroit Smash channels 45% of OFA’s power, lunging forward and damaging everything in your way. |
| Q + R | Delaware Smash: Air Force launches an air projectile from your fingertips while flipping backward. |
| Q + T | Faux 100 Percent propels you at extreme speeds by combining 45% OFA with Fa-Jin, with damage scaling based on stored energy. |
| Q + H | Detroit Smash: Quintuple unleashes four consecutive Detroit Smashes, obliterating everything in range. |
| E + R | Black Cage elevates you into the air before slamming down multiple pillars of Black Whip. |
| E + T | Blackchain enhances Black Whip with Fa-Jin, sweeping a wide area with immense force. |
| E + T | Overdrive Detroit Smash activates Gearshift, launching you into the air before delivering an earth-shattering strike. Damage increases with stored Fa-Jin energy. |
| Q + T + H | Overdrive Detroit Smash activates Gearshift, launching you into the air before delivering an earth-shattering strike. Damage increases with stored Fa-Jin energy. |
| Q + E + T | Faux 100 Percent: Manchester Smash lets you anchor yourself mid-air with Black Whip before launching at Mach speed using OFA and Fa-Jin. |
| R + Y + H | Transmission combines Float, Smokescreen, and Gearshift, propelling you forward in a powerful, controlled charge. |
| Q + E + R + T + Y + G + H | One For All: Full Cowling 100 Percent activates every quirk at once, pushing your power to its absolute peak at the cost of HP. |
| Q + Z (Hold) | United States of World Smash is the ultimate move. At 20% HP or lower, you dash toward your opponent and retire them permanently with an unstoppable final strike. |
12. Padoru

Once obtainable only on December 8, 2022, Padoru has made a return, though its reputation remains infamous. Known for its ridiculous moveset and frail health, it stands as one of the worst specs in existence.
- M1 – Hashire sori yo kaze no you ni tsukimihara wo Padoru Padoru is your basic attack, though its effectiveness is questionable at best.
- Z – Surprise! lets you swing a present-filled bag at an opponent, knocking them away while applying random status effects. The chaos is accompanied by Padoru Padoru playing in the background.
It has the lowest HP of all the listed Sakura Stand specs, at just 100 HP, making it perhaps the most hated spec in the game. And no, it’s not unobtainable anymore—stop spreading misinformation.
13. Herrscher of Human (Elysia)
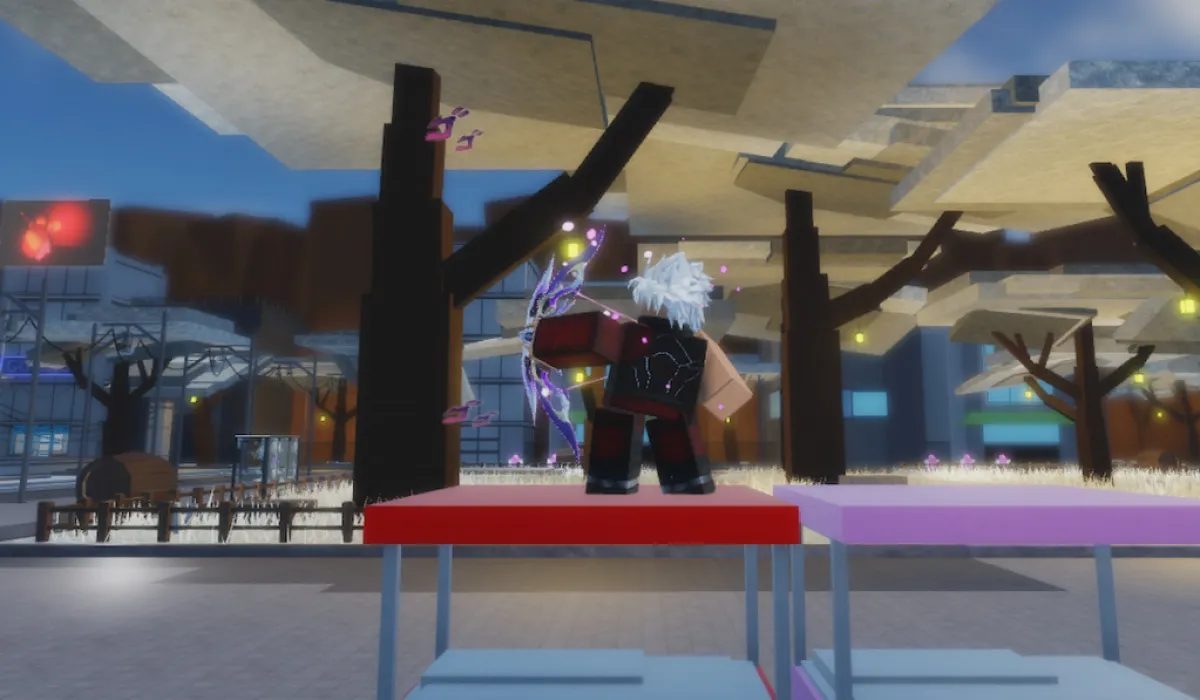
This spec brings elegance and overwhelming power to the battlefield, striking with pinpoint accuracy and bending reality itself.
With rapid-fire energy blasts, gravity-defying movement, and a domain that traps everything in its path, this spec is as flashy as it is deadly. Obtainable through the Banner system, this spec requires Mastery 1 to trade HOHE. Its moveset? Well:
| Q | Summon calls forth the user’s weapon, preparing them for combat. |
| LMB | Shoot fires an arrow directly at an opponent, dealing precise ranged damage. |
| LMB (Hold) | Infinite Helix expands the bow into a massive ballista. This move has no limit and allows continuous firing of arrows indefinitely. |
| E | Lost Shard launches the player into the air before shooting down an arrow that forms a layer of shards around the opponent. |
| R | Spirit of Origin summons an ethereal force that rises upwards, dealing damage in its wake. |
| T | Pristine Shot fires multiple energy blasts at the targeted opponent in rapid succession. |
| Y | Dormant Seeds sends out an arrow that locks the opponent inside shards, hitting them continuously before impact. |
| H | Colliding Path pulls the opponent toward a gravity well, stunning them briefly and leaving them vulnerable. |
| G | Radiant Destiny activates Herrscher of Origin, granting a 30% damage buff and trapping nearby opponents in a domain. This state unlocks two additional moves. |
| G + LMB | Shattered Transience replaces the bow with a staff, striking the opponent while unleashing beams of energy. |
| G + Y | Origin Dive summons a Spirit of Origin, allowing the user to ride it and pass through opponents with force. |
| P | Pose makes the user strike a stance, with different animations depending on whether they are inside their domain. |
14. Cid Kagenou (Shadow)
Requires Mastery 12 to trade. Playing as Cid Kagenou (Shadow) means stepping into the role of someone who moves beyond limits. With Immense Regenerative Ability, you heal 0.5 HP every 0.5 seconds outside of combat and every second while in combat, keeping you in the fight longer.
Greater Than Time lets you move freely during time-stop effects, so nothing slows you down. Shadow gives you a 1.35x damage boost at night, and yes, it stacks with certain titles—because why wouldn’t it? Here’s the full moveset for the Cid Kagenou spec in Sakura Stand:
| Q | Overdrive Form makes your eyes glow purple with a surrounding flame, boosting all your damage by 15% until the form ends. It’s pure power mode. |
| M1 | Master of Their Blades is a clean and lethal combo—two slashes, a round cut, and a final piercing strike to put an end to your enemy’s resistance. |
| E | Speed Blitz is all about precision. You twist your blade and unleash a series of piercing thrusts, finishing with an upward slash. Unstoppable, but it can be countered. |
| R | Pause Walker stops time just long enough for you to cut straight through space and time, ignoring whatever defense they thought they had. Bypasses counters, can’t be canceled. |
| T | Spark within the Dark is a trap move with style. You toss a spark, and the moment it lands, purple flames spread, dealing damage over time to anyone stuck inside. Bypasses counters, can’t be canceled. |
| T + Hold | Throughout the Dark upgrades your spark attack—flames ignite instantly, and you send out four slashes before dashing in to thrust your blade through your opponent, finishing with a circular flourish. Bypasses counters, can’t be canceled. |
| Y | Fallen Into the Dark makes you stomp the ground, shattering the area around you with raw force. It’s a devastating AoE shockwave. Bypasses counters, can’t be canceled. |
| H | Highest takes you to the skies. You launch yourself upward, then descend in a wild flurry of horizontal and vertical slashes before leaping back and finishing with a final, devastating strike. Bypasses counters, can’t be canceled. |
| G | I. AM. ATOMIC… is the ultimate flex. You raise your blade, gather all your power, chant the incantation, spin your blade in a circular motion, and then slash downward—nuking an entire area. Deals TRUE damage, bypassing iFrames and cutscene moves. |
And because style matters, there are two voice lines you can trigger using !ar / !allrange.
15. Kaiju No. 8
You didn’t just pick up some overpowered spec—you became a Kaiju, a walking disaster with strength that crushes everything in your path.
Whether you’re using Partial Kaiju or going full Berserk Mode, you’re built different. The Partial Kaiju moveset goes as follows:
| Q | Kaiju Jab lets you transform your arm and launch a devastating punch that sends out a shockwave. It even breaks blocks, because why should anyone be able to stop you? |
| M1 | Kaiju Combo is a brutal hand-to-hand sequence, because sometimes, you just gotta get up close and personal. |
| E | Kaiju Barrage transforms both of your arms before unloading a flurry of rapid punches. More fists, more problems—for them. |
| R | Kaiju Axe Kick has you transform your leg before bringing it crashing down in a devastating axe kick. |
| T | Kaiju Slam turns both of your arms into wrecking machines as you slam them into the ground, making sure everything nearby feels it. |
| G | Kaiju Grab means exactly what it sounds like—you grab your opponent, beat their face in with multiple punches, and send them flying with a monstrous right hook. |
| H | Kaiju Transformation is when you go all in, fully transforming into your Kaiju form and regenerating any damage you’ve taken. You’re not going down that easily. |
| Z | Jet Leap turns your legs into Kaiju-powered boosters, launching you forward in a short but powerful burst. |
| P | Pose lets you unleash some of that good ol’ Kaiju flexin’. |
Being fully Kaiju-fied gives you faster movement and a damage boost based on how low your HP is—so the weaker they think you are, the harder you hit. Your new moves are:
| Q | Kaiju Aura supercharges you with Kaiju Energy, giving you a raw power boost. |
| LMB | Kaiju Combo is a fully enhanced, even nastier version of your base combo. If you weren’t punching hard before, you definitely are now. |
| E | Kaiju Big Barrage is an upgraded version of your barrage, except this time, you’re throwing Kaiju-powered fists at speeds that should be illegal. |
| R | Kaiju Dash Kick makes you lunge forward before slamming your leg down in an axe kick so powerful, the ground might actually cry. |
| T | Kaiju Big Slam is an AoE nightmare where you smash the ground so hard, anything in range just gets obliterated. |
| Q + T | Kaiju Roar shakes the battlefield as you unleash an earth-shattering roar powered by pure Kaiju energy. |
| Y | Sonic Wave sends out a devastating shockwave, because even your voice is a weapon. |
| G | Kaiju Uppercut launches your enemy straight into the sky before you fly up to meet them with a final crushing blow. |
| H | Kaiju Counter lets you bait an attack, teleport behind your opponent, and then mercilessly beat them down. |
| B | Kaiju Impact is pure devastation. You charge up a ridiculous amount of Kaiju energy, leap into the air, and punch the ground so hard it erupts into an explosion. |
| Z | Jet Leap sends you flying forward with Kaiju-powered agility. |
| P | Kaiju Pose because when you’re this powerful, you deserve to show off. |
| Q + Death | Berserk Mode is when all control is lost, and you fully surrender to the monster inside, entering an unstoppable rampage. |
And once you enter Berserk Mode, it’s truly go time. Going Berserk means constant health regen, faster movement, and a massive damage boost. There’s no turning back now and you get a whole new set of moves:
| LMB | Berserk Combo is an even wilder, more unpredictable attack sequence. At this point, you’re just swinging with raw fury. |
| E | Berserk Barrage is a non-stop flurry of feral punches, faster and harder than ever before. |
| T | Berserk Roar is pure rage unleashed in the form of a deafening, devastating shockwave. |
| Y | Berserk Wraith turns Kaiju energy into a massive energy wave, sending destruction in all directions. |
| B | Berserk Impact is your final act of annihilation. You charge insane levels of energy, leap into the sky, and bring it crashing down, causing a ridiculous explosion of Kaiju power. |
| Z | Berserk Leap launches you insanely far, because when you’re in Berserk Mode, you’re moving like a true monster. |
16. Yuji Itadori (Shinjuku Showdown Arc)

If you’re playing as Yuji, you’re not just another fighter—you’re an all-out brawler infused with raw cursed energy. Every hit packs a punch, and with a little luck, you might just land a Black Flash, turning a solid strike into an absolute knockout.
Divergent Fist makes sure every hit does double duty—your opponent gets struck, and then a delayed second wave of cursed energy follows up. It’s blockable, but still a nightmare to deal with. Black Flash takes things to another level, randomly boosting the damage of your attacks for insane burst potential. Here are all the moves for the Yuji Itadori Sakura Stand spec:
| Q | Curse Energy Detection sharpens your senses, letting you pick up on people, curse objects, and sorrow itself. |
| LMB | Cursed Energy Infused Combo is a standard beatdown, but with cursed energy enhancing every punch. |
| E | Cursed Energy Infused Barrage turns it up a notch, unleashing a rapid barrage of kicks and punches. If you’re lucky, you’ll land a Black Flash in the mix. |
| R | Manji Kick is a swift leg sweep, knocking your opponent off balance and keeping you in control. |
| T | Black Flash is exactly what it sounds like—you let loose several consecutive Black Flashes, overwhelming your enemy with pure cursed devastation. |
| Y | Triple Kick Combo sets you up for a flashy finisher—you kick twice, then slam your foot into the ground, making sure they feel every bit of it. |
| P | Pose since even in battle, you need to show some Never Surrender energy. |
| G | 120% Potential is where things get real. You manifest cursed claws, pushing your limits and unleashing your full strength. You’ll need to complete Kusekabe’s Quest first, but once you do, nothing stands in your way. |
| Z | Reverse Curse Technique: Regeneration lets you tap into RCT to heal yourself, keeping you in the fight longer. |
Once you’ve unlocked your potential, everything gets even crazier. Divergent Fist and Black Flash remain active, but now you’re fighting at 120%, meaning every strike feels like a truck hitting your opponent.
| LMB | 120% Cursed Energy Combo throws out cursed-energy infused strikes, then cuts your opponent apart using Shrine. |
| E | 120% Potential Barrage is a relentless storm of devastating kicks and punches, with the chance to land a Black Flash just to make it even worse for them. |
| R | Manji Kick and Divergent Fist means you first sweep their legs, then slam them into the ground with a Divergent Fist, doubling the impact. |
| T | Black Flash is even more brutal, chaining together multiple Black Flashes in rapid succession. |
| Y | Shrine Technique: Limb Dissection is one of the nastiest finishers. You climb onto your opponent, cut off their arm, and then shred them apart with a flurry of cleaves. |
| G | Blood Manipulation: Piercing Blood lets you compress your own blood to the absolute limit before firing it like a deadly projectile from your fingertips. |
| P | Pose with full confidence since you can now look your opponent dead in the eyes and say, “I’m you.” During the awakened pose, there’s a chance for a cover of Skyfall to play, making the moment even more dramatic. |
17. Herrscher of Flamescion
If you’re stepping into the role of the Herrscher of Flamescion spec in Sakura Stand, get ready to burn through everything in your path. Once you hit Mastery 4, this spec is yours, but it stays locked to players who’ve proven themselves at that level.
Every fight fuels your Herrscher Form. Dealing damage fills your meter, and once you hit at least 2%, pressing Q lets you ignite the battlefield.
While in Herrscher Form, you take passive burn damage, but in return, your attacks hit harder, apply burn damage, and you can extend the duration just by landing hits.
The more you fight, the longer you stay in the flames, and the rest of your available moves are:
| Z | Gate lets you summon a small black hole in front of you. Just type in your destination, and the black hole expands, teleporting you wherever you need to go. |
| LMB | Greatsword Slashes brings the raw power—a series of sword swings with the last strike cutting twice for extra impact. |
| E | Star Tempered Phoenix dashes forward at insane speed, delivering a burning slash that launches your opponent away. |
| R | Scattering Blitz teleports you straight up, then you slam back down onto the battlefield, hitting everything in your path. |
| T | Blazing Chariot’s Trail is a flashy, destructive move. You start with a backflip, then blast yourself forward with fire, cutting through the air with a huge AoE slash that hits everyone caught in it. |
| Y | Unyielding Inferno is a black hole of destruction. It pulls enemies in, then explodes, tearing apart anyone who can’t escape. This move bypasses I-Frames, unless it’s a beatdown cutscene. |
| G | Light Up The World lets you pull out a pistol and throw it forward, creating a small AoE that constantly damages anything inside. |
| H | The Blade Supreme, Rekindled takes things to another level. You charge up your sword, slash the sky, and cause a massive explosion, because why settle for anything less? |
Damage scales with your meter. Using The Blade Supreme, Rekindled without meter does 10 damage, but with full meter, it jumps to 25 damage. If you’re in Herrscher Form with full meter, it can go up to 50 damage. The stronger your flames, the more devastating your attacks.
Pose music rotates between three different tracks, too, by the way.
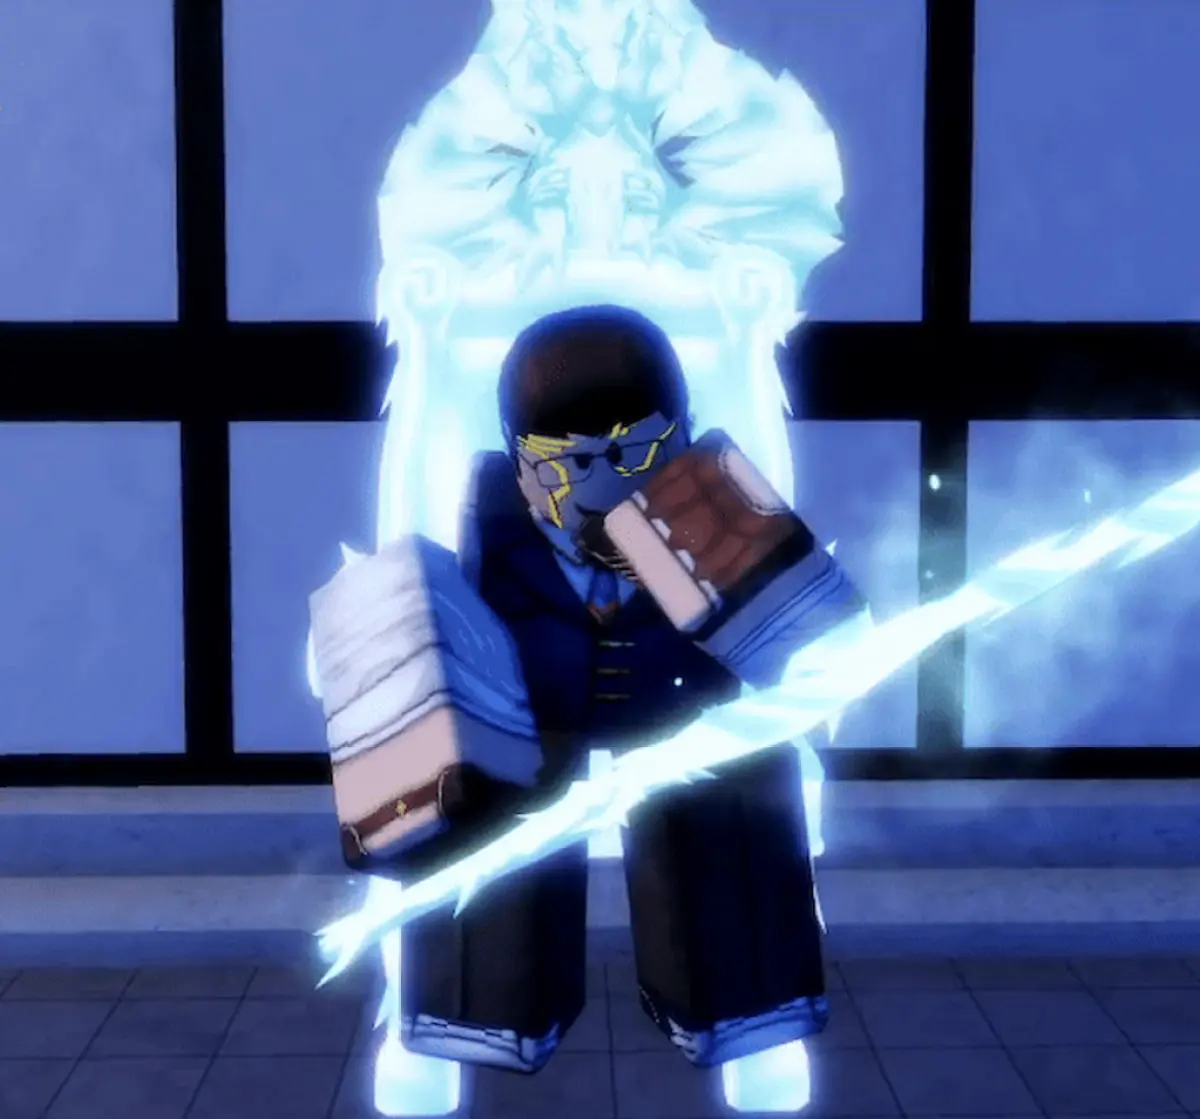
18. Shinra

If you’re playing as Shinra, you’re striking fear into the bones of all other Sakura Stand specs. Once you hit Mastery 8, you unlock a moveset that’s all about high-speed kicks, fiery combos, and devastating finishers.
| LMB | Flaming Combo starts off with a solid kick before you breakdance-kick your opponent into oblivion, finishing with a powerful launch kick to send them flying. |
| E | Fierce Flame is all about aggression and speed. You charge up, zoom upwards, then blast toward your enemy with a fiery kick that hits like a truck. |
| R | Ignition Blast lets you kick your opponent straight into the air, then spike them down to the ground, making sure they feel every bit of impact. |
| T | Whirling Trail of Fire turns you into a spinning inferno, building up momentum before kicking your opponent backward in a fiery blaze. |
| Y | Devil Footprint takes you up into the sky before you come crashing down on your target like a meteor, leaving behind nothing but destruction. |
| G | Adolla Burst is straight-up broken—you tap into Adolla’s blessing and dispatch your opponent in just 2 seconds. No mercy. |
| H | Corna is pure nightmare fuel. You rush forward, plant your foot on your opponent, and before they can react, a massive beast appears and takes a bite out of them. |
| Z | Crimson Flight turns your feet into jet engines, letting you travel insanely fast across the map. You can control your flight with WASD, making it one of the best mobility skills out there. |
| P | Pose lets you flex your unstoppable speed and power, with three different pose songs playing at random. Because when you’re Shinra, standing still isn’t an option. |
19. Sakuya

If you’re picking Sakuya, you’re stepping into one of the most stylish and calculated playstyles in the game. Mastery 12 is the requirement, but once you unlock her, you’re playing with time, precision, and a whole lot of knives. The moveset is as follows:
| Q | Switch Mode lets you start using Spell Cards, but your Gauge meter needs to be filled first. Regular and Spell Card moves keep that meter going, so keep attacking. |
| LMB | Auto Combo is a clean mix of jabs, kicks, and a slick backhand finisher to keep your opponent on their toes. |
| E | Magic Star Sword locks onto your opponent before you unleash a storm of knives directly at them. |
| R | Time Paradox summons a holo clone that rushes forward alongside you, turning the pressure up to insane levels. |
| T | Misdirection gives your opponent another target status, before you rain knives from above. If they move in the wrong direction, they’re done for. |
| Y | Sense of Thrown Edge sets up seven floating knives that hover for a moment before launching straight at your opponent. |
| G | Dancing Star Sword summons four rotating knives behind you. Press G again, and they fire forward like guided missiles. |
| H | Perfect Maid is a counter move with serious style. You turn your back, waiting for your opponent to strike, and when they do, you stop time, teleport behind them, and send a barrage of knives straight at them. |
Once you activate Spell Cards, things escalate quickly:
| Q+E | Illusion Sign “Killing Doll” has you stop time just long enough to conjure a wave of knives and launch them all at once. Costs 2 bars of Gauge. |
| Q+R | Wound Sign “Inscribed Red Soul” goes full-on swordplay, slicing through your opponent with rapid precision. Costs 3 bars of Gauge. |
| Q+T | Conjuring “Eternal Meek” lets you fire off a relentless knife barrage that floods the battlefield with blades. Costs 2 bars of Gauge. |
| Q+Y | Lightspeed “C. Ricochet” is where things get interesting. You throw a purple knife that bounces off invisible walls for 8 seconds before finally locking onto and piercing through your opponent. Costs 4 bars of Gauge. |
| Q+G | Last World “Deflation World” is where you go beyond broken. If you land this, a cutscene plays, and suddenly, knives from past and future timelines appear all at once, striking your opponent simultaneously. The downside? Your Gauge meter is permanently disabled for the rest of your life. Costs 5 bars of Gauge, so use it wisely. |
| Q+H | Sakuya’s World gives you free control over time. A basic time-stop for 5 seconds, where only you can move. The cooldown is shorter than other time-stop moves, because canonically, Sakuya can do this whenever she wants. Costs 5 bars of Gauge. |
| P – Pose | Pose lets you flex in the most stylish way possible. Let’s be real—after throwing this many knives, you deserve a moment to take it all in. |
20. Astolfo (Saber)
If you’re playing as Astolfo, you’re here to fight with style, speed, and just a little bit of chaos. Unlocked through Holy Grail War, this spec is all about high-speed slashes, insane mobility, and devastating critical hits.
Your Passive – Critical gives you a chance to land double damage on any attack, and the lower your DiM, the higher your crit chance gets. Play aggressively, and you’ll start dealing absurd amounts of damage.
| Q | Majestic Triumphal Return powers you up for 30 seconds, increasing your damage by 25%, critical damage by 30%, and critical rate by 15%. Basically, if you weren’t hitting hard before, now you are. |
| LMB | Oath of Saber starts with a whip strike upward, followed by a downward slash, then a jab that pulls you toward the enemy. It finishes with a spinning aerial cut, slicing through anyone in range. |
| E | Dance of The Knight lets you spin like a deadly tornado, slashing everything around you with your extended blade. |
| R | Wheel of Fortune is a double-hit vertical spin attack, bringing down heavy damage in quick succession. |
| T | Followup Carnage dashes you straight into the enemy, landing an upward slash, then spinning and whipping downward for a stylish finish. |
| Y | Imperial Chain makes you dash through your opponent, cutting them multiple times in a flash before finishing with a spinning vortex of chains. They won’t even know what hit them. |
| G | Noble Phantasm: Vulcano Caligorante traps the enemy in your chain blade, then repeatedly slashes them inside, leading to massive damage. |
| H | Warrior’s Saber lets you charge up your blade, then leap into the air and fire a beam of energy at wherever your cursor is pointing. If you fully charge it, the attack ends with a giant explosion. |
| P | Pose because femboy energy is eternal, and the theme song is Fate/Extella Link – Knights’ Pilgrimage (Knights of Charlemagne Theme). |
21. Toji Fushiguro
Unlocking Toji isn’t simple—you need all three required items, Heavenly Restriction, and you have to reset with all the items in your hotbar as Standless with Heavenly Restriction active. Do all that, and you become the man who defies sorcery itself.
Passive – Curseless Body/Heavenly Restriction makes sure you’re moving at inhuman speeds, giving you a faster run, higher jump, and even bypassing Gojo’s Infinity. No cursed energy? No problem. Toji doesn’t need it.
| Q | Cursed Tool Summon lets you instantly pull out your weapons, ready to dismantle anyone in front of you. |
| LMB | Cursed Tool Combo lets you slash and cut your opponent with the Inverted Spear of Heaven, pulling them closer before sending them flying. |
| E | Domain Breaker is exactly what it sounds like—you slash your spear at extreme speed, shredding anyone caught in the small AoE. Even domains won’t save them. |
| R | Corner Cleave teleports you straight to your enemy, slashing them once, then again, before they even have time to react. |
| T | Throughout Heaven is where the Split Soul Katana comes into play. You summon it for just a moment, slashing forward and cutting a piece of your opponent’s soul. |
| Y | Throughout Earth takes brutality to another level. You slash the ground with the inverted spear, sending a barrage of rocks flying into anyone caught in the attack. |
| G | Throat Gauge/Throat Slit is one of the most satisfying finishers in the game. You lunge forward at blinding speeds, stabbing your opponent multiple times before kicking them away. Holding G makes it even more disrespectful—you teleport behind them before going for the kill. |
| H | Cross Cut is a close-range grab move where you draw your weapon twice at lightning speed, slicing your opponent into an X shape. |
| Z | Lightspeed Flash is the best movement move you could ask for. Place your cursor anywhere—a building, a rooftop, across the map—you teleport instantly. You can use this up to 10 times before needing to wait for the cooldown. |
| P | Pose lets you flex the sheer dominance of Toji. |
If you didn’t know, Toji used to be able to dash with almost no cooldowns, making him an absolute nightmare to fight. His T move can even affect bosses, proving just how absurd his raw power really is.
21. Satoru Gojo

If you’re stepping into Gojo’s domain, you’re playing as the strongest sorcerer alive, and everything about this moveset makes sure you feel like it. You’ll need to reach Mastery 1 and complete Gojo’s quest with Itadori to unlock him, but once you do, you’ll have Limitless, Six Eyes, Hollow Purple, and even Resurrection at your disposal.
| C | Teleport Dash lets you blink across the battlefield. Just aim with your mouse, and Gojo will teleport instantly. |
| LMB | Cursed Combo is a brutal mix of skillful strikes that ends with you grabbing your opponent and hitting their vital organs before kicking them away. |
| E | Infinity Blast is pure power, as you extend your hand and release a gust of cursed energy that shreds anything in its path. |
| R | Aerial Kick launches your enemy into the air, only for you to teleport behind them and slam them back down onto the ground. |
| T | Reversal Red builds up cursed energy before releasing an AoE explosion that damages everything within range. |
| Y | Lapse Blue pulls your enemy back to their previous position, stunning them just long enough for you to land a free combo. This move bypasses some I-frames, except beatdown cutscenes. |
| G | Limitless: Infinity is what makes Gojo, Gojo. No more holding the button—just press it once and Infinity is active until you use a move. Anyone who attacks you while it’s active gets stunned and locked in place. |
| H | Reversed Cursed Technique: Regeneration lets you heal up to 200 HP if you hold it for the full duration. You can cut it short to heal less HP if needed. |
| Q | Six Eyes pulls Gojo’s blindfold off, activating maximum power and setting up for his deadliest techniques. |
| E | Martial Combo is a flashy beatdown, as you kick forward and completely overwhelm your opponent. |
Now, let’s take a look at those juicy combos:
| R | Imaginary Technique Hollow: Purple is where things get insane. You combine Red and Blue to unleash Hollow Purple, wiping everything in front of you in one massive attack. |
| R + Hold | Hollow Technique: Purple: Maximum Output takes it even further. Instead of attraction (Blue) or repulsion (Red), this annihilation wave has infinite range and even grants you I-frames. |
| T | Cursed Technique Reversal: Red: Maximum Output lets you fire a massive cursed technique blast, but if someone tries to attack you mid-charge, you teleport behind them and still hit them with it. |
| Y | Cursed Technique Lapse: Blue: Maximum Output supercharges Blue, creating a massive energy sphere that you can drag around with your mouse. |
| G | Domain Expansion: Infinity Void opens Gojo’s domain, allowing free attacks and dealing 30 guaranteed damage if no hits are landed. The domain can be broken by players outside. |
| G + Tap | Domain Expansion: Infinite Void: Point Two Second stuns everyone caught in it for 6-7 seconds, giving you complete control over the fight. |
| H | H – Reversed Cursed Technique: Resurrection is your ultimate trump card. |
If you’re in Six Eyes mode and drop to 15% HP (52.5 HP or lower), pressing H sets up your resurrection. Once you die, you come back to life stronger than ever, in addition to:
- Plays a cutscene upon resurrection.
- Your screen shakes constantly until death.
- Outgoing damage is increased by 100%.
- Incoming damage is also increased by 100%.
- Hollow Purple cooldown is reset immediately.
- Healing and Domain Expansion are completely disabled.
- You passively have Infinity in Awakening, but it no longer stuns enemies.
- Shielding limit increases to 200 and regenerates over time.
22. Ryomen Sukuna

Once you become the all-mighty Sukuna, you step into the role of the King of Curses, wielding devastating slashes, insane speed, and the ability to tear through anyone in your path.
| Q | Reversed Cursed Technique: Regeneration lets you heal up to 110 HP, keeping you in the fight longer and making sure you’re always ready to dismantle your enemies. |
| LMB | Curse Combo is exactly what it sounds like—a brutal series of dismantling slashes that rip through your opponent without hesitation. |
| E | Dismantle-Combo takes it even further, unleashing a flurry of slashes before following up with two massive dismantle strikes to finish the job. |
| R | Head Crusher lets you grab your opponent by the face, fly into the air, and slam them straight into the ground, making sure they know exactly who they’re dealing with. |
| T | Flame Ballista is where things get nasty—you summon a flaming arrow before launching it forward, incinerating anyone unlucky enough to get hit. |
| Y | Speed Blitz turns you into a zig-zagging blur, moving at ridiculous speeds while cutting through anyone in your way with Cleave, leaving nothing but shredded remains behind. |
| H | Domain Expansion: Malevolent Shrine is your ultimate flex. You summon your domain, completely devastating a massive portion of the battlefield with non-stop slashes. If they’re inside, they’re done for. |
| G | Counter is your answer to aggression. If someone dares to hit you while you’re in this stance, you grab them, slam their face into the ground, and toss them aside like trash. |
| P | Pose is just pure confidence, because when you’re Sukuna, you don’t need to prove anything—you just stand there and let your presence do the talking. |
Sukuna was once meant to be obtained through the banner system, but that never happened. Now, he’s locked behind Mastery 12, making sure only the most worthy get to wield his power.
23. Geto Suguru

If you’re playing as Geto, you’re stepping into the role of the ultimate curse manipulator, wielding both raw strength and an arsenal of summoned curses to dominate the battlefield. With Playful Cloud in hand and a roster of curses at your disposal, you have endless ways to obliterate your opponents. Here’s the rest of the Geto moveset in Sakura Stand:
| Q | Summon Playful Cloud brings out Playful Cloud, letting you swing it like an absolute menace. |
| LMB | Chain Combo turns that staff into a whirlwind of destruction, smashing enemies multiple times with quick, heavy swings. |
| E | Whirling Cloud has you spin Playful Cloud around, damaging everyone in range—basically, if they’re nearby, they’re getting hit. |
| R | Joyous Cloud slams Playful Cloud straight into the ground, making sure anyone in the way feels it. |
| T | Squid Curse Shot lets you fire off three squid curses at an opponent, but it de-summons Playful Cloud if you were using it. |
| Y | Curse Manipulation: Absorb is where things get interesting. If an enemy curse is at 25% HP or lower, you can absorb them and store them for later use. |
| H | Curse Spirit Manipulation: Summon: Cyclops makes a massive cursed spirit crash from above, dealing huge AoE damage. |
| H+Z | Curse Spirit Manipulation: Summon: Rainbow Dragon has Rainbow Dragon snatch your opponent, drag them into the sky, and then slam them down for massive impact. |
| H+Z | Curse Spirit Manipulation: Summon: Hookworm summons a massive cursed spirit that lunges forward and bites down on your enemy, dealing devastating damage. |
| H+Z | Curse Spirit Manipulation: Summon: Squid creates multiple portals behind you, unleashing a barrage of squid curses at your opponents. |
| H+Z | Curse Manipulation: Summon lets you summon any curses you’ve absorbed, bringing them into battle to attack nearby enemies—and yes, that includes everyone but the summoner. |
| G | Maximum Uzumaki is the ultimate attack. You unleash every curse you’ve collected, forming them into a massive destructive torrent that devastates everything in its path. The more curses you’ve absorbed, the stronger it gets, and you can even aim it with your mouse for maximum devastation. |
| Z | Curse Selection opens a small tab at the bottom of your screen, letting you choose which curse to summon or use next, giving you complete control over your arsenal of destruction. |
| P | Pose lets you flex your curse-wielding dominance, complete with three different pose songs to make sure you’re styling on your opponents. |
24. Okkotsu Yuta

Playing as Yuta means wielding Rika’s overwhelming power alongside your own, making you a force of nature on the battlefield. With a fluid mix of swordplay, cursed techniques, and Rika’s devastating attacks, you can slice, counter, heal, and completely shut down opponents.
| Q | Switch Mode summons Rika, unlocking a new moveset and taking your power to another level. |
| LMB | Slice is a simple but deadly sword slash, cutting down enemies with precision. |
| E | Ray of Light lunges you forward, slashing straight through your opponent in a single, clean motion. |
| R | Butterfly Dance has you twirl toward your target, slashing through them with speed and finesse. |
| T | Love is Blinding is pure flash and brutality—you move at blinding speeds, appear right in front of your opponent, and slash their arm off before they even know what hit them. |
| Y | Black Flash is where things get cinematic. You grab your opponent, slam them into the ground, and deliver a cursed-energy infused punch in a quick cutscene moment. |
| G | Godspeed Reflex is a deadly counter. The moment your target tries to attack, you teleport in front of them and slash them down before they even realize what happened. |
| H | Arc Cut is a fast and powerful upward slash, sending opponents reeling with sheer force. |
When Rika is active, things get serious.
| Q+E | Rika Slash makes Rika target your opponent and slash them with her claw—but you have to be close enough for it to land. |
| Q+R | Raging Mash is a full-on Rika rampage. She twirls around you for a few seconds before smashing the ground, sending out shockwaves of destruction. |
| Q+T | Cursed Bubble locks your opponent inside a cursed bubble for 5 seconds, completely preventing movement. This move de-summons Rika, so you’ll need to summon her again after. |
| Q+Y | Copy: Cursed Speech lets you pull out a megaphone and command your opponent to “die.” The result? They get completely crushed, because cursed speech isn’t up for debate. |
| Q+G | It’s Pure Love is the final, all-out attack. Rika completely surrounds you, charging up a massive cursed-energy beam, and blasting everyone in its path. After using this, Rika disappears for 1 minute, so use it wisely. |
| Q+H | Reverse Cursed Technique gives you the ability to heal others, restoring 25 HP to nearby players. |
| Q+H+Hold | Reverse Cursed Technique: Self Recovery focuses all of that energy on yourself, healing you for 40 HP. |
| Z | Domain Expansion: All-Encompassing Unequivocal Love changes your E move to Mimicry, letting you copy a random JJK-related move and unleash it in battle. |
| P | Pose lets you flex your bond with Rika, giving you one normal pose and a special pose where she appears with you. |
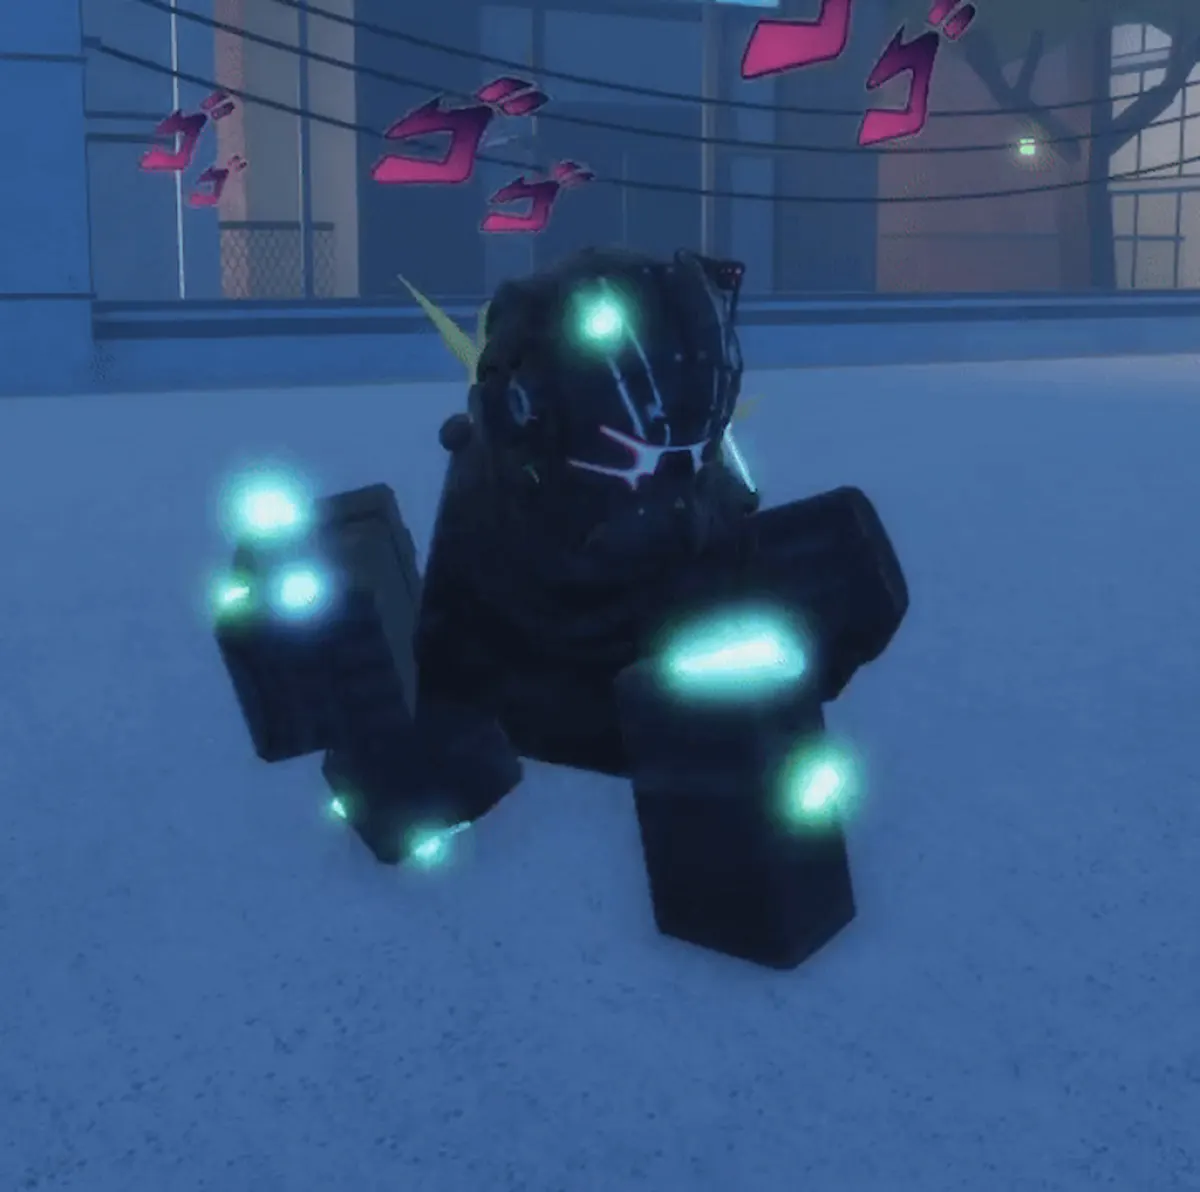
25. Sandevistan
The guy from Cyberpunk 2077—you already know what that means. Playing as Sandevistan turns you into an unstoppable cybernetic beast, moving at blistering speeds, landing brutal hits, and dodging attacks like you saw them coming before they even happened. But power comes at a cost.
Cyberpsychosis is always looming in the background. You have a gauge that tracks how much of your Sandevistan ability you’ve used. Push it too far, and you glitch out, paralyzing yourself for a few seconds and taking 141.66 self-damage as a brutal side effect. Use it wisely.
| Q | Rapid Fire lets you pull out your gun and unload a full clip into your opponent, landing six shots for 30 total damage. |
| LMB | LMB Combo keeps things fast and brutal—you punch three times, then finish with a spin kick that sends them flying for 28 damage in total. |
| E | Face Breaker is exactly what it sounds like. You grab your opponent by the face and smash them with your cybernetic arm, dealing 45 damage straight up. |
| R | Enhanced Leap launches you high into the air, slows down time, and sends you crashing down onto your opponent for 32 damage. |
| T | Projectile Launch System gives you a built-in mini rocket launcher, firing off a small explosive that hits for 27 damage, plus 5 bleed damage, for a total of 32 damage. |
| Y | Enhanced Reflex surrounds you with a green aura, signaling that you can dodge any attack (except a few exceptions) for 1-2 seconds, making you nearly untouchable. |
| H | Sandevistan is your signature move. You slow down time, move at insane speeds, and freeze everyone else in place if they’re close enough. You’re moving so fast, they might as well not be moving at all. |
If you’re running Sandevistan, you’re playing at full throttle, with speed and power cranked up to the max. But don’t lose control, because Cyberpsychosis doesn’t care how strong you are—it will ruin you if you push too far.
26. Sandevistan: Cyberskeleton
If regular Sandevistan was about raw speed and reaction time, Cyberskeleton takes it to a whole new level. You’re no longer just some wired-up solo running on chrome—you’re a walking war machine, loaded with firepower and enhanced beyond human limits. But with power comes strain, and if you push it too far, Cyberpsychosis is waiting to take over.
Your Stress Gauge tracks how much you’re pushing the Sandevistan’s limits. Overusing it will force you into Cyberpsychosis, locking you in place for a few seconds while your systems glitch out—a brutal side effect of being too fast for your own good. Other moves include:
| Q | Rapid Fire lets you pull out your gun and start unloading on your opponent, because sometimes, bullets are the best solution. |
| LMB | LMB Combo mixes in gunfire and hand-to-hand combat, hitting with a punch, a shot, another punch, and then finishing with a final blast to the face. |
| E | Face Breaker is as brutal as ever—you grab your opponent and smash their face in using your cybernetic arm. |
| R | Enhanced Leap launches you straight into the sky, slowing down time before slamming down onto your target, making sure they feel every bit of impact. |
| T | Projectile Launch System gives you an arm-mounted rocket launcher, letting you fire off a high-speed explosive that wipes out anyone unlucky enough to be in the blast zone. |
| Y | Enhanced Reflex surrounds you in a green aura, letting you dodge nearly any attack for 1-2 seconds—unless you’re up against something truly unstoppable. |
| H | Sandevistan is where things get ridiculous. You slow down time, move at insane speeds, and completely freeze anyone who gets too close. The world moves in slow motion, while you zip across the battlefield like a ghost. |
| G | Accelerated Wrath takes full advantage of your speed and firepower. You activate Sandevistan, weave around your target at blinding speeds, deliver a flying kick to the face, and then empty an entire magazine into them before sending them flying—because who needs mercy when you can teach them how to fly instead? |
| Z | Gravity Flux taps into your Cyber Skeleton upgrades, letting you launch yourself into the air while marking a red target zone below. The second you trigger it, everything in that area is frozen in place, completely stopping enemies in their tracks. |
| P | Pose lets you flex the full power of the Cyberskeleton. |
The Cyber Skeleton’s dash animation is completely unique, making you move faster and smoother than standard Sandevistan. Sheesh, even how you move is different.
27. Coyote Starrk
Unlocking Starrk isn’t easy—his questline is the longest in the game, but once you complete it, you’re stepping into the shoes of the Primera Espada himself. With blinding speed, deadly ceros, and overwhelming firepower, Starrk is a one-man army, and his Resurrección: Los Lobos makes him even stronger.
| LMB | Slash Combo is a brutal four-hit Zanpakuto combo, slicing your opponent apart while stacking six ticks of bleed. |
| Q | Sonido Cleave is speed and precision combined, delivering a quick slash at near-instant speeds. |
| E | Flash Cleave surrounds you in a fast, circular slash, catching anyone too close in the attack. |
| R | Chest Cero is raw destruction, gathering spirit energy in your chest before blasting it forward in a devastating wave. |
| T | Cleaving Rush is all about relentless pressure. You dash at your target, landing a rapid slash, then follow up with another heavy strike before knocking them away, inflicting four ticks of bleed. |
| Y | Sonido Clones makes you disappear in a blur, moving so fast your opponent barely sees you before stabbing them from behind and sending them flying. |
| G | Gran Rey Cero is pure obliteration—you slice your hand open, then fire off a massive Gran Rey Cero, erasing anything in its path. |
| H | Resurrección: Los Lobos is where you ascend to true power. Your new form heals you for 110 HP and unlocks an entirely new moveset, making you even deadlier. |
Once you hit Resurrección, things get crazy.
| Q | Colmilo lets you solidify Reishi into a sword, cutting down anyone in your way. |
| LMB | Los Lobos changes your attacks to shooting mini ceros from your guns, turning you into a walking artillery unit. |
| E | Left Gun fires off weaker ceros, quick and relentless, perfect for keeping pressure on your opponent. |
| R | Right Gun charges up a stronger cero, hitting harder and dealing more damage. |
| T | Pointblank Shot is savage—you kick your opponent into the air, then blast them away with a close-range cero, sending them flying. |
| Y | Savage Claws summons a ghostly wolf, leaping onto your opponent, clawing them, then tossing them into the air, where you finish them off with a brutal point-blank cero. |
| H | El Tormento lets you jump back and rain gunfire onto your opponent non-stop, keeping them completely locked down. It even has an air variant for mid-air dominance. |
| G | Cero Metraella lets you charge up and release a rapid-fire barrage of ceros, so dense and fast that they merge into a massive single blast. |
| B | Cero Oscuras is a devastating, high-energy cero, fired at full power after a quick animation—because sometimes, you just need to erase whatever’s in front of you. |
| P | Pose lets you flex in true Primera style, because if you’re playing Starrk, you’re at the top. |
Starrk originally had a bug where Savage Claws did 300 damage, making it one of the most broken moves in the game on release. His counter is Bari, which can actually block incoming cero blasts. If you’re feeling flashy, you can even re-roll your outfit color with “!rerollcolor” or change your cero to match your outfit using “!cerocolor”.
28. Kurosaki Ichigo (Substitute Shinigami)

If you’re stepping into Ichigo’s shoes, get ready to cut down Hollows like it’s your job—because, well, it kind of is. As a Substitute Shinigami, you deal extra damage against Hollows, making you one of the best at hunting them down.
Unlocking Ichigo means going into battle without a Stand, fighting Hollows with Standless mode until you land that 25% drop chance for the First Stage. Once you get it, you’re on your way to mastering Zangetsu. The moves include:
- M1 – Blade Combo keeps things fast and fluid, slashing through your opponent with a clean sword combo, finishing with a flashy flourish that knocks them back. Simple, stylish, and effective.
- P – Pose lets you point your sword forward. There’s no need for extra theatrics—just pure confidence and power.
29. Kurosaki Ichigo (Shikai)

If Substitute Shinigami Ichigo felt like just getting started, Shikai Ichigo is where things start getting serious. Instead of just swinging a sword like any other Shinigami, you now wield Zangetsu in its true form, unlocking faster attacks, stronger slashes, and Getsuga Tenshou itself. But, like before, you’re still on the grind—to get this stage, you need to keep taking down Hollows with Stage 1 Ichigo, and there’s only a 15% chance of unlocking it. Your moveset is:
- M1 – Zangetsu Slash flows like lightning, letting you slice through opponents with speed and precision, before ending with a downward cleave that sends them flying. It’s clean, it’s fast, and it leaves your enemies scrambling to recover.
- E – Unrelenting Barrage lives up to its name—you unleash a rapid, relentless flurry of slashes, striking so fast that it ends with a small burst of Reiatsu just from the sheer force of your swings.
- R – Getsuga Tenshou is where things get iconic. You channel your Reiatsu into the blade, then fire off a massive, cutting wave of energy with a powerful downward slash. It’s pure devastation in its simplest form.
- P – Pose lets you stand there like the badass you are, because if you’ve made it this far, you’ve earned the right to flex a little.
30. Kurosaki Ichigo
If Substitute Shinigami Ichigo was the beginning and Shikai Ichigo was a taste of real power, then Kurosaki Ichigo is the full evolution of his strength. You’ve gone from swinging a basic Zanpakuto to getting the privilege of stepping into Vasto Lorde rage mode.
But getting here isn’t easy—you have to complete Kisuke’s quest to reach Stage 3 Ichigo, and to truly complete his power, you need to hunt down an Adjuchas, claim a Hogyoku Fragment, and use it to reach the next level.
| Q | Getsuga Slash is raw aggression in motion. You swing Zangetsu three times, each slash sending out a wave of Hollowfied Reiatsu, overwhelming anything in its path. |
| LMB | Zangetsu Slash keeps things fast and precise, cutting through your opponent before finishing with a flashy downward slice that knocks them away. |
| E | Unrelenting Barrage floods the battlefield with chaos, delivering a Bankai-enhanced flurry of slashes, ending with a burst of Hollowfied Reiatsu that leaves nothing standing. |
| R | Getsuga Flourish is all about closing the gap—you flash step toward your target, punt them into the air, then slash them away. Even if the kick doesn’t land, you still follow through with the slash, ensuring your opponent doesn’t get away untouched. |
| T | Airbound Strike sends both you and your opponent sky-high, lifting them with an upward slash before setting up for an aerial assault. |
| G | Getsuga Tenshou is pure devastation. You channel Hollowfied Reiatsu into Zangetsu, then unleash it in a massive energy wave, carving through anything unlucky enough to be in front of you. |
| Y | Hollow Mask is the first step toward full Hollowfication. Once activated, you gain a temporary damage boost, letting you cut through enemies with even more ferocity. |
Afterwards, things get even more intense.
| R + Y | Getsuga Flourish lets you flash step toward your opponent, kick them into the sky, and then slice them apart with a brutal finishing slash. |
| T + Y | Airbound Strike launches your opponent skyward, only for you to flash step after them and slam them back down. |
| H | Mugetsu is Ichigo’s ultimate trump card. You throw away your sword, use up all your Reiatsu, and become the Getsuga itself. Slashing downwards, you release a wall of pure black Reiatsu, obliterating everything it touches. But there’s a price—you lose all Shinigami powers until you die, leaving you with only basic attacks and Flash Step. Use it wisely. |
| C | Flash Step/Sonido lets you move so fast you become invisible to the naked eye, perfect for closing in or getting out of trouble in an instant. |
And then, Vasto Rage takes over.
| Y + Death | Vasto Rage is the moment desperation turns to raw power. Instead of dying, your inner Hollow takes control, reviving you. But to trigger this, your Hollow Mask has to be at two bars or lower when you’re about to die. |
| Vasto + R | Crushing Roar makes you unleash a monstrous, primal roar, dealing massive AoE damage in every direction. |
| Vasto + T | Cero Blast lifts you into the sky, where you fire off a massive, destructive Cero, scorching the battlefield below. |
| Vasto + Y | Cero Counter is a deadly last resort. You enter a stance, and if someone attacks you, you counter by stabbing them in the sternum, impaling them with Zangetsu, and finishing with a point-blank Cero that incinerates them on the spot. The force is so overwhelming that it reverts you back to normal Ichigo. |
| P | Pose gives you two flex options—one in your normal form and another as a Vasto Lorde, because when you’ve reached this level of power, you deserve to show it off. |
31. Roland (Black Silence Spec)

Roland isn’t just another swordfighter—he’s a walking armory, seamlessly switching between pistols, axes, daggers, and giant greatswords, adapting to the fight in real time. And the best part? He only gets stronger the longer the battle lasts.
With Phase Change, every 45 hits you progress through a new phase, getting a damage multiplier increase of 0.2 per phase. By Phase 4 and 5, you fully embrace the Black Silence, wielding Durandal, gaining a perception-blocking mask, and radiating a dark aura. Your attacks evolve, your moves become more devastating, and if that wasn’t enough, the theme “Gone Angels” by Mili starts playing to really set the mood.
| LMB | Durandal & Old Boys Workshop gives you two precise slashes with Durandal, before following up with a powerful strike using Old Boys Workshop. |
| Q | Ranga Workshop has you summon claw gauntlets, lunge forward twice, then switch to a dagger for a final slash. You can press this three times for a full combo, making it perfect for closing gaps. |
| E | Mook Workshop locks onto your opponent and unleashes a flash-drawn flurry of slashes, applying bleed for extra pressure. But once you hit Phase 4, it becomes Mook Workshop: Sorrow, where multiple weapons rain down from above, turning this move into a true onslaught of blades. |
| R | Wheels Industry is a brutal overhead slash that devastates a large area in Phase 4, making it a fantastic crowd-control move. And if you hold R in Phase 4, you let out a scream of anguish, dealing AoE damage to everything nearby. |
| T | Atelier Logic switches things up, bringing out dual pistols to fire two quick shots, before switching to a shotgun for a powerful blast. If you reach Phase 4, the shotgun round becomes a devastating slug, making it even deadlier. |
| Y | Zelkova Workshop lets you swing a massive axe, then follow up with a crushing mace strike. In Phase 3, it upgrades to Zelkova Workshop: Rage, launching your target into the air, before slamming them down with full force. |
| G | Crystal Atelier makes you dash forward twice, moving so fast that it’s almost impossible to react. But once you hit Phase 4, it upgrades to Crystal Atelier: Conflict, where you leave behind a storm of slashes, applying bleed in your wake. |
| H | Furioso is pure chaos—you slide forward while equipping your dual pistols, then unleash an all-out attack with every weapon in your arsenal, creating an unpredictable and devastating flurry of strikes. |
| Z | Allas Workshop is all about brute force, as you charge forward with a massive weapon, impaling anyone in your path before striking again for good measure. |
| P | Pose lets you stand there, silent and imposing, because when you’re The Black Silence, you don’t need words to make an impact. Phase 4’s pose radiates nothing but pure menace. |
If you’re lucky, on Phase 3 there’s a chance for “Keter Battle 3’s” theme to play instead of the usual soundtrack, giving you an extra layer of atmosphere. And if you really grind Furioso, there’s a 1 in 2000 chance (about 0.005%) to trigger a special Furioso sound effect, making it one of the rarest audio cues in the game.
And finally, Roland holds the record for the longest quote in the game. Don’t judge—when you’ve been through everything he has, you’re going to have a lot to say.
32. The Arbiter (Binah)
Binah isn’t just about brute strength—it’s about control, precision, and unraveling your opponent piece by piece. With the Fairy passive, every hit you land applies a lingering effect, steadily chipping away at your opponent’s max HP over time.
Think of it as slowly dismantling them from the inside out. These other moves might also come in handy:
| Q | Singularity Infusion kicks things up a notch, granting a 15% damage buff for 65 seconds, reducing cooldowns, and even changing some of your moves. But that’s not all—once it runs out, you gain a permanent 4.09% damage buff. Stack that up, and suddenly, you’re hitting way harder than when the fight started. |
| LMB | Fairy Cleave doesn’t just cut—it shreds opponents apart with pure Fairy energy. |
| E | Degraded Fairy lets you launch a Fairy from your hand, slashing at your opponent from a distance. |
| R | Degraded Pillar summons a massive pillar, launching it forward. If it connects, it pushes enemies back before detonating into a storm of Fairies. |
| T | Degraded Chain is all about trapping. It wraps around your target, holding them in place for two seconds before exploding into Fairies. |
| Y | Degraded Lock is straight-up denial. If it lands, your opponent becomes sluggish and completely unable to use their moves for a short period. |
| G | Degraded Shockwave gathers a massive amount of light before unleashing a devastating blast, knocking everything away. |
| H | Clawing Wave summons a terrifying wave of claws, striking forward before following up with Degraded Fairy for extra damage. The Former Arbiter moveset plays similarly but is a more refined, stripped-down version of the default Binah kit, retaining its core destructive power. |
| P | And of course, Librarian Posing lets you sit back, sip your coffee, and bask in the pure, calculated destruction you’ve unleashed. |
Binah’s SPEC isn’t tradable, but the item to obtain it can be. Her block comes with a frame 1 parry, making it one of the most oppressive defensive options in the game. And, for the record? The drink in her cup? Not tea—it’s coffee.
Originally, this spec was considered a “secret spec” when it first dropped, adding to its mystique and rarity.
33. Red Mist (Gebura)
Red Mist is all about relentless aggression, cutting through other Sakura Stand specs with sheer brutality and precision. Once you build up enough damage output, you can unleash E.G.O, transforming into an unstoppable force of destruction. With 50% increased damage and 15% reduced incoming damage, you become an absolute menace until your Awakening Bar runs out.
| Q | Manifest E.G.O kicks things off by activating your full power once your bar is charged. This isn’t a timed transformation—it lasts as long as you keep dealing damage and your bar isn’t drained. |
| LMB | Blade of Mimicry is a four-hit combo, each slice designed to tear through defenses. |
| E | Spear follows up with three brutal thrusts, forcing opponents to stay on the defensive. |
| R | Level Slash is a wide, horizontal strike, perfect for cutting through multiple enemies at once. |
| T | Upstanding Slash slams Mimicry into the ground twice, dealing heavy impact damage. |
| Y | Onrush charges forward with Mimicry, slicing through anything in the way. If you land the hit, you follow up automatically, making this a fantastic initiation tool. |
| G | Great Split: Vertical is all about precision, lunging toward your target and cleaving straight through them with a devastating vertical slash. |
| H | Retaliate (Counter) is a brutal counterattack, baiting opponents in before kicking them in the gut and sending them flying with a vicious slash. |
| Z | Focus Point is a raw power buff, increasing your damage output by 15% for a full minute—stack that with E.G.O’s bonus and you become a walking executioner. |
| H + E.G.O | Once in E.G.O mode, Great Split: Horizontal triggers a cinematic finisher, slashing everything in your path in one clean motion. |
| P | And finally, Pose changes if you’ve completed the E.G.O quest, letting you don the iconic armor—though it removes your headwear for the full effect. |
Red Mist was actually teased before release, hidden behind Kisuke’s shop, making it one of the most hyped specs to drop.
34. Baiken
Baiken isn’t just about raw power—she’s about control, counters, and relentless aggression. She’s unpredictable, unforgiving, and always one step ahead of her opponent. Baiken’s moves in Sakura Stand are as follows:
| Q | Heavy lets you blast a beam of energy straight from your hand, giving you some solid ranged pressure. |
| LMB | Slash Combo mixes brutal hand-to-hand combat with precise katana strikes, making every hit count. |
| E | Tatami is as stylish as it is painful—slam your foot down and send a tatami mat flying at your opponent, knocking them off balance. |
| R | Rifle turns things explosive—pull out a cannon pistol, take the shot, and watch everything in its path erupt. |
| T | Counter is classic Baiken—enter a stance and if someone dares to hit you, you retaliate with a brutal slam. |
| Y | Chainlash is all about control—hook your opponent in and drag them straight into the fight, whether they like it or not. |
| G | Tsurane Sanzu-watashi is a beautifully vicious rush attack, slashing through your opponent three times before they even know what hit them. |
| H | Metsudo Kushoudou sends Baiken charging forward with five grappling hooks, tearing through anything in her path. |
| J | Tachi is a powerful upward swing, perfect for sending enemies flying. |
| P | Pose is all about severing, tearing, and instilling fear, because Baiken wouldn’t have it any other way. |
She’s also the first spec to have a missing limb, proving that you don’t need two arms to dominate the battlefield.
New Sakura Stand Specs from the 2025 Winter Update
The Sakura Stand Winter update is here, giving us access to four new specs. Keep on reading to find out how to unlock the new Sakura Stand specs from 2025, what are their movesets and what’s so unique about each.
35. Hie Hie no Mi
Hie Hie no Mi is all about freezing the battlefield and dominating your opponent with relentless ice attacks. If you want control, mobility, and the power to lock your enemies in place, this spec is for you. To get it, you’ll need to use the Hie Hie Devil Fruit on Standless. These fruits spawn under trees across the map every 40 minutes, but the chances of finding one depend on the season:
- 1/5 chance in winter
- 1/70 chance in summer
- 1/20 chance in any other season
The passives give you serious mobility and pressure. Ice Skating lets you glide effortlessly across the battlefield, boosting your movement speed. Logia Reflex means every time you dash, you leave behind an ice clone to throw off your opponent.
Partisan Strike is another nasty trick—after hitting Y, several ice partisans hover above your target, and pressing E activates them, sending them crashing down into your enemy. The rest of the moves include:
| Q | Equip Ice Sword brings out a massive icicle blade, setting you up for devastating melee attacks. |
| LMB | Frozen Fury is all about rapid, overwhelming strikes, hitting your opponent with a storm of ice spikes. |
| LMB+Q | Frigid Blade Slash takes things further, swinging your ice blade four times and leaving behind an icy trail to slow down enemies. |
| E | Ice Partisan arms you with a massive ice trident, which you then hurl at your opponent for a quick and brutal ranged attack. |
| E + Q | Shattered Blade Barrage is a rapid multi-hit move where you stab the opponent repeatedly with ice shards, stacking serious damage. |
| R | Hoarfrost Stomp sends ice spikes surging from the ground, punishing anyone in your way. |
| R + Q | Ice Eruption takes that stomp to the next level, launching giant ice spikes outward in all directions. |
| T | Frozen Clone Throw is tricky—you toss an ice clone at your opponent, and if it connects, you teleport straight to them for follow-up pressure. |
| T + Q | Pheasant Beak is a deadly long-range move where you summon an ice pheasant and send it flying toward your enemy. |
| Y | Subzero Strike lets you jab forward with an ice spear, piercing through your opponent with precision. |
| Y + Q | Partisan Combo steps up the pressure, letting you repeatedly stab with an ice trident, locking down your opponent. |
| G | Chillbound Execution is one of the flashiest finishers. You grab your opponent with frost chains, dash toward them, send them flying into the air, impale them with ice spikes, then brutally stab them before launching them away. |
| G + Q | Aetos Dios takes that brutality further, summoning an ice pheasant before unleashing a relentless beatdown, ending with a final ice blast. |
| H | Ice Age is the ultimate battlefield control move. You slam your hand into the ground, freezing everything in a massive radius and sending out huge waves of ice. |
| P | Pose makes sure you look as cold as your abilities. |
Hie Hie no Mi is the fourth fruit ever added to the game, and it’s still one of the most dominant specs for controlling fights and overwhelming your opponents with sheer ice power.
36. Soul of Cinder
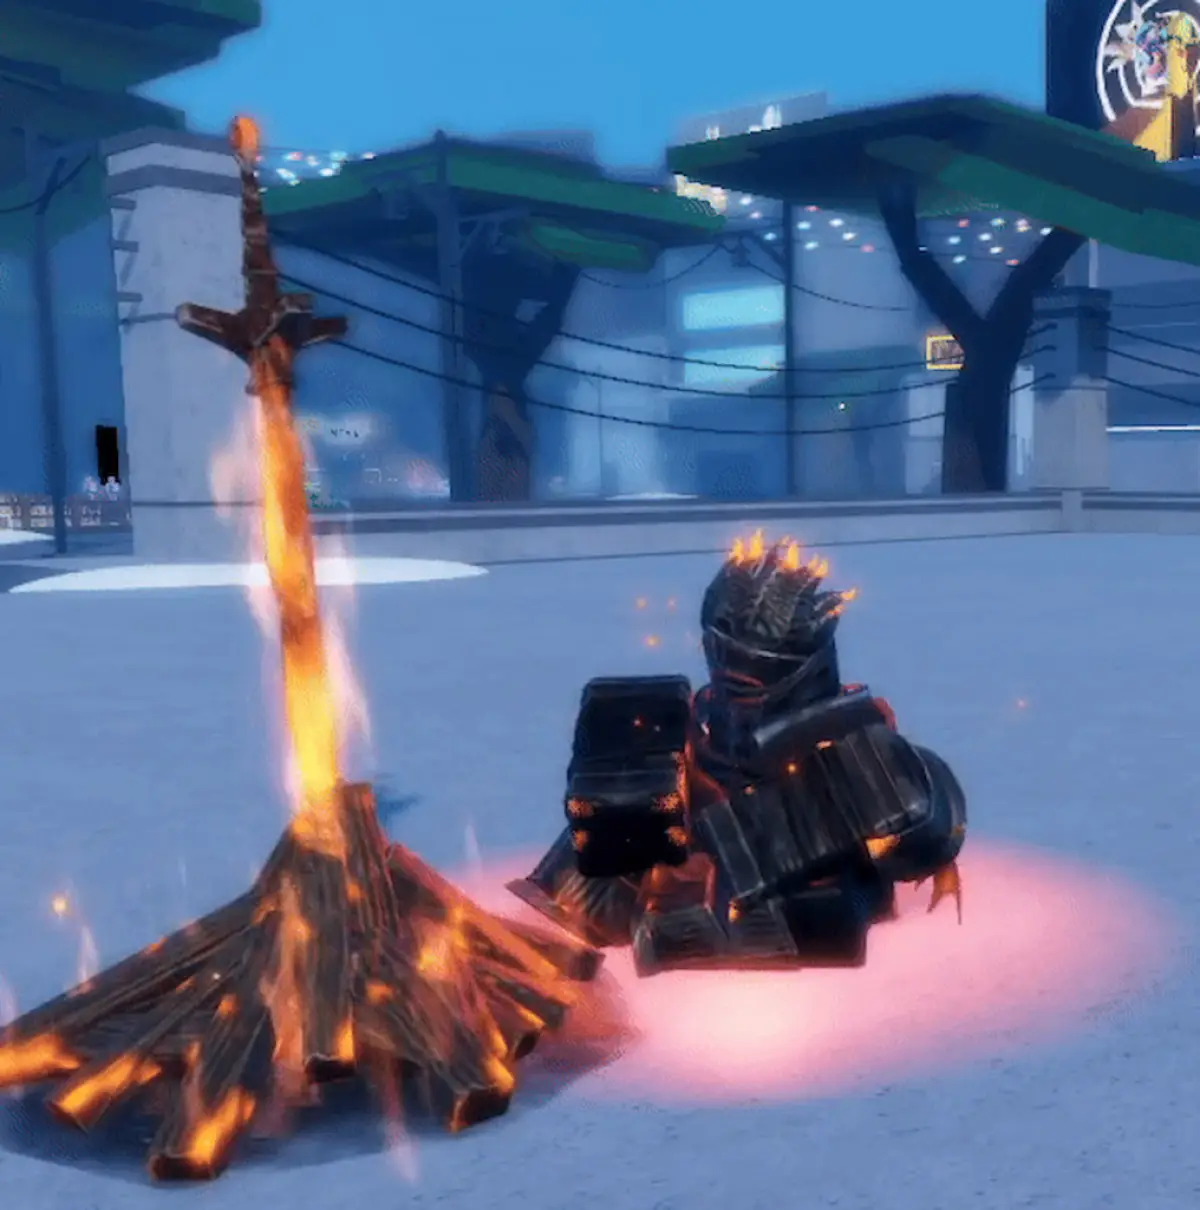
The Soul of Cinder spec comes from the banner system, meaning you’ll need tokens to roll for it. Each roll costs 600 tokens, or you can get 10 rolls for 6,000 tokens at a slight discount. If you hit 120 rolls without getting it, you’re guaranteed to pull it on the next one.
There’s a rumor that if you land an Ancient Skin, your next pity roll guarantees Soul of Cinder, but that hasn’t been officially confirmed.
If you’re looking to farm tokens fast, try these methods:
- Converting Breakthrough Points into 1,500 tokens
- Grinding ornaments by selling items to the event NPC
- Farming certain enemies and bosses like Space Curse, Roland, and Nokotan
Speaking of farming, Sould Cinder’s raw power, resilience, and ability to set everything around you ablaze, have you covered. Its repertoire includes moves such as:
| Q | Med Heal lets you tap into Miracles to restore some of your health mid-battle, keeping you in the fight longer. |
| LMB | Firelink Combo is a brutal series of greatsword swings followed by a well-placed kick to send your opponent flying. |
| E | Ashen Fury takes things further with two devastating upward slashes, lifting your enemy off the ground and leaving them open for more punishment. |
| R | Farron Hail calls forth a deadly spell that charges before unleashing destruction in front of you. |
| T | Flame Waltz lets you spin through your enemies with a fiery slash, cutting down anything in your path. |
| Y | Wrath of the Gods is an explosive shockwave that clears out enemies in close range, giving you space to breathe—or to strike. |
| G | Soul Greatsword summons a massive blade of pure energy, swinging it with overwhelming force. |
| H | Soul Stream fires a rapid burst of soul energy, overwhelming anyone caught in its path. |
| B | Poison Mist adds another layer of devastation, covering the battlefield in a deadly fog that chips away at anyone unfortunate enough to be caught in it. |
| P | Pose lets you stand in the flames, radiating power because you’re the embodiment of fire itself. |
And just when your enemies think they’ve taken you down, Flame Rekindled activates. After your first death, you’re revived with 200 extra HP and a completely new set of abilities, making you even stronger.
In Phase 2, things get even more intense:
| LMB | Firelink Combo stays, keeping that mix of greatsword swings and a kick. |
| E | Leaping Slash launches you into the air before crashing down with your blade. |
| R | Command Grab lets you snatch your opponent up and incinerate them mid-air. |
| T | Sunlight Spear hurls a spear of pure energy straight at your enemies. |
| G | Infernal Requiem swipes at your opponent, sending them into the air before juggling them mid-air and slamming them back down. |
| Splintering Thunder Spear throws a spear upward, causing it to scatter and home in on the nearest enemy. | |
| Z | Sunlight Stake drives a spear into the ground, detonating in a fiery explosion. |
This spec isn’t just about damage—it’s about endurance. You burn your enemies, heal yourself, resurrect stronger, and overwhelm everything in your path. If you like the idea of being an unstoppable force of destruction, Soul of Cinder is the perfect fit.
37. Nokotan
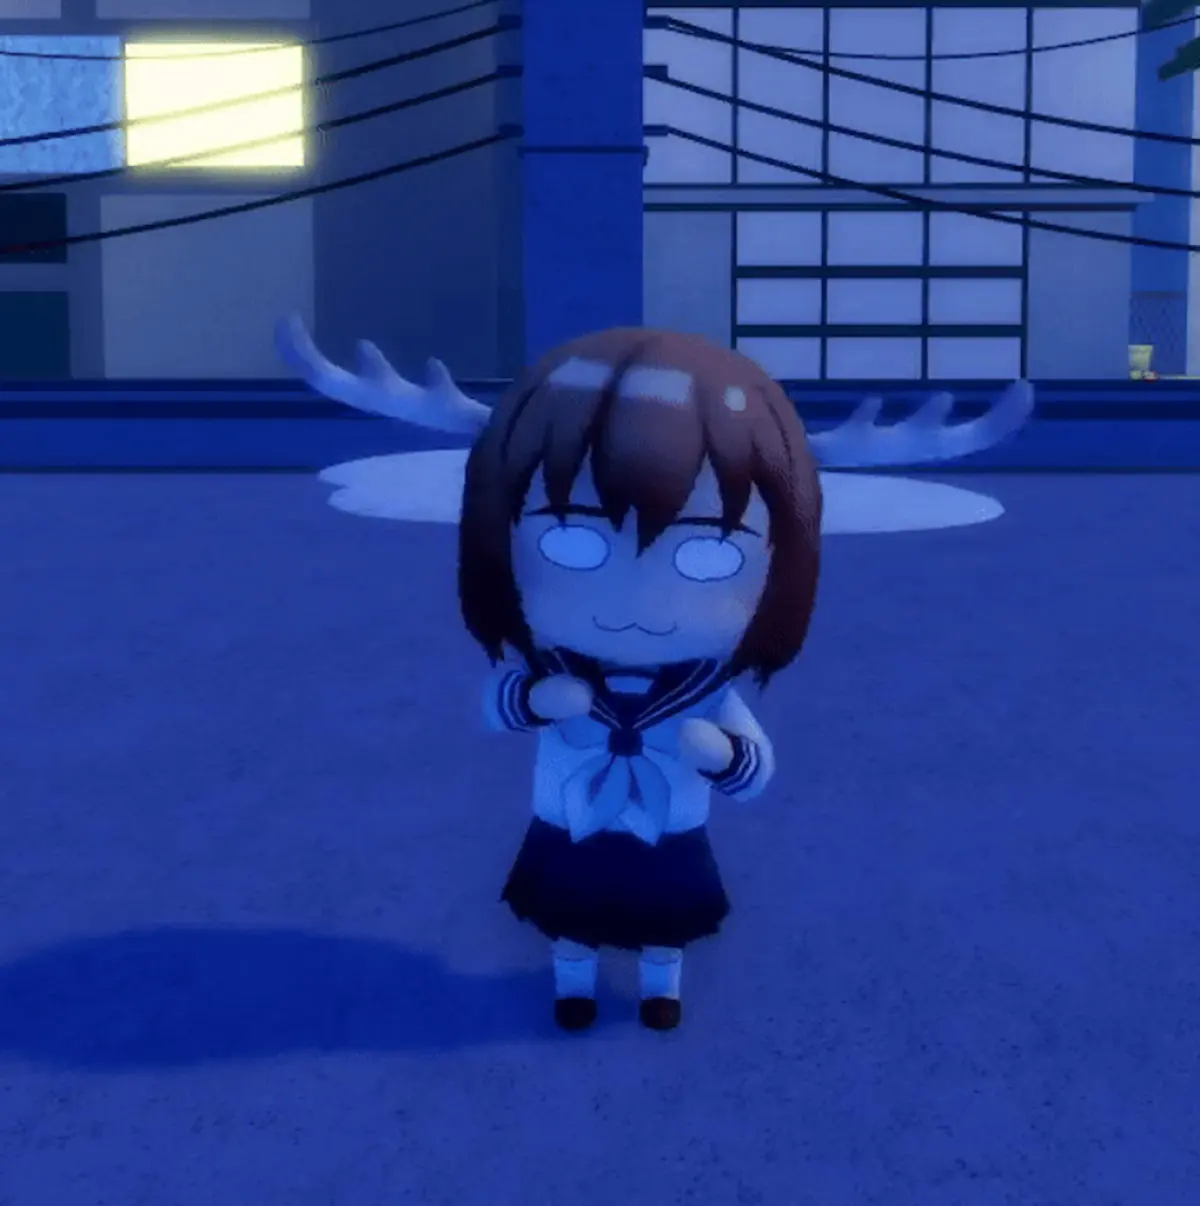
To obtain Nokotan, you’ll need to interact with the Sion NPC while your character is in a Standless state. Sion offers Nokotan in exchange for 700 Ornaments. Ornaments can be collected through various in-game activities, so gathering the required amount might take some dedication.
Once you’ve unlocked Nokotan, you’ll have access to her unique moveset, which includes:
- M1 – Deer Crackers: Nokotan throws deer crackers at her opponents.
- E – Absolutely Random: An unpredictable move that can have various effects.
- R – Pierces: Nokotan performs a piercing attack against her target.
If you’re looking for something a little… different, Nokotan is exactly that. This spec isn’t about raw power or flashy combos—it’s about throwing senbei crackers at people and seeing what happens. Also, nun.
Recent nerfs include:
- Barrels: Now only 1
- Chest Keys: Reduced to 5
- Sukuna Fingers: Reduced to 8
38. Okarun

Okarun is a spec that requires you to complete a quest. Head to the tunnel near the Sukuna NPC and talk to Turbo Granny to start. Your first task is to collect 100 Souls by defeating Hollows or Curses, which drop red orbs upon death.
You can collect these from any enemy, even those killed by other players. Paper Curses are the best source since they drop 4 Souls each. After collecting 100 souls:
- Return to Granny.
- Talk to Momo and choose not to be disabled.
- You’ll enter a minigame – complete it to proceed.
- If you fail three times, you’ll lose 10 souls from the previous quest.
- After completion, switch to Standless and talk to Granny again to unlock Okarun.
Now, if speed is your thing, Okarun is about to become your new favorite. With Turbo Granny’s power at your disposal, you won’t just be fast—you’ll be untouchable. The transformation grants a massive running speed buff, making you the quickest thing on the battlefield.
| Q | Turbo Transformation lets you tap into Turbo Granny’s full power, shifting into your yokai form and unlocking your full moveset. |
| LMB | Turbo Combo is a rapid series of kicks, keeping your opponent locked down with relentless pressure. |
| E | Blow Rampage takes things up a notch with three brutal double uppercuts, launching your enemy before they even know what hit them. |
| R | Drop Kick has you charging forward at insane speed before slamming into your opponent like a human missile. |
| T | Roundabout Slam makes sure no one is safe, as you leap into the air before crashing down at ridiculous speeds, crushing anything below. |
| Y | Penta Whirlwind has you dashing at high velocity in the shape of a pentagram, slicing through anyone who gets too close. |
| G | Turbo Counter rewards smart play—if you’re hit, you instantly dash behind your attacker, juggle them mid-air, and finish things off by torpedoing straight into them. |
| H | Ayase-san brings in some backup. After landing a powerful drop kick, one of your allies grabs the enemy with spiritual energy, slamming them into the ground before you finish things off with a devastating torpedo attack. |
| B | Granny Rush is pure chaos. Turbo Granny herself is summoned, mauling through anything and anyone in your way. |
| P | Pose lets you flex either normally or while fully transformed. Why, because being the fastest also means looking the coolest, silly. |
Okarun is the undisputed king of speed, with the fastest sprint in the game, making sure no one can keep up with you.
Sheesh, it was a doozie, but that marks the end of my attempt to get all Sakura Stand specs listed in one place. Once you’ve made your pick, choose one of our Sakura Stand codes and get some of those sweet rerolls.


Published: Feb 14, 2025 8:08 AM UTC