
Many locations in Visions of Mana will give you some optional side quests to complete, yielding you extra rewards that can be very helpful in your journey. Here’s how to complete all of the various side quests we get in the game.
Table of contents
- All Available Side Quests in Visions of Mana
- All Chapter 1 Side Quests in Visions of Mana
- All Chapter 2 Side Quests in Visions of Mana
- All Chapter 4 Side Quests in Visions of Mana
- All Chapter 5 Side Quests in Visions of Mana
- All Chapter 6 Side Quests in Visions of Mana
- All Chapter 7 Side Quests in Visions of Mana
- All Chapter 8 Side Quests in Visions of Mana
All Available Side Quests in Visions of Mana
Each chapter has its individual Side Quests, but once they become available, you’ll be able to do them at any point in the game. We recommend following at least those mentioned during our walkthrough, as they give out some good rewards such as good weapons.
Certain quests won’t be available until you reach a certain point in the chapter either. Sometimes they also have other Side Quests as prerequisites. So if you haven’t unlocked them yet, just keep exploring the world until you manage to find them.
All Chapter 1 Side Quests in Visions of Mana
You’ll find plenty of quests in the game’s first chapter, usually just involving meeting certain NPCs or visiting certain places. They offer you some good extra items, so don’t sleep on those.
Words on the Wind
- Location: Logren, the Vale of Wind
- NPC: Panicking Keshi
- Objective: Find the missing letter
- Reward: Lucre x360
The letter is next to the city’s entrance, hidden beneath a few trees and bushes. Grab it and return it to Panicking Keshi for your due rewards.
Find and Replace
- Location: Logren, the Vale of Wind
- NPC: Windwill Maker Oroshi
- Objective: Deliver the Relinquished Windmill Components to the targets
- Reward: x1 Healing Light Ability Seed
Deliver the parts to the two marked NPCs in Aery Passage to complete this quest.
Fungus Finger Fun
- Location: Logren, the Vale of Wind
- NPC: Gourmand Toki
- Objective: Defeat x3 Mushbooms and deliver their fingers back to Toki
- Reward: x1 Arrow Rain Ability Seed
Mushbooms can be found both in the Charred Passage and in the Aery Passage. A good location is next to the north Meridian in Charred Passage, as there are usually two Mushbooms there.
Behind the Scenery 1
- Location: Logren, the Vale of Wind
- NPC: Traveler Fiona
- Objective: Find the depicted area
- Reward: x10 Gold Clover

Locate the area depicted in the painting and Admire the View in it to complete the quest. There are seven more quests in this series, which must be done in order.
No Place Like Home
- Location: Fallow Steppe
- NPC: Hawker Huey
- Objective: Defeat the monsters around the house.
- Reward: x1 Purger of Evil Ability Seed
Another straightforward quest to defeat a few monsters for easy rewards.
Danger in the Dirt
- Location: Fallow Steppe
- NPC: Fruit Farmer Marna
- Objective: Defeat the Lullabuds
- Reward: Lucre x1490
There should be a lot of Lullaburds around the area, so it won’t be hard to complete it.
A Cascade of Critters
- Location: Rhata Harbor
- NPC: Traveling Carpenter Antonee
- Objective: Defeat the Sahagins in Rime Falls
- Reward: Lucre x1440
A simple “defeat the monsters”, nothing too special here.
A Force To Be Reckoned With
- Location: A Force to Bee Reckoned With
- NPC: Hospitable Baretta
- Objective: Defeat the Beelancers in Fallow Steppe
- Reward: x1 Blessing of Water Ability Seed
Defeating some of the regular enemies in the previous area rewards you with an early healing skill, so don’t sleep on this quest.
Lost and Found
- Location: Rhata Harbor
- NPC: Nikoko the Town Beauty
- Objective: Find her missing hairpin
- Reward: x1 Luck Sigil Ability Seed
Her hairpin is easily displayed around the center of the Fallow Steppe next to a tower, so it’s easy to return it to her.

Behind the Scenery 2
- Location: Rhata Harbor
- NPC: Traveler Fiona
- Objective: Find the depicted area
- Reward: Gold Clover x20
The second quest in the line, rewarding you again with some Gold Clovers if you find the right place.
All Chapter 2 Side Quests in Visions of Mana
Hillside Hoodlums
- Location: Ledgas Bay
- NPC: Trader Graddey
- Objective: Defeat Quilted Hoods at Pritta Ridge
- Reward: Lucre x2270
The enemies are easy to find if you keep heading through the main route in the area.
Mushroom Mania
- Location: Ledgas Bay
- NPC: Gastronomist Nostimo
- Objective: Collect beachside fungi at Pritta Ridge
- Reward: Lucre x1980
The fungi are easily found once you reach the shores of Pritta Ridge, next to some trees.

Get Outta The Way!
- Location: Illystana, Capital of the Deep
- NPC: Watchful Neytha
- Objective: Defeat the monsters blocking the path at Pritta Ridge
- Reward: x1 Extra MP Ability Seed
The monsters are next to the bridge leading to Illystana, so make quick work of them as soon as you see them.
Fallen by the Quayside
- Location: Illystana, Capital of the Deep
- NPC: Gaidam the Spry
- Objective: Find the house key in Ledgas Bay
- Reward: Lucre x2160
The key is found with Madame Tullah next to the harbor. Speak with her and return to Gaidam to complete the quest.
Tending to Attendants
- Location: Illystana, Capital of the Deep
- NPC: Lighthouse Attendant Warver
- Objective: Deliver the message to Niel in Pritta Ridge
- Reward: x1 Blessing of Light Ability Seed
Return to Pritta Ridge and speak with Niel once, then return to the Capital to complete the quest
All Chapter 4 Side Quests in Visions of Mana
Traces of the Ancients
- Location: Illystana, Capital of the Deep
- NPC: Historian Fuyeu
- Objective: Find all Ancient Ruins around the world
- Reward: Lucre x2200, x3 Parpoto Oil, x1 Lucent Beam Ability Seed
Visit all of the Ancient Ruins around the game to trigger a cutscene, indicating you completed the step. They are all located in the following areas:
- Charred Passage
- Aery Passage
- Lefeya Drifts
- Fallow Steppe
- Pritta Ridge
- Ahrvet’s Pasture
- Khaswia Moors
- Zawhak Desert

Nemesis Takedown
- Location: Illystana, Capital of the Deep
- NPC: Historian Fuyeu
- Objective: Defeat the Nemeses hiding in the ruins
- Reward: x1 Respect for the Ancients Ability Seed
There’s a powerful Nemeses enemy hiding in each of the ruins you visited. You can defeat them before starting this quest, but as they’re all Level 50, you might want to wait a bit before trying it out.
No Taste Like Home
- Location: Khaswia Moors
- NPC: Historian Naaz
- Objective: Bring a Ledgas Bay meal to Naaz.
- Reward: x1 Throwing Knife Ability Seed
Complete Ingredients for Success in Ledgas Bay to obtain a Ledgas Seafood Stew, which completes the quest.
A Beespoke Outfit
- Location: Ledgas Bay
- NPC: Dressmaker Moniqua
- Objective: Grab Ladeeb wings
- Reward: Lucre x2820
Both Pritta Ridge and Ahrvet’s Pasture will have some Ladeeb available, and both of them work here.
Feelings Bottled Up 1
- Location: Ledgas Bay
- NPC: Organizer Limoney
- Objective: Send a bottle into the sea in Pritta Ridge
- Reward: Lucre x2070, x2 Honey Elixir
The first quest in another series. Visit the beach in Pritta Ridge and release the bottle to complete it.
Ingredients for Success
- Location: Ledgas Bay
- NPC: Fleyr the Foodie
- Objective: Find the ingredients for the Ledgas Seafood Stew
- Reward: Lucre x2640, Ledgas Seafood Stew
The ingredients are found in different areas, but are easy to spot. You need to complete this quest to complete No Taste Like Home later.
Memory of a Fish
- Location: Free City of Tsaata
- NPC: Poised Liegard
- Objective: Collect Iffish fillets
- Reward: Lucre x3360
Iffish can be found at the shores of Khaswia Moors, so head there and defeat some to get some fillets.
Calm Before the Storm
- Location: Free City of Tsaata
- NPC: Swordmaster Chathis
- Objective: Defeat the Beguiling Celaeno Nemeses
- Reward: x1 Peacebringer Ability Seed
The Nemeses is one of the first ones you can find in Khaswia Moors. If you’ve already defeated it on your way to the city, you can complete the quest immediately.
Natural Quillosophy
- Location: Free City of Tsaata
- NPC: Acupuncturist Hurrigon
- Objective: Collect Needlion quills.
- Reward: Lucre x3640
Dura Gorge and Khaswia Moors will both have some Needlions, so head for any of these.
Thanks a Mill
- Location: Longren, the Vale of Wind
- NPC: Windmill Maker Oroshi
- Objective: Defeat the monsters around the windmill in Mt. Gala.
- Reward: Lucre x5620
Despite you being able to get this quest rather early, the monsters will be around Level 30, which you normally won’t attain until late Chapter 5 or even early Chapter 7, so don’t worry if you can’t complete it right away.
All Chapter 5 Side Quests in Visions of Mana
Behind the Scenery 3
- Location: Illystana, Capital of the Deep
- NPC: Traveler Fiona
- Objective: Find the depicted area
- Reward: Gold Clover x30
After a good while, Fiona has another area for you to find, this time inside Illystana.
Behind the Scenery 4
- Location: Illystana, Capital of the Deep
- NPC: Traveler Fiona
- Objective: Find the depicted area
- Reward: Gold Clover x40
Head for Pritta’s Ridge to find the area, depicting the bridge to Illystana.

Behind the Scenery 5
- Location: Illystana, Capital of the Deep
- NPC: Traveler Fiona
- Objective: Find the depicted area
- Reward: Gold Clover x50
The next area is found in Ahrvet’s Pasture, next to some of the farmhouses.
Tails with Tales to Tell
- Location: Illystana, Capital of the Deep
- NPC: Kindhearted Maik
- Objective: Help Lilytea out of her predicament.
- Reward: x1 Myriad Wishes Ability Seed
After grabbing the quest, visit various NPCs around the world to see what they think about tails. Later, return to Illystana and speak with the kids twice to complete the quest.
An Unforgettable Taste
- Location: Longren, the Vale of Wind
- NPC: Spinner Suvaru
- Objective: Deliver Suvaru his Needlebeak leg meat.
- Reward: x1 Spirit Circle Ability Seed
Needlebeaks are found in the Charred Passage, Aery Passage and Fallow Steppe. Any of these places will drop the required meat, so go for the nearest one.
Never Judge a Goblin By Its Cover
- Location: Tianeea, the Fire Village
- NPC: Steadfast Amarr
- Objective: Protect Amarr from the monsters
- Reward: x1 Provoke Ability Seed
Follow Amarr next to the first Meridian in Charred Passage to see him being attakced by some Goblins. Save him to complete the quest.
Too Far Down a Rabite Hole
- Location: Tianeea, the Fire Village
- NPC: Steadfast Amarr
- Objective: Protect Amarr from the monsters
- Reward: Lucre x5090, x1 Luck Serum
Same thing as the previous quest, but this time with Rabites.
More Danger in the Dirt
- Location: Fallow Steppe
- NPC: Fruit Farmer Marna
- Objective: Defeat the Molebears
- Reward: x1 Spikes Ability Seed
Just like the previous quest, just kill some of the Molebears you see around to get your rewards.
Pillagers of the Pasture
- Location: Ahrvet’s PAsture
- NPC: Farming Mendelle
- Objective: Defeat the Crawlers
- Reward: Lucre x4800, x1 Magic Elixir
Crawlers spawn around the farm areas of the Pasture, so keep going around them until you find enough of them to defeat.
Color Me Famous
- Location: Ahrvet’s Pasture
- NPC: Passionate Idir
- Objective: Find the pigment for Idir
- Reward: Lucre x1920, x1 Knock-back Resistance Ability Seed
After saving Idir from the monsters, head to Dura Gorge to find a specific Pigment for him next to where you fought the boss here.

Crabbing a Bite to Eat
- Location: Ledgas Bay
- NPC: Gardener Beirke
- Objective: Find some shelled Pincher Crabs
- Reward: Lucre x5760
Return to the Charred Passage to find some easy crabs. Alternatively, the Zawhak Desert also has them in a higher level.
Hillside Hoodlums Here Again
- Location: Ledgas Bay
- NPC: Trader Graddey
- Objective: Defeat the Quilted Hoods in Pritta Ridge
- Reward: Lucre x4800, x1 Stamina Serum
Similar to the previous quest, just with some slighty stronger enemies this time.
Feelings Bottled Up 2
- Location: Deade Cliffs
- NPC: Beast Watcher Jegga
- Objective: Find a Terese Seed in Khaswia Moors
- Reward: x3 Honey Elixir
Head for the Moors to find the seed, then return to Jegga to watch him sending a message through the seas.
Broth of a Boy
- Location: Deade Cliffs
- NPC: Babarim the Wise
- Objective: Collect Mushgloom stems from Mylos Woods
- Reward: Lucre x6240
The Mushgloom stems are located in the second Mylos Woods area, mostly next to the entrance.
Revenge is a Picnic Best Served Stolen
- Location: Free City of Tsaata
- NPC: Carefree Vatrio
- Objective:
- Reward:
Faster Than a Speeding Bulette
- Location: Zawhak Desert
- NPC: Baeser the Explorer
- Objective: Defeat Bulettes around the Desert
- Reward: Lucre x4420
Bulettes are easily found at the entrance of the Desert, next to the bay.
Desert Defenses
- Location: Zawhak Desert
- NPC: Desert Warden Keet
- Objective: Defeat Sand Stingers around the Desert
- Reward: Lucre x4080
Sand Stingers are found a bit past the Bulettes from the previous quest, and you’ll naturally come across them by exploring around.
The Masterplan
- Location: Zawhak Desert
- NPC: Ambitious Kevi
- Objective: Defeat the swarm of Grumpkins
- Reward: x1 Blessing of Fire Ability Seed
Head for the area and bring an end to the Grumpkins.
Feelings Bottled Up 3
- Location: Log’grattzo Dark Archives
- NPC: Scrivener Kiuna
- Objective: Find the parchments scattered around the area.
- Reward: Lucre x4860, x4 Honey Elixir
The first quest you’ll see once you reach Log’grattzo. The parchments are all around the area, so grab them all as soon as you enter.

Feelings Bottled Up 4
- Location: Tianeea, the Fire Village
- NPC: Cheerful Heath
- Objective: Get the rock from Kanlow in Charred Passage
- Reward: x5 Honey Elixir
Visit Heath’s grandmother to collect his rock, which the boy will later send through the seas.
Hooked on Books
- Location: Log’grattzo Dark Archives
- NPC: Librarian Floi
- Objective: Collect the books from people all around the world.
- Reward: x1 Illustrious Intellect Ability Seed
Each of the other continents will have at least one person with a book, so you’ll have to travel for a good while to find them.
Fear in an Ivory Tower
- Location: Log’grattzo Dark Archives
- NPC: Novice Scribe Risha
- Objective: Defeat the monsters inside Passagean Tomespire
- Reward:Lucre x6480
The monsters will be easy to spot as you enter the Tomespire, so head directly for them.
A Slashing and a Curse
- Location: Log’grattzo Dark Archives
- NPC: Armed Scribe Kiri
- Objective: Defeat the Dainslaifs
- Reward: x1 Blade and Shield Sigil
The Dainslaifs need to be exactly the ones in the Passagean Tomespire, and others won’t count for the quest.
Gone But Not Forgotten
- Location: Gudju, the Earth Village
- NPC: Watts
- Objective: Explore Gudju and collect items from the past.
- Reward: x1 Blessing of Earth Ability Seed
Explore all of the marked places and collect something to remind Watts about the village before the fall.
The Specter of Friendship
- Location: Tianeea, the Fire Village
- NPC: Timid Zoen
- Objective: Defeat the monster inside Passagean Tomespire
- Reward: x3 Vitality Elixir
Head to the Tomespire and fight the monsters that appear in the marked area. Collect the doll and return to Zoen to finish the quest.
Save Me Hide!
- Location: Radiant Playhouse Terratio
- NPC: Lady Froide
- Objective: Gather Jackal pelts
- Reward: Lucre x6400, x1 Spirit Serum
Jackal are common enemies inside the Temple of Wendel, so you should have no problem finding a few of them.
Niccolo’s Purrplexing Purroblem
- Location: Illystana, Capital of the Deep
- NPC: Niccolo
- Objective: Gather Harpy down for Niccolo
- Reward: Salesman Glove
Hapies can be found either in Dura Gorge or Khaswia Moors, so pick any of them to bring their drops to Niccolo.
A Purrsistent Purroblem
- Location: Illystana, Capital of the Deep
- NPC: Niccolo
- Objective: Bring Bumpink bomb powder to Niccolo.
- Reward: Broom & Pan
Bumpkin can be found in the Ahrvet’s Pasture nearby, so head there to grab their drops.
Retrieving Purrloined Goods
- Location: Illystana, the City of Water
- NPC: Niccolo
- Objective: Find the stolen cargo in Ahrvet’s Pasture
- Reward: Lucre x4900, x1 Luck Serum
Head to the marked area in the Pasture and defeat the monsters that appear, then return to Niccolo to finish another quest.
The Purrpetrator Is…
- Location: Illystana, Capital of the Deep
- NPC: Niccolo
- Objective: Find the stolen cargo in Ahrvet’s Pasture
- Reward:x1 Blessing of Darkness Ability Seed
Just like before, retrieve the goods in the zone and defeat any enemies that appear. Niccolo will reward you when you return.
Walking on Thick Ice
- Location: Radiant Playhouse Terratio
- NPC: Sky-Gazing Vissen
- Objective: Defeat Bluster Gasses
- Reward: Lucre x7680
Bluster Gasses are found in the later portions of the dungeon. They can easily freeze you, so be careful.
Girl With a Lone Earring
- Location: Radiant Playhouse Terratio
- NPC: Thespian Ruka
- Objective: Find Ruka’s earring.
- Reward: x1 Boost Silence Ability Seed.
Her earring is automatically found after winning a battle inside the temple.

Scales of The Problem
- Location: Temple of Wendel
- NPC: Mild-Mannered Marko
- Objective: Defeat Seaserpents and bring their scales to Marko
- Reward: Lucre x5120, x1 Goddess Scales
After completing the previous quest, enter the Temple again. You should find some Seaserpents by just heading forward in the dungeon.
All Chapter 6 Side Quests in Visions of Mana
Gudju Came Back
- Location: Gudju, the Earth Village
- NPC: Watts
- Objective: Bring Higgly back to Gudju.
- Reward: x3 Parpoto Oil
After speaking with Watts, head to Log’grattzo and look for Higgly inside the Archives. Once you speak with her, return to Zawhak Deser to find her and Joo-ah being attacked by monsters. Save them and return to Gudju, where the couple will now stay indefinitely.
All Chapter 7 Side Quests in Visions of Mana
Waifs and Strays
- Location: Radiant Playhouse Terratio
- NPC: Model Martha
- Objective: Defeat the Marmpotos enemies inside the Temple of Wendel.
- Reward: Lucre x5700, x1 Null Freeze Ability Seed
The enemies will be found halfway through the temple, so keep heading inside.
Safety First
- Location: Gudju, the Earth Village
- NPC: Donoban the Artisan
- Objective: Obtain Mad Mallard helmets
- Reward: Lucre x11900
Mad Mallards are easy to find in Zawhak Desert, next to the entrance of the Gamurda Mines. Defeat them until you finish the quest.
Woes of a Worrywart
- Location: Gudju, the Earth Village
- NPC: Worrywart Treen
- Objective: Find Biju in Gamurda Mines
- Reward: Lucre x10400, x1 Intellect Serum
Head to the mines to find Treen’s husband being attacked by some monsters. You’ll need to rescue him twice to convince him to return to Gudju.
Devil In the Dunes
- Location: Gudju, the Earth Village
- NPC: Ceramicist Swello
- Objective: Defeat the Scorched Pavlov Nemeses
- Reward: x1 Lionheart Ability Seed
Scorched Pavlov is next to the village’s entrance in Zawhak Desert, and it’s a Level 50 Nemeses. Bring some Water skills to make the fight easier.
The Desert Son
- Location: Gudju, the Earth Village
- NPC: Craftsman Dwioh
- Objective: Find Anthon in Zawhak Desert
- Reward: Lucre x9970, x1 Stamina Serum
Anthon is being attacked by some monsters, but they’re easy to fend off. Save him and return to the village.
Evil Begone!
- Location: Log’gratzo Dark Archives
- NPC: Suth the Faithful
- Objective: Bring x10 Imp Eyeballs and x3 Spiral Chess Knight Horns to Suth.
- Reward: Lucre x12600
Imps are easy to find inside the Passagean Tomespire, but you’ll need to visit the Sanctuary of Mana to defeat some Spiral Chess Knights.
Dyeing Wish
- Location: Log’gratzo Dark Archives
- NPC: Designer Tigo
- Objective: Bring Dark Batmo hides to Tigo
- Reward: x1 Scorch Ability Seed
Dark Batmos can be found inside Gamurda Mines, so fly there to finish the quest.
Object of the Herb
- Location: Deade Cliffs
- NPC: Desperate Flotant
- Objective: Gather dewy herbs in Mylos Woods.
- Reward: Arboreal Cadusprout
The herbs are easy to find in the very first Mylos Woods area, so gather them and return to Flotant. Required for the Feelings Bottled Up quest series.
Claw, Line and Sinker
- Location: Deade Cliffs
- NPC: Angler Ajuki
- Objective: Gather Hippogryph talons
- Reward: Lucre x6100, x3 Niccolo Coin
Hippogryph Claws can be found in the Wind Sanctum, so head there to grab as many Talons as you need.
Full of Youthful Promises
- Location: Deade Cliffs
- NPC: Worried Mother Rayan
- Objective: Find Murth inside the Mylos Woods
- Reward: Lucre x9590, x1 Magic Elixir
Her son will be easy to spot as you enter the area, so save him from the monsters nearby and return to collect the reward later.
A Pansy By Any Other Name
- Location: Deade Cliffs
- NPC: Fortune Teller Senth
- Objective: Gather Killer Pansy in the Mylos backwoods.
- Reward: x1 Null Sleep Ability Seed
Head for the second Mylos Woods area to find the Killer Pansy enemies.
Threadbare Silk
- Location: Deade Cliffs
- NPC: Weaver Droaht
- Objective: Gather Silkspitter thread.
- Reward: Lucre x12500
Found in the first Mylos Woods zone, defeat them to grab their thread.
Temple Trespassers
- Location: Free City of Tsaata
- NPC: Scholar Rhigo
- Objective: Defeat Tomatomen next to Tatoh Temple
- Reward: x1 Spirit Sigil+ x1
You’ll find the enemies on your way to the temple in Khaswia Moors, and they won’t be much of a challenge by this point of the game.
Behind the Scenery 6
- Location: Free City of Tsaata
- NPC: Traveler Fiona
- Objective: Find the depicted area
- Reward: x60 Gold Clover
The area this time is located in Khaswia Moors, looking directly at the Tatoh Temple from below.
Behind the Scenery 7
- Location: Gudju, the Earth Village
- NPC: Traveler Fiona
- Objective: Find the depicted area.
- Reward: x70 Gold Clover
You’ll need to defeat the monsters around the Ancient Ruins to reach the area depicted here, so wait until you have enough levels for this one.
Twisted Tales
- Location: Free City of Tsaata
- NPC: Shipwright Fahler
- Objective: Defeat the demonic fish in Khaswia Moors
- Reward: Lucre x12100
Head to the shores of Khaswia Moors and defeat the marked enemies, which are quite easy to bring down.
It Came From The Beach!
- Location: Ahrvet’s Pasture
- NPC: Sea-Loving Fohr
- Objective: Defeat the Tezlas
- Reward: Lucre x9780, x1 Vitality Elixir
Head to the beach to find the Tezlas, then return to Fohr to complete the quest.
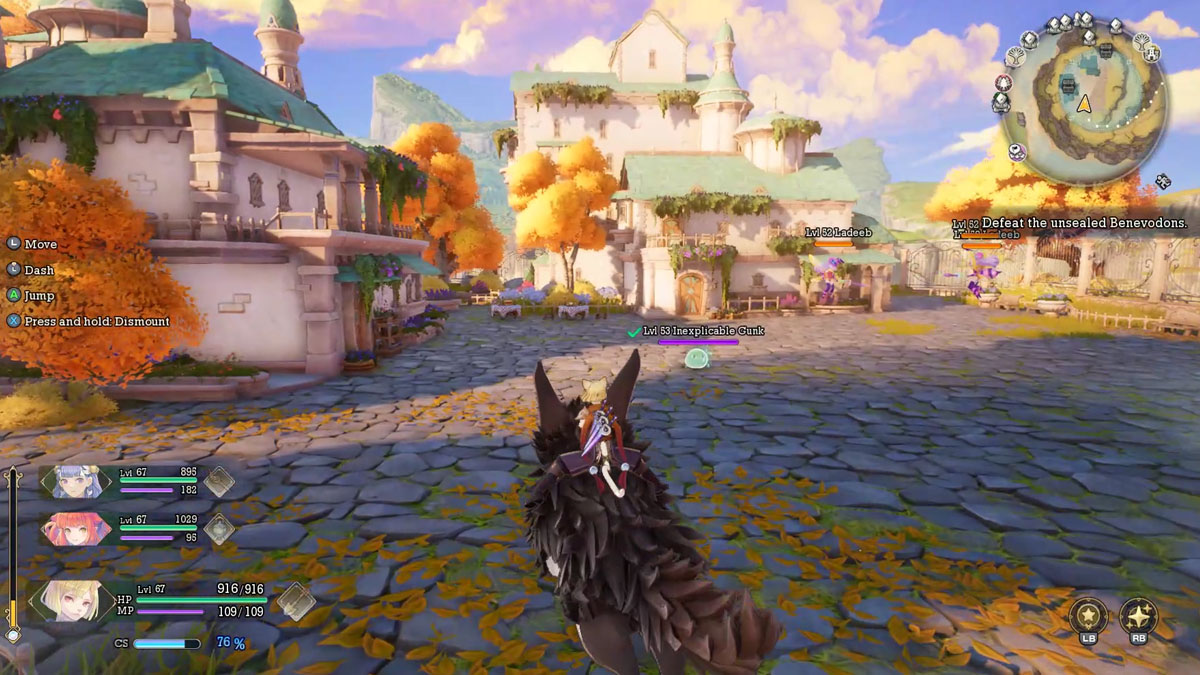
Menaces By The Manor
- Location: Ahrvet’s Pasture
- NPC: Chatty Hiryano
- Objective: Defeat the Inexplicable Gunk in the manor
- Reward: x1 Untouchable Ability Seed
The Nemeses is right next to where you got the quest, so head uphill to beat it. Be careful with the poison.
Forgotten Perspectives
- Location: Illystana, Capital of the Deep
- NPC: Passionate Idir
- Objective: Sell Idir’s painting to someone in the world
- Reward: x1 Unbreakable Ability Seed
Visit the marked places, but no one will commit to buying Idir’s painting. He’ll later give it away to a passerby when completing the quest.
No Rest For The Wicked
- Location: Illystana, Capital of the Deep
- NPC: Niccolo
- Objective: Help around Niccolo’s Emporium
- Reward: x1 Null Poison Ability Seed
You need to address each person to a different task. Set out Ramcoh for the deliveries, Morley as the salesman and Palamena as the storeroom associate for great results, but any combination should work.
Niccolo’s Last Request
- Location: Illystana, Capital of the Deep
- NPC: Niccolo
- Objective: Find Bulette horns.
- Reward: Ethereal Katarance
Head to Zawhak Desert to find the Bulettes next to the entrance. Defeat them and return to Niccolo.
Paem, the Chivalrous Thief
- Location: Illystana, the City of Water
- NPC: Palamena
- Objective: Find the stolen items in Pritta Ridge
- Reward: Spirit Fettertwine
Disguised as Paem, Palamena must find the various shining items stolen by the Succubus. Once you ambush and defeat them, the quest will be done.
A Bevy of Hill Beauties?
- Location: Illystana, Capital of the Deep
- NPC: Cyrus the Gossip
- Objective: Defeat the Succubus in Pritta Ridge.
- Reward: Lucre x11900
The Succubes must be defeat next to the Ancient Ruins, and beating them in any other area won’t count to the quest.
Knights Errant and Aberrant
- Location: Rhata Harbor
- NPC: Scholar Mondolay
- Objective: Defeat the Dark Knights in Fallow Steppe
- Reward: Lucre x11700
The Dark Knights roaming around the Ancient Ruins are powerful, but an endgame team should have no trouble with them. Remember to continue exploring to fight another Nemeses and obtain an Ultimate Weapon.
Heading For a Fall
- Location: Rhata Harbor
- NPC: Roaming Zeelo
- Objective: Defeat the monsters in Rime Falls
- Reward: Lucre x5640, x1 Boost Freeze Ability Seed
Head to Rime Falls to have a very similar fight to the one you had in the main story earlier in the game.
Feelings Bottled Up 5
- Location: Rhata Harbor
- NPC: Demure Messetina
- Objective: Deliver Messetina’s letters to all other NPCs in the quest series.
- Reward: x1 Invisible Bonds Ability Seed
Return to all of the NPCs you found along your way to deliver them a letter, then visit Messetina one more time to complete the series.
Grist to the Mill
- Location: Mt. Gala
- NPC: Windmill Maker Oroshi
- Objective: Give Oroshi the Crimsonite and the Azurite
- Reward: x1 Artificer Ability Seed
The Crimsonite is obtained from the quest Rubinus Ex Machina available during Chapter 7, while the Azurite is a gift from the Lapis Ex Machina, also from Chapter 7.
Meelpa’s Methodology
- Location: Fallow Steppe
- NPC: Meelpa
- Objective: Bring the evidence for Meelpa
- Reward: x1 Meelpa’s Teachings Ability Seed, Ethereal Glimmerdge
Collect all of the required items for Meelpa, which are all marked on the map. The reward is one of Morley’s best weapons.

A Gesture of Good Quill
- Location: Etaern, the Moonlit Parish
- NPC: Quillmaker Matheo
- Objective: Gather Needlebeak Feathers
- Reward: Niccolo Coin x6
Needlebeak can be found in the Charred Passage, Aery Passage and Fallow Steppe. Defeat enough of them and deliver the loot to Matheo.
An Eye for Trouble
- Location: Etaern, the Moonlit Parish
- NPC: Taciturn Scholar Norrhis
- Objective: Defeat the Wizard Eyes inside Castle Cresceno
- Reward: Lucre x5830, Niccolo Coin x3
Enter the Castle and look for the special encounter midway through the dungeon to complete the quest.
Queen Bee
- Location: Etaern, the Moonlit Parish
- NPC: Qula the Refined Witch
- Objective: Defeat the Nemeses Puppet Meriska
- Reward: x1 Special Attack+ Ability Seed
Meriska is found in the Fallow Steppe and is a Level 50 Nemeses, so be prepared with everything you can.

Lapis Ex Machina
- Location: Etaern, the moonlit Parish
- NPC: Clever Youth Paeil
- Objective: Defeat the monsters in Lefeya Drifts
- Reward: Lucre x5270, x1 Azurite
Head to Lefeya Drifts and defeat the pack of monsters to earn the shining Azurite. You get to keep it and use it for the Grist to the Mill quest later.
Where There’s a Quill, There’s a Way
- Location: Etaern, the Moonlit Parish
- NPC: Quillmaker Matheo
- Objective: Gather Assassinant forewings
- Reward: Niccolo Coin x8
Much like the previous Quill quest, your target now are the Assassinant found in Pritta Ridge or Ahrvet’s Pasture.
Quill Pro Quo
- Location: Etaern, the Moonlit Parish
- NPC: Quillmaker Matheo
- Objective: Gather Siren Plumes
- Reward: Niccolo Coin x10, x1 Siren Quill
This time, defeat some Sirens for Matheo in Wind Sanctum to complete the quest. You’ll use the Siren Quill later in Love Quest.
Words From The Heart
- Location: Panicking Keshi
- NPC: Longren, the Vale of Wind
- Objective: Deliver Keshi’s letter to Cheeka in Rhata Harbor.
- Reward: Lucre x9400, x1 Spirit Serum
Very straightforward quest. Just complete the two trips to finish it.
Meat and No Veg
- Location: Longren, the Vale of Wind
- NPC: Tailor Yotsuba
- Objective: Deliver Yotsuba some Pricklebeak tenders.
- Reward: Lucre x11,850
The Pricklebeak must be defeated specifically in the Wind Sanctum to get the tenders, so avoid them in Gamurda Mines.
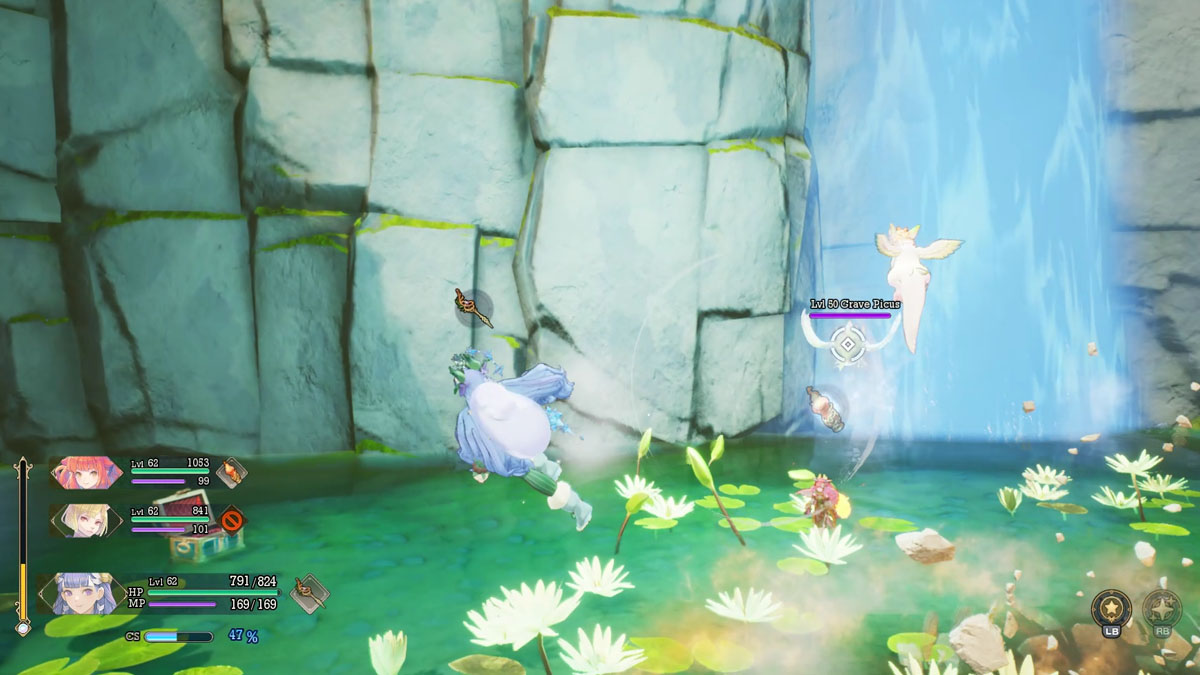
Death’s Portent
- Location: Longren, the Vale of Wind
- NPC: Seamstress Miyabi
- Objective: Defeat the Grave Picus Nemeses
- Reward: Narrow Escape Ability Seed
Grave Picus will spawn once you grab the quest. Take a look at our Nemeses guide for specific info on how to beat it.
Never-Ending Nightmares
- Location: Gudju, the Earth Village
- NPC: Sleepless Hoppee
- Objective: Defeat Beholders in Castle Cresceno
- Reward: x1 Stamina Sigil + Ability Seed
Head all the way back to Castle Cresceno and defeat the Beholders (easy to find at the end of the castle) to complete the quest.
Amour for Armor
- Location: Gudju, the Earth Village
- NPC: Armorer Nogrei
- Objective: Gather Dark Knight plates.
- Reward: Lucre x12600
The Dark Knights must be fought in Castle Cresceno, and any other you find around the world won’t count for the quest.
Behind the Scenery 8
- Location: Longren, the Vale of Wind
- NPC:Traveler Fiona
- Objective: Find the depicted area
- Reward: x1 Love’s Light Ability Seed
Returning to where you first meet Fiona, your final location is located in Charred Passage. You get an Ability Seed for all of your work.
Ramcoh’s Roast
- Location: Longren, the Vale of Wind
- NPC: Careena
- Objective: Make a dish for Ramcoh.
- Reward: x1 Beastly Force
Gather all five Sheeproccoli in Mt. Gala, then return to Longren to cook it. Finally, visit the Wind Sanctum to finish the quest.

Adeptus Rabite
- Location: Longren, the Vale of Wind
- NPC: Expert Wind Dyer Hodzuki
- Objective: Defeat Great Rabites in Wind Sanctum
- Reward: x1 Goddess Scales
Great Rabites spawn very commonly in the area. There’s a encounter midway through the dungeon with eight of them, which will instantly complete the quest.
Grandpa’s Treasure
- Location: Tianeea, the Fire Village
- NPC: Fruit Farmer Kyuree
- Objective: Find the buried treasure in Charred Passage
- Reward: Lucre x10160, x1 Strength Serum
The treasure is located at the beach, southeast of the map. Find it and return it to Kyuree to complete the quest.


Hobgoblin Holdup
- Location: Tianeea, the Fire Village
- NPC: Traveling Merchant Cymon
- Objective: Defeat the Hobgoblin gang in Charred Passage
- Reward: Lucre x11660, x1 Summon Goblin Ability Seed
Head to the marked area and defeat the monsters to complete the quest.
When Fish Fly
- Location: Tianeea, the Fire Village
- NPC: Bibliophile Lolo
- Objective: Defeat Iffish in Khaswia Moors
- Reward: Lucre x11470
Pretty straightforward. You’ll find them by the shores.
Grab the Crab By The Claws
- Location: Ledgas Bay
- NPC: Gardener Beirke
- Objective: Grab some peeled Clincher Crab
- Reward: x1 Stamina Sigil Ability Seed
The crabs can be found in Luka Ruins Undertemple, and will be easy targets for you.
Love Quest
- Location: Ledgas Bay
- NPC: Elegant Cerejera
- Objective: Find Muguet and bring him back to Cerejera
- Reward: x1 Promises Fulfilled Ability Seed
Muguet is found next to the Illystana entrance in Pritta Ridge. You’ll need to complete Quill Pro Quo to obtain the Siren Quill, which is necessary to convince Muguet to return.
Popo B-Gone
- Location: Deade Cliffs
- NPC: Julei
- Objective: Find a way to solve Julei’s problems
- Reward: Lucre x3760, x1 Repellent Ability Seed
Visit Trent in the Sanctuary Entrance and grab the ingredients Trent asks you around the Woods. Later, head to Ledgas Bay to find someone who can make the recipe. Speak with Glicina and the quest is done.
Draconic Dealings
- Location: Radiant Playhouse Terratio
- NPC: Jeweler Aleiz
- Objective: Defeat Kid Dragon, Frost Dragon and Kid Drakonis
- Reward: Mystic Vanebrace
Kid Dragon is found in Dura Gorge, Frost Dragon is inside the Temple of Wendel and Kid Drakonis is found in the Wind Sanctum.
Rubinus Ex Machina
- Location: Charred Passage
- NPC: Voyager Berzer
- Objective: Find the secret hidden by the monsters inside the Volcano
- Reward: Lucre x7520, x1 Crimsonite
Defeat the monsters in a secluded area of Dorpher Volcano to complete the quest. The Crimsonite is used later for Grist to the Mill.
Who Let The Cerberuses Out?
- Location: Tianeea, the Fire Village
- NPC: Shepherd Bastor
- Objective: Defeat Cerberus inside Dorpher Volcano
- Reward: Lucre x6580, x4 Niccolo Coin
The Cerberuses around Charred Passage won’t count toward the quest, so you need to fight them inside Dorpher.
Do Me a Crystalline Solid
- Location: Aery Passage
- NPC: Praying Souka
- Objective: Find all Elemental Blooms around the world.
- Reward: x1 Mana Grace
The Elemental Blooms are all found next to the Greater Elemental Aery challenges for each of the elements. The Wind one is right next to Souka, but others are all around the world:
- Fire: Charred Passage
- Water: Pritta Ridge
- Wind: Aery Passage
- Earth: Zawhak Desert
- Moon: Lefeya Drifts
- Wood: Mylos Woods
- Darkness: Log’grattzo Dark Archives
- Light: Radiant Playhouse Terratio

From Curation to Communication
- Location: Log’grattzo Dark Archives
- NPC: Aesh
- Objective: Find the books for each of the party members.
- Reward: Shelter of Knowledge
Follow Vash inside a special Passagean Tomespire instance, where he’ll recommend a book for each of your party members. You get the weapon for Julei after finishing it.
Goo-Goo For Goo
- Location: Etaern, the Moonlit Parish
- NPC: Ceramicist Vaze
- Objective: Obtain Red Drop Goo
- Reward: Lucre x7150, Niccolo Coin x3
Red Drops can be found inside Dorpher Volcano, so head there to grab them.
All Chapter 8 Side Quests in Visions of Mana
Featherly Duties
- Location: Free City of Tsaata
- NPC: Supply Seller Morae
- Objective: Find out the origins of the Soul Guard talisman
- Reward: x1 Traveler’s Talisman Ability Seed
Head to Tianeea to speak with Master Fiugo, then speak with Khoda at the Sanctuary Entrance.
Fake It Till You Make It
- Location: Free City of Tsaata
- NPC: Enigmatic Traveler Marin
- Objective: Defeat the Shape Shifters in Dorpher volcano
- Reward: x1 Strenght Sigil+ Ability Seed
Head to the Volcano and look for the enemy packs with differently-colored enemies, which are Shape Shifters. Defeat those to complete the quest.
Visions of Mana is available on PC, Xbox and Playstation.


Published: Sep 11, 2024 10:30 am