
The Gorilla Nebula is your first full world to conquer in Astro Bot, which means plenty of smaller levels for you to complete inside. This walkthrough will cover how you can get to the end of each level in the nebula while finding all the Bots and puzzle pieces along the way
Jump To:
- Astro Bot Sky Garden Walkthrough
- Astro Bot Creamy Canyon Walkthrough
- Astro Bot Az-Tech Trail Walkthrough
- Az-Tech Trail Area 1
- Az-Tech Trail Area 2 (Bot 1)
- Az-Tech Trail Area 3
- Az-Tech Trail Area 4 (Bot 2, Bot 3)
- Az-Tech Trail Area 5 (Puzzle Piece 1)
- Az-Tech Trail Area 6 (Lost Galaxy)
- Az-Tech Trail Area 7 (Bot 4)
- Az-Tech Trail Area 8 (Bot 5)
- Az-Tech Trail Area 9 (Puzzle Piece 2)
- Az-Tech Trail Area 10 (Bot 6, Puzzle Piece 3)
- Az-Tech Trail Area 11
- Az-Tech Trail Area 12 (Bot 7)
- Astro Bot Construction Derby Walkthrough
- Construction Derby Area 1 (Puzzle Piece, Bot 1)
- Construction Derby Area 2 (Bot 2)
- Construction Derby Area 3 (Bot 3, Puzzle Piece 2)
- Construction Derby Area 4
- Construction Derby Area 5 (Bot 4)
- Construction Derby Area 6
- Construction Derby Area 7 (Bot 5)
- Construction Derby Area 8 (Bot 6)
- Construction Derby Area 9
- Construction Derby Area 10
- Construction Derby Area 11 (Bot 7, Puzzle Piece 3)
- Astro Bot Mighty Chewy Walkthrough
Astro Bot Sky Garden Walkthrough
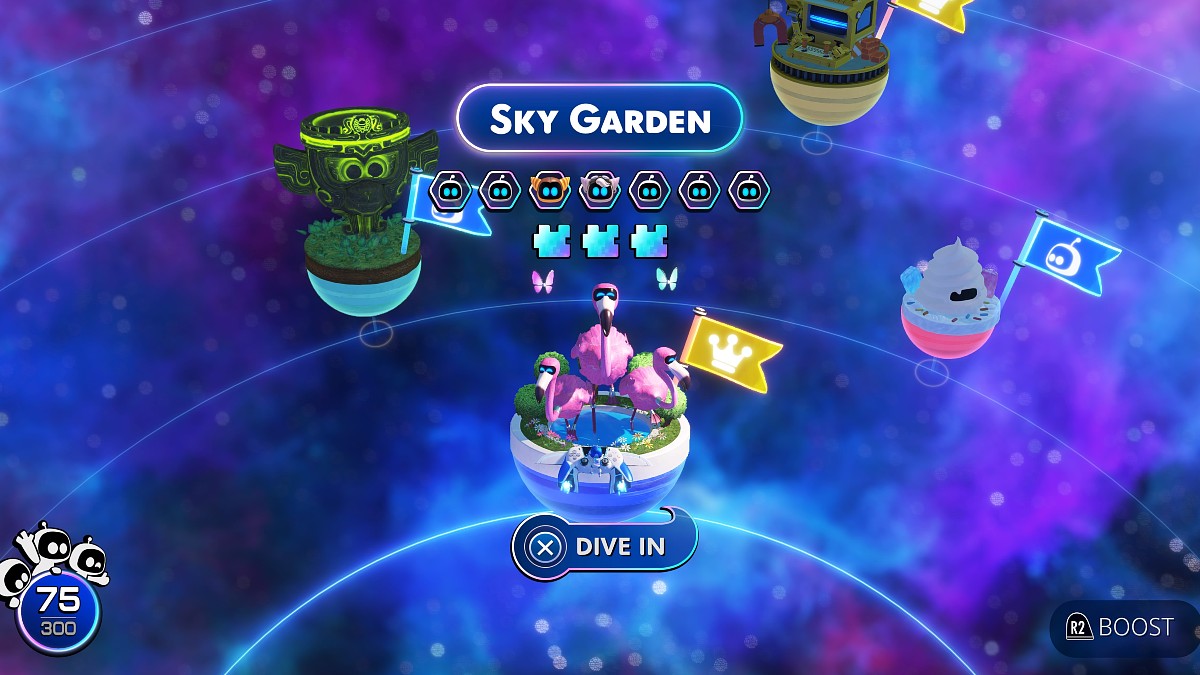
Sky Garden is the first level in the whole game, and it gives you a decent handling of all the base mechanics. It’s a small level that still has a few collectibles to find as you swim your way to the end amidst coins and bonuses.
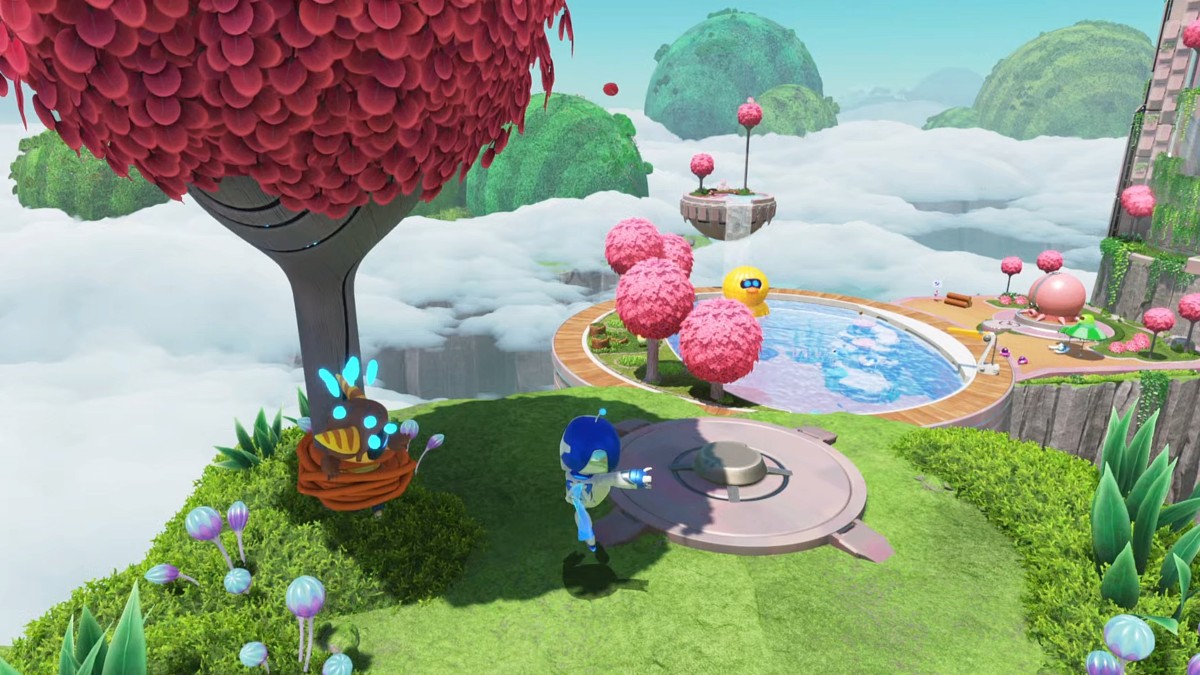
Sky Garden Area 1 (Bot 1)
Land in the starting zone and move to the end of the path ahead to start exploring Gorilla Nebula in Astro Bot. There is a bot that is jumping around on a rock platform. Punch the Bot to bring “discover” it so you can add it to your collection. Right after you slap the Bot, the first real checkpoint opens up.

Checkpoint two is three simple jumps away, so this is all part of the same area. Collect all of the chests you can, many of which are on top of trees, and run through the coins. When you are ready for the second area, just use your boosts by holding “X” to jump across to the wooden platform.
Sky Garden Area 2 (Bot 2)

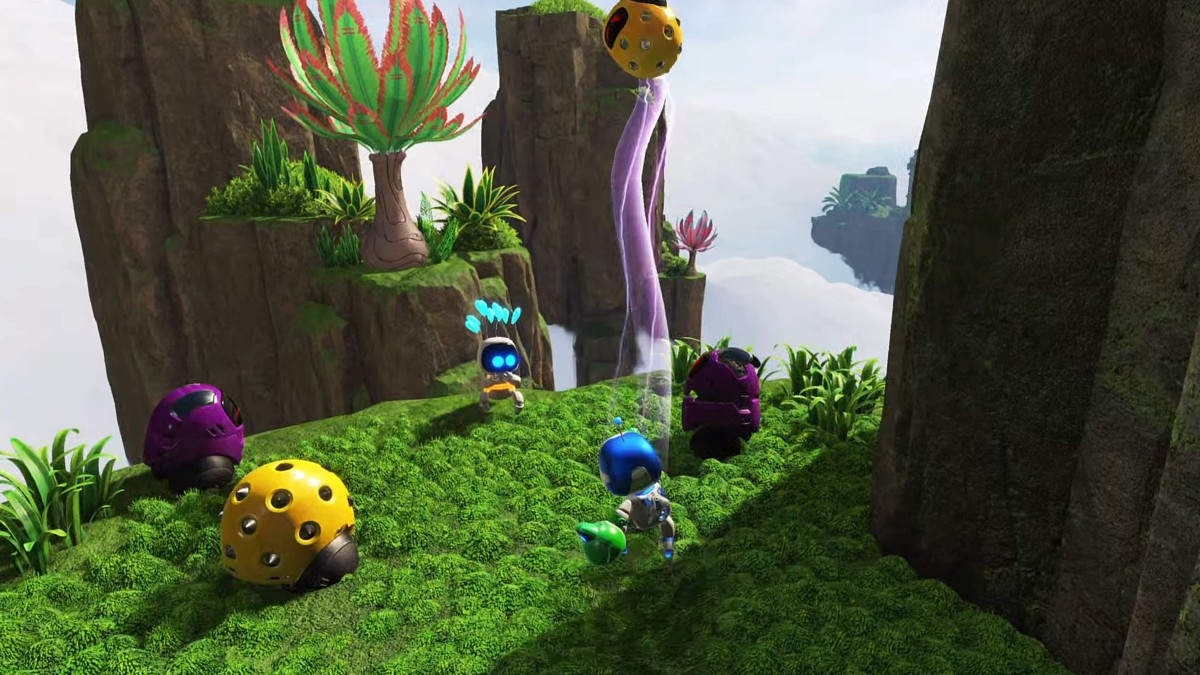
Move off the wooden platform and head into the wide-open area. There are some more enemies, including a green one that launches slime at you. Destroy these with your standard punch or the rocket boost on your jump. Then you can find the second Bot holding onto the rock. Like all the other collectibles in the game, just give the Bot a hit to collect it. You can also use the rope to claim some extra chests and the soccer balls to destroy a unique enemy.
Go to the left side and use the trampoline to get higher up, and the next section is ready to go. Be ready to start using your boosters even more than before.
Sky Garden Area 3 (Bot 3 and Puzzle Piece 1)
Checkpoint three starts with three electric enemies in a low crevice. Never try to break these with a punch. They will take you out in one hit, but you can do the same by using your thrusters to burn them. Either burn them or jump over them and move ahead. Grab the chests around the corner if you want more coins before moving up.

On the next platform, you will find two purple enemies and the first puzzle piece in the game. Simply walk over it to collect it, and then a set of three wires will appear. Approach the wires and hold “Square” to grab them. Then move backwards to pull them like a string. A trampoline will appear after pulling the wires that you can use to reach the top.
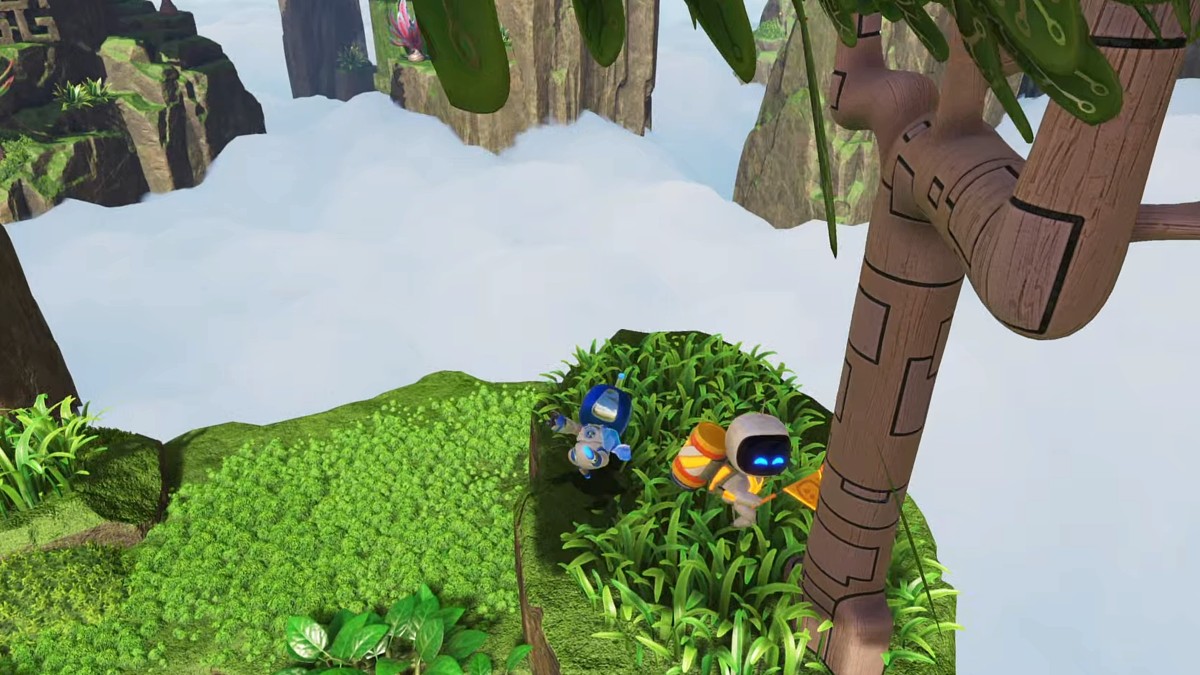
Upon landing, there is another Bot tied to a tree. Hit the Bot to get one of your first PlayStation-based Bots. Shortly after, a fan will appear on the ground. Hold “Square” to wind up and spin the fan yourself. This summons a water slide and gives you a nice save point.
Sky Garden Area 4 (Bot 4, Bot 5, Puzzle Piece 2)
Fly down the water slide after knocking down all the inflatable balls to dive into the next area. You will be tossed into a pool with plenty of chests. Punching some of the anemones below will even drop some extra coins. But there is also a secret room. Go into the spot with the air bubble that contains a fan. Hold “Square” to spin the fan and open up a secret passage. Jump inside so you can enter a new room that has a fish tank. Run to the other side and jump on the zipper while holding down on the joystick. This will open the tank and unlock the fourth Bot.
Take the trampoline back up and swim to the surface, where there is another bot enjoying the water. Punch it so it goes back into the controller, then move over to the inflatable octopus. Grab the wire and pull it back to reveal a trampoline you can use to pull the zipper down. Doing so reveals a chest with a personal inflatable octopus. You can use this for the rest of the level by holding R2 to blow yourself up with air and reach new heights.
Before you go to the next area, use the inflatable ability to grab the puzzle piece from the flamingo in the air directly next to you. Or you can head back and grab some chests on trees as well. Once you have all the collectibles you want, head up the wall by using the inflation with “R2” until you get to the major water tank.
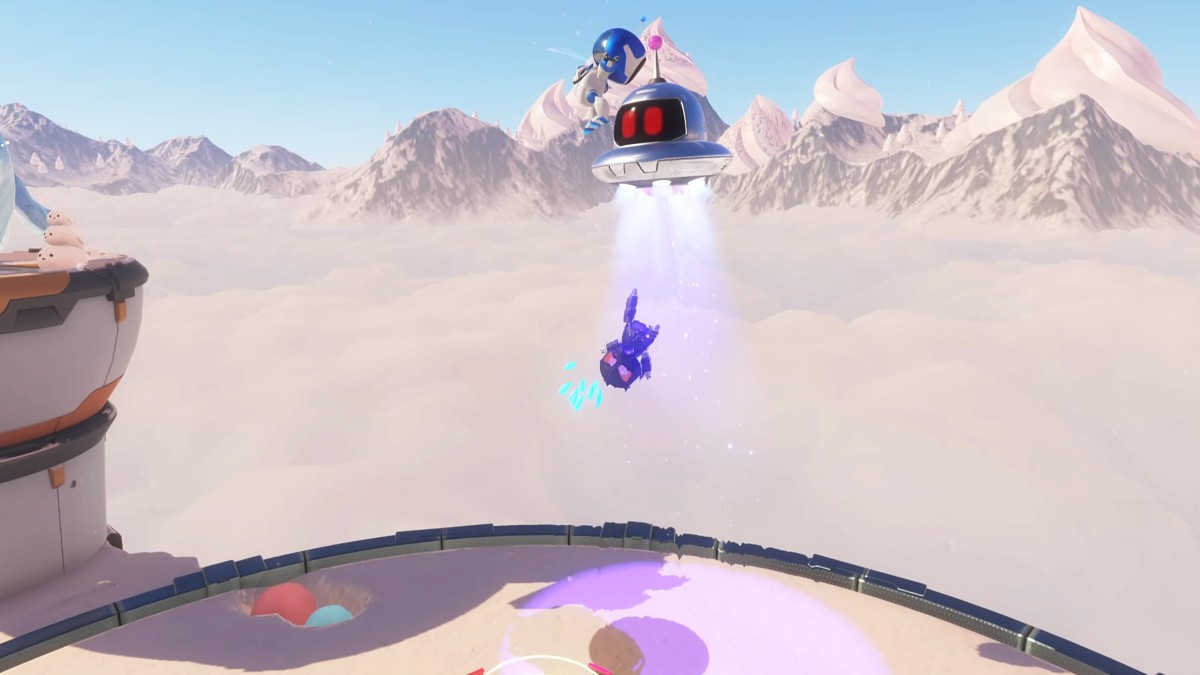
Sky Garden Area 5 (Bot 6, Bot 7, Puzzle Piece 3)

Jump into the water just ahead of the checkpoint and swim down before you do anything else. There is a bubble with an air pocket that has two enemies and the sixth Bot. Take down the enemies and then smack your friend before floating back up with the inflation ability. On the way up, there are some manta rays, and the one in front of the others is carrying the third puzzle piece for the level.
Now just float to the surface, where you will find two hedges. Break the one on the right to reveal the seventh Bot in the Sky Garden. After that, you have everything you need, and you can break the glass with a few punches. And that’s the end of the level.
Astro Bot Creamy Canyon Walkthrough

Every level in Astro Bot, including the ones in Gorilla Nebula, has its own gimmicks and a unique theme that separates it from the rest. In this case, you will be introduced to ladybug trampolines, plenty of snow or ice that covers potential secrets, and all kinds of ice cream.
Creamy Canyon Area 1 (Bot 1, Bot 2, Puzzle Piece 1)
Before you attack the ladybug enemy to flip it over, focus on the left side of the area. First, you want to smack the giant pink ice cream tree to knock down the Legendary Mercenary Bot. If you go further into the corner and break the snowman, there is a wire you can pull by holding “Square” that will reveal the first puzzle piece in the level. Once those are both out of the way, you can use the ladybug to reach the platform on the left, which has a cardboard.

Next, look to the right of the area to find a hidden path below. Jump down and use the ice to glide beyond the icicles. As long as you get there fast enough, you should be fine, and you can punch the second Bot. Head back and hit the ladybug to flip it over. Make sure it’s close enough to the ledge up top and then use the trampoline.
Creamy Canyon Area 2 (Bot 3, Puzzle Piece 2)
Bot three is right in your face at the start of this area, but he is quickly whisked away. It seems hectic, but you aren’t timed at all. Just keep heading up the path and smash any chests along the way. Eventually, you will encounter some ice paths. They will all start to break as soon as you walk on them. That means you need to move as fast as you can to the other side until you reach another ladybug.
Hit the bug for an easy trampoline to reach the next open platform. Up there, you will find yet another ladybug. Use it to jump high enough to hit the flying robot carrying your own stranded Bot. Then use the same trampoline to reach the puzzle piece on the left side next to a seal ice sculpture. That marks all the collectibles here for now, but you aren’t done with the statue.
Creamy Canyon Area 3 (Bot 4, Lost Galaxy)

The start of the next area in Gorilla Nebula in Astro Bot introduced some charging pigs. Wait for the pig to steam up and then jump on the other side. Some wires are dangling from the back that you can use to grab and throw the beast. You need this to smash the ice in your path, but it’s also perfect for smashing the seal ice sculpture in the area just before this. Toss the pig and then head over to the platform, where the seal was destroyed. A portal to a Lost Galaxy will be waiting. However, this will take you out of the level, so be prepared.
With the seal dealt with, you can head back to the platform with the pig. If you start pushing all the sprinkles out of the way, you will find a glowing blue X on the ground. These always mean you can hold “Square” to dig below. Here, you can find the fourth Bot in the level and then head back to the main path. As long as you smashed the ice in the way, it’s time to move forward.
Creamy Canyon Area 4 (Bot 5, Bot 6, Puzzle Piece 3)
Give the ladybug in the ice room a good smack so it can break all the icicles in the way. Plenty of space will be cleared, and then you can skate ahead into an open arena. Make sure to take out all the enemies before you start collecting because there are a handful. After they are destroyed, use the ladybugs to jump up and grab the third puzzle piece.

To the right side of the arena, there are two more optional paths. The first one is a ladder you can use that leads to another glowing spot. Spin like you did before to reach the area below and rescue the next Bot. Hit the ladybugs in this icy area so they can break all the spikes and reveal the fifth Bot. Then, a trampoline will appear, so you can head back up.
Back at the top, go to the right again, only this time punch a ladybug down the path. It will lock into the socket, and you can use the trampoline to get higher. Take down the enemies and save the sixth Bot in the Creamy Canyon area.
Creamy Canyon Area 5 (Bot 7)

Yet another ladybug is in your way that you can slam into the ice, so use to jump up higher. A ramp will fall down and then you are faced with a second pig. Let the pig charge and then grab it by holding “Square” behind it. Wait for the arrow to line up on the massive ladybug robot behind the ice and then launch to pig. The bug will fall and destroy all the ice in your way.
As you make the small jump across, you will see the final Bot in the canyon in half a block of ice. Just punch your friend, and that marks all the progress you need to make this time around in Astro Bot.
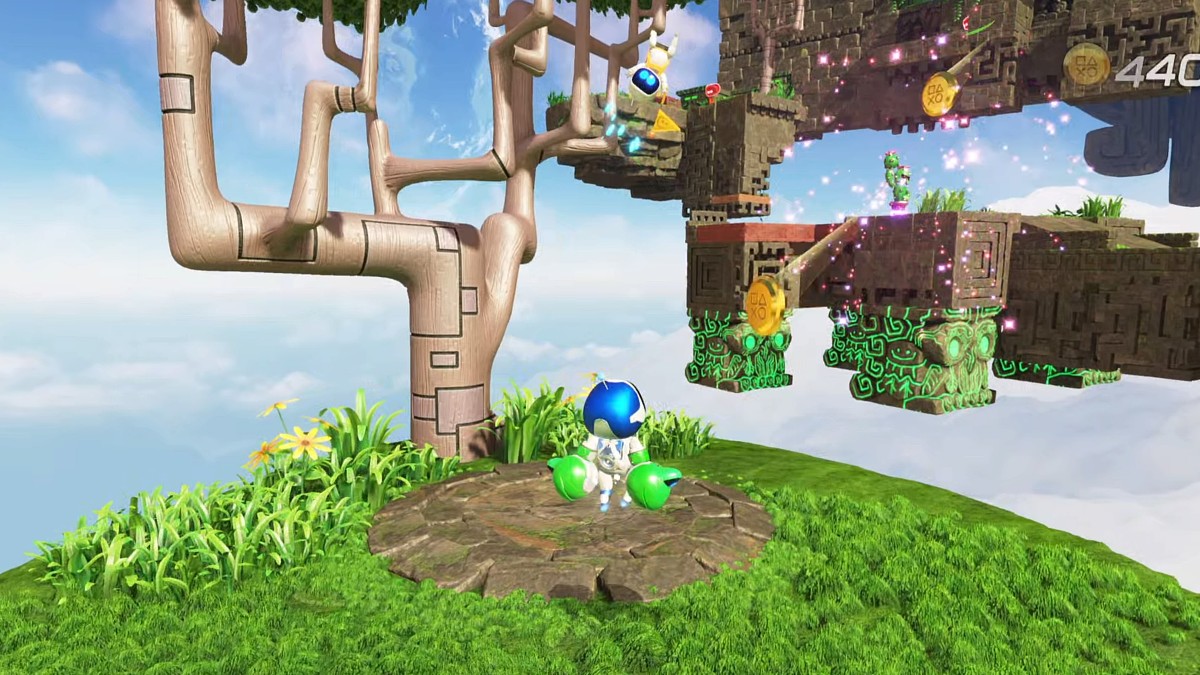
Astro Bot Az-Tech Trail Walkthrough

If you like punching stuff with your favorite PlayStation Bot, then this level is going to quickly be one of your favorites. With the help of some frog gloves, you will be able to hit items with springs on the back of your hands for longer reach. Of course, all the collectibles and the platforming will revolve around using these arms for an advantage.
Az-Tech Trail Area 1
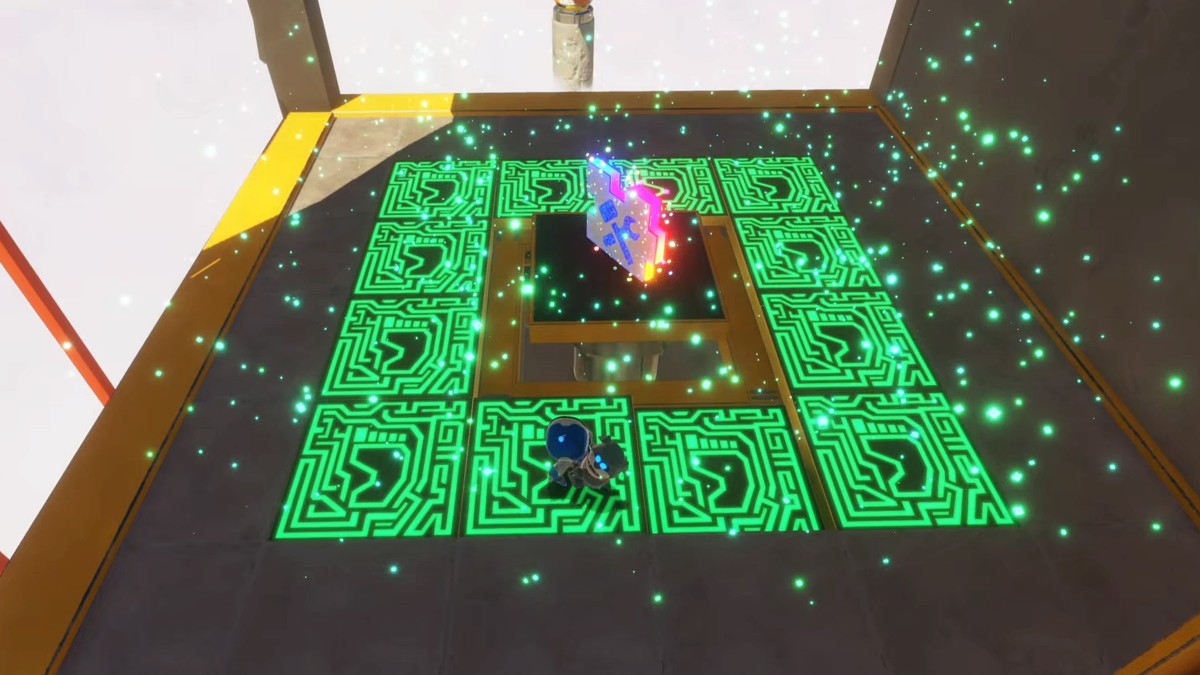
When you land in this area, there is a massive golden wall in front of you with nowhere else to go. Get close to the wall so that you can see the green glowing cubes and then use the controller vibration as a guide. Push the cube directly in the middle of the bottom row to open the giant metal door and proceed to the first checkpoint.
From there, you can move across the bridge. Only a few enemies and a chest in a tree occupy the area. Aside from a few extra coins, there isn’t much to find here. Keep going until you get to the second checkpoint.
Az-Tech Trail Area 2 (Bot 1)
Jump across the moving blocks and hit the ladybug across in the center of the platform. This will give you a trampoline that you can make use of to reach the platform on the left side. When you bounce to the left platform, there is a terrified Bot that you can punch and add to your growing collection for the ship.
Go back down to punch the ladybug robot to the right side platform and use the trampoline once again. Only this time you’re going to grab the wires at the top instead of finding a Bot. This will unveil another small wall of green glowing blocks. Either use the vibration as an assist to find the block you need or just push the third block from the left.
Az-Tech Trail Area 3

The wall with the green blocks will open to reveal a chest inside an empty room. Grab the frog gloves from the chest that allow you to do spring-loaded punches from a distance by using “L2” and “R2” as your left or right attacks. These are integral to the rest of the level in numerous ways, so always keep them in mind.
Your first test with these is to simply punch the golden door ahead of you. The wall will quickly break and then there are a handful of enemies waiting outside. Easily punch them from a distance so you don’t have to take any spike damage. Then you can punch the red square on the wall and pull back like you would with the wires. A trampoline will fly out to reach the next platform.
Az-Tech Trail Area 4 (Bot 2, Bot 3)
As soon as this area starts, a cactus will start rolling bombs at you. Punch one of the bombs back at the cactus to destroy it. Then you can approach the bombs that were left behind and punch them across the chasm to destroy two easy chests.

Jump down to the right after dealing with the cactus to find a small platform with a yellow chest. If you look at the wall to the left, there is a red square you can use to pull the wall out with your gloves. Inside is the second Bot in the level who has been hanging out with a squirrel. Use the trampoline that was left behind to get back up.
Keep moving ahead and destroy a second cactus to make sure the area is safe. Then you can go on the path to the right that has a giant wooden crate. Punch the crate with your frog gloves to break it and reveal a third iconic Bot in the level.
Az-Tech Trail Area 5 (Puzzle Piece 1)

Three more giant crates are stacked directly in front of the Astro Bot this time. Punch them with “R2” one by one until the platform is at your level. Watch out for the spiky enemies and then head over to the red cylinders. These can be used just like the red square to stick your fist on. Only this time the goal is to swing across.
Another red square can be found next to a patch of grass on the left. Pull the wall out with your arm to release a stream of water and an easy puzzle piece. When you’re done here, use the red cylinders ahead and tap “R2” in succession to get across.
Az-Tech Trail Area 6 (Lost Galaxy)

This area is tiny and is meant to introduce a Russian doll enemy. After you punch it twice with “L2” or “R2” it will shatter and the smaller version will appear. You only need a total of five hits to completely destroy these enemies and you can hit the triggers in quick succession to make the fight easy.
Once the Russian doll is dealt with, use the red square on the right wall to release a lady bug. Before jumping to the next area, use the ladybug to jump higher and destroy all four torches on the wall. A Lost Galaxy will be unveiled on the other side, but remember that this brings you to another area and will effectively end the level if you jump in.
Az-Tech Trail Area 7 (Bot 4)
After punching the two spiky bots, look at the golden door on the right wall. Punch it seven times to find the fourth Bot surrounded by enemies. Quickly take them out and then send your friend back to the ship so he doesn’t get cornered again.
Head back into the room and use the red square to destroy the wall. Platforms will quickly rise up as you look out at the sky and a slingshot will appear. Hit “L2+R2” to grab both ends of the slingshot with your gloves and then pull back. Releasing will catapult you to the next section with ease.
Az-Tech Trail Area 8 (Bot 5)
Two more of the Russian doll enemies will jump toward you as this area begins. Take them out one at a time and use your punches as fast as possible to easily break them. After they’ve been destroyed, head to the left platform where there is a small trampoline. Jump onto the platform to find a third Russian doll that can easily be shattered. Then punch the tree to knock down the fifth Bot.
Head back down to the main platform and face the next wall where a set of gold teeth will appear. Punch these to push the platform backward and use the trampoline to get to the top.
Az-Tech Trail Area 9 (Puzzle Piece 2)
Before moving ahead, approach the floating platform to the right. A red square will appear that you can pull with your spring-loaded gloves. This will cause the platform to rotate and spring out another section of it. Bounce on the trampoline that appears and glide to the top of the platform to grab a second puzzle piece on the trail.
Glide back to the main platform and punch one of the rolling cactus bombs at your enemy as you move ahead. The robot will explode and then two Russian dolls will appear. Give those a nice boxing combo and then punch the red square that floats up. Pulling the square will give you a trampoline and a red cylinder. Jump on the trampoline and punch the cylinder to launch yourself across.
Az-Tech Trail Area 10 (Bot 6, Puzzle Piece 3)

Two floating face platforms will move back and forth across the chasm. The face in the front will quickly flash a red square as it moves. Pull this square to reveal the sixth Bot on the trail and then move across to the face on the wall. It’s another red square that can be pulled to reveal red cylinders. However, you need to move carefully behind you on the moving faces to get a full extension.
When you swing on the cylinders, keep in mind that the third puzzle piece is in a hole in the wall. You need to jump from the cylinders to reach this piece, so don’t land at the next checkpoint until you grab it.
Az-Tech Trail Area 11
Another speedy area, there are really only two moves here. Punch the spiky enemy ahead of you and then jump on the trampoline to get some easy coins. Of course, the trampoline gives you enough air to grab a red cylinder and launch yourself to the next cylinder. Eventually, you reach the top and the final checkpoint for the trail level.
Az-Tech Trail Area 12 (Bot 7)
When you move across the platform, another slingshot will appear, but you don’t want to use it yet. Instead, head to the left and jump to the top until you find a red square. Pull it to spawn a few spiky enemies that can be easily punched. Then you can jump through the blue glowing square that brings you to a secret room.

Inside the room is a set of electric blocks that need to be avoided. Hover past them and then use the red cylinders to swing and flip the platforms. Repeat that action until you reach the top, which requires about five different swings. At the top, you will find the seventh and final Bot in the Az-Tech Trail before you punch the block and use the trampoline.
Now that you have all the collectibles, use the slingshot and launch across the chasm. If you time the launch right, you can easily hit both coin circles for a decent bonus. That room on the other side brings you to a boxing ring with multiple Russian dolls as opponents. Crack them all open to finish the level.
Astro Bot Construction Derby Walkthrough

The Gorilla Nebula name is starting to make sense with this level. Chewy will appear for the first time and there are plenty of monkey enemies to worry about. However, you get a rocket dog to help you soar through the construction site and grab all the collectibles along the way.
Construction Derby Area 1 (Puzzle Piece, Bot 1)

Every level in the game starts by gliding in on a rocket-boosted controller, and this time, you can move to the left to catch an early puzzle piece. If you miss the piece, just restart the level because this is the easiest point for a reset. Once you have the piece, land like you normally would and move ahead until the giant gorilla appears. He jumps around for a second until all the platforms you need will show up.
Jump across the circular platforms and take down the monkeys. On the other side, there is a floating drone you can take down with an aerial spin attack and the area should be clear. Head to the right to find the first Bot climbing a steel beam.
Construction Derby Area 2 (Bot 2)
Run or glide across the glass bridge, but be quick because it will break as you go. The bridge leads to a small area with what looks like wet concrete and a ton of metal ingots. Grab the wire that is floating above the concrete to yank the container open. Bot two for this level will fall out and you can smack it to add it to the overall collection.

With the Bot out of the way, pull the wire in the center of the yellow circle on the ground to grab a magnet. This allows you to form a ball of metal ingots. Run around the area to collect as many as you can until the ball glows blue. Enough ingots collected will allow you to throw the metal ball at the crane to move the steel beam. Use the beam to move to the next platform with another magnet and more metal ingots. Toss another metal ball at the next crane to smash a massive hole in the wall.
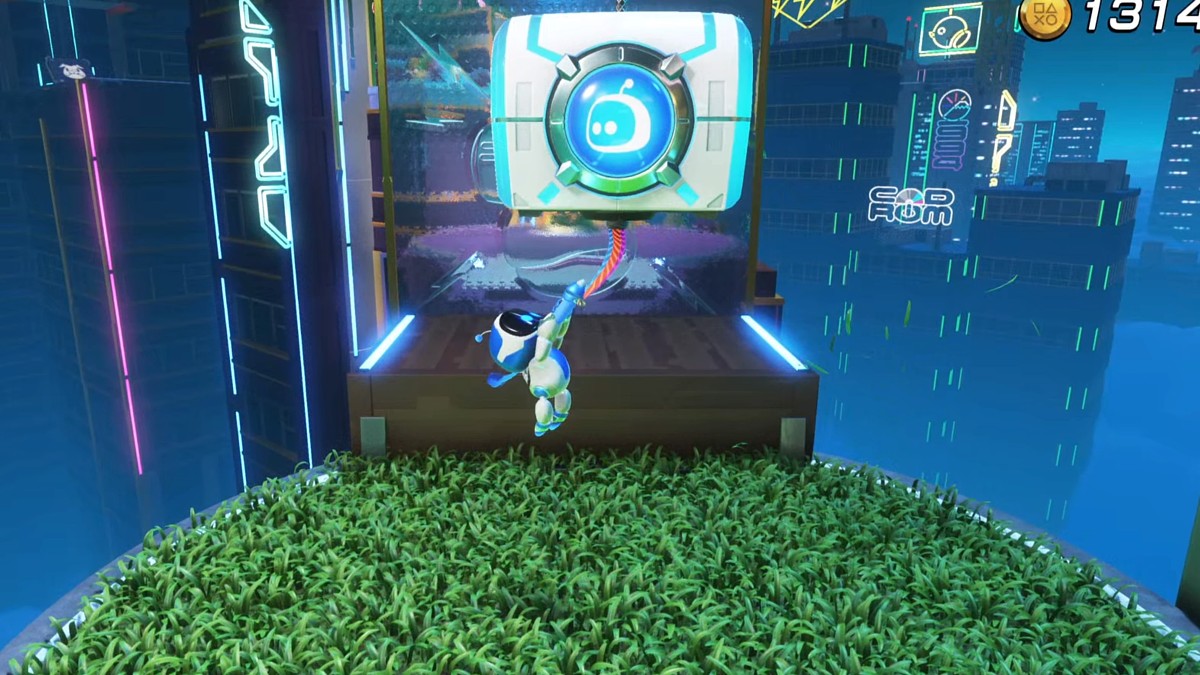
Jump into the open building where there is a blue chest. These always signify a level mechanic and this time it’s a rocket dog used like a jetpack.
Construction Derby Area 3 (Bot 3, Puzzle Piece 2)

Opening the chest marks the next area. With the booster on your back, hold “R2” to boost through any of the glass walls. On the other side of the same wall is a small platform you can glide onto. From there, use the booster to reach the ladder. After you climb up, you can find yellow beams on the broken side of the wall. Traverse these with the booster dog until you reach the third Bot.
With the high vantage point, you can boost into the basketball hoop for an easy coin and then head to the right side of the room. Another wire is in the ground that provides a magnet. Collect metal cans and then toss them at the crane. This will flop the platform from the crane so you can fly across and grab the puzzle piece on the other side.
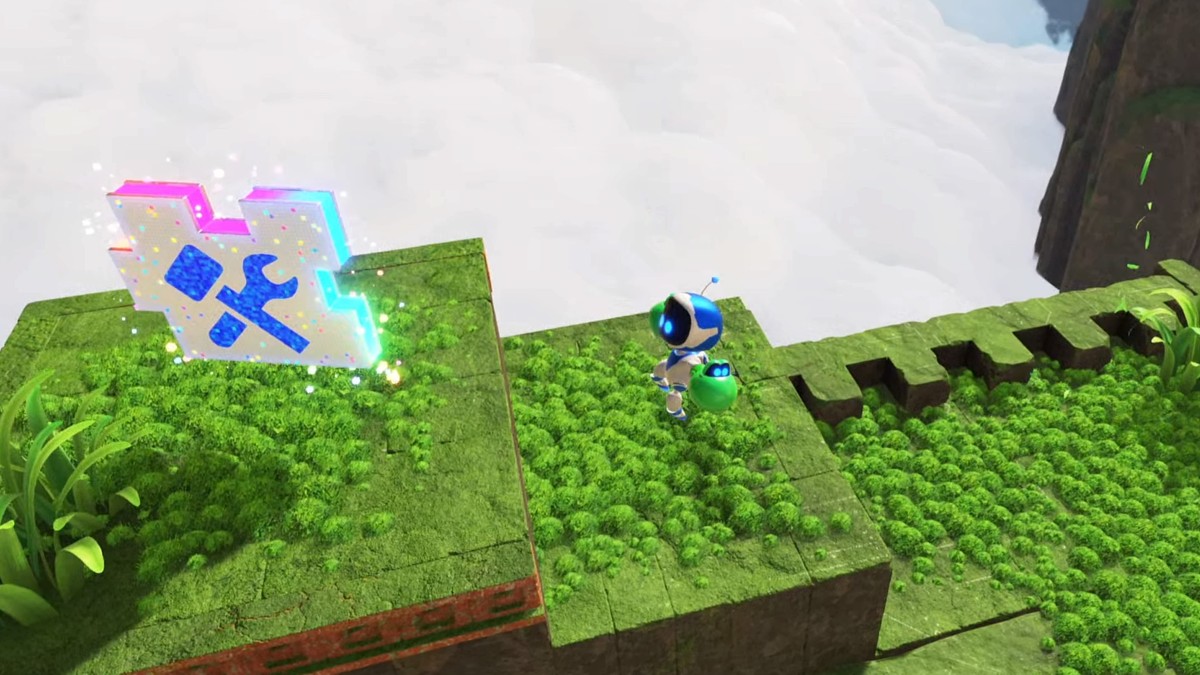
Now head back into the main room and look for the golden dog symbol on the wall. These always mean you can boost into them with the dog to smash the surrounding structure.
Construction Derby Area 4
After the wall crumbles, go across the small platforms and boost through the rings to easily destroy the floating robots. Then a golden bell will appear as an enemy. Anything made out of gold in this level can be hit with the booster dog. In this case, the boost will knock the bell over and reveal a trampoline like the ladybugs from the Creamy Canyon.
Construction Derby Area 5 (Bot 4)

The fifth area starts with a Bot that gets grabbed by a machine. Follow the same path but don’t worry about running out of time. Move across the boxes and take the ladder up to the platform where the Bot is suspended. Simply smack the Bot to add the fourth one to the list.
Two golden bells will follow the Bot. Both of them can slam the ground to cause waves of damage. Jump over the waves and boost at each bell with full force to get rid of any danger. They will fly off the map and you can then grab the wire from the wall. A massive trampoline will appear at an angle and it has a dog emblem. This always signifies the use of the dog booster.
Construction Derby Area 6
Boost into the blue trampoline to fly high above. Astro Bot will smash through the glass above that is cover in nails. If you break the glass just a few feet ahead, there is a hidden spot with a chest and two spiky enemies, but it’s nothing special.
Across the bridge is a sumo robot. Dodge the enemy like you would with the pig robot and get behind the enemy. Utilize the dog booster to push the sumo off the edge at full force. Now the path is clear.
Construction Derby Area 7 (Bot 5)
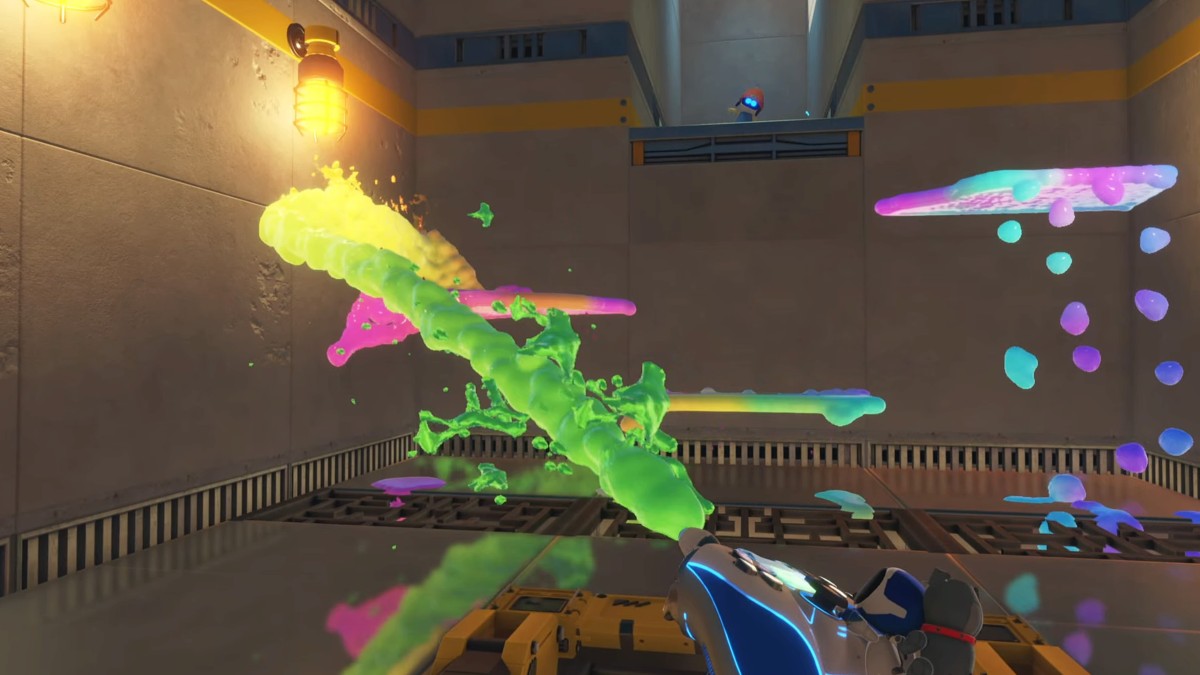
Use the dog booster to go through the hoop and take out the floating robot. After you land, there is a button you can stand on to spill paint from the three containers. It will tilt the platform and drip paint down the path to the right. Follow the right side path while the paint is moving so you can see the stairs. They lead to a secret room through the blue glow.
Inside the room is a controller you can use to shoot paint. Aim by physically moving your controller and painting the room until you find three platforms. Use these to reach the Bot at the top side of the room. Hit the Bot and then boost back up to the initial paint area. Only this time you need to boost to the left side to reach the next checkpoint.
Construction Derby Area 8 (Bot 6)

Start this area by boosting through the glass directly next to the checkpoint. You’ll find a perfect photo opportunity where bird bots cover the area in poop. With your new photo op done, you can head back to the main path. The next platform will have another sumo, and just like before, you can jump over it and use the booster to knock it off the map.
Use the booster again on the trampoline to the right to reach the top of all the crates. The sixth Bot will be waiting for a smack so it can head back to the ship with all the others. Go back down to the normal platform after and boost through the floating bots to the other side.
Construction Derby Area 9
It’s all about the dog booster here. Make use of the dog to follow the arrows and get past the bump. Then you can slide all the way down and end the trail with one more boost through the glass. Checkpoint ten will be on the other side of the glass.
Construction Derby Area 10
Carefully follow the steel beams ahead and punch each enemy as you go. When they are all clear, you can use the dog booster to get across to the next beam without falling. They will lead to two bunny enemies that can both be punched. Once they are dealt with, the next area begins but we aren’t done with this platform yet.
Construction Derby Area 11 (Bot 7, Puzzle Piece 3)
Below the first platform you start on, you can find a wire around a yellow circle. jump down here from the left side and then punch the bunny below. Pulling the wire will reveal a set of green blocks. Use your thrusters on the bottom right block next to the corner to reveal the third puzzle piece. If you can’t find the right block, run on it until your controller vibrates.
With the puzzle piece in hand, go back up and go straight across to the glass platform. Quickly move along so you don’t fall through and then use your thrusters to destroy the electric robots. All that’s left is the seventh Bot crying because they are tied up.
The rest of the level is a simple use of the dog booster on some blue trampolines. Use them as fast as you can to escape the gorilla’s hand and reach the top of the construction zone. That marks the end of the derby.
Astro Bot Mighty Chewy Walkthrough
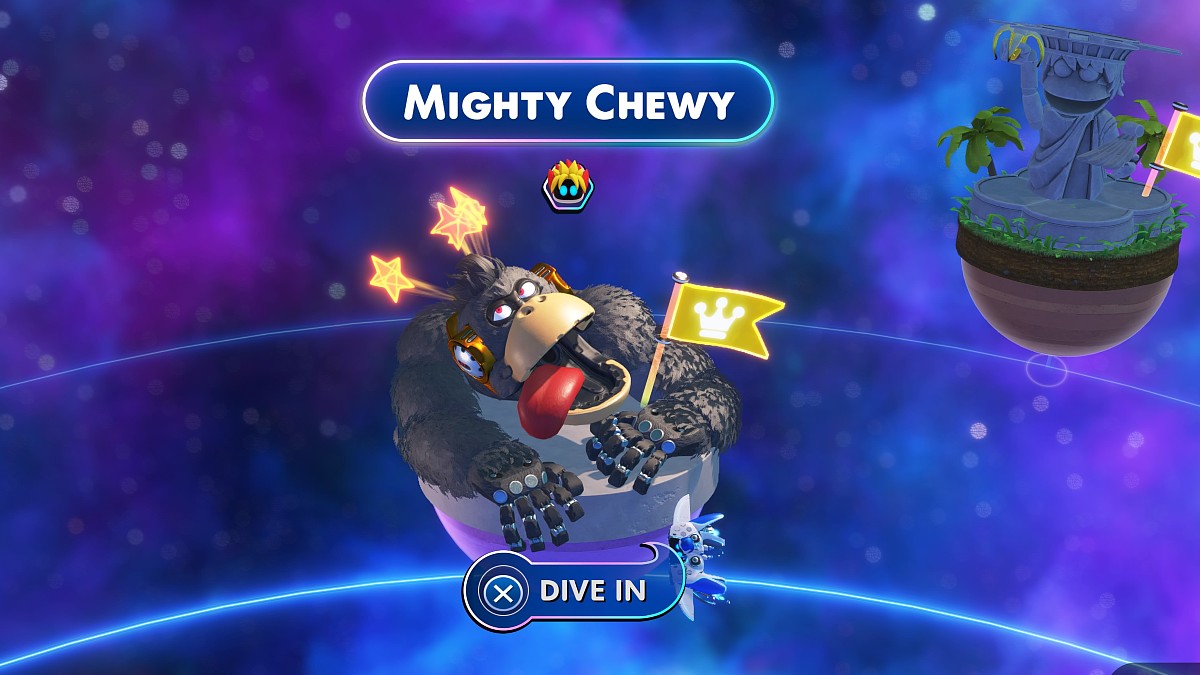
After beating the four main levels in the Gorilla Nebula and you have at least 20 Bots collected, you can unlock the boss section. In this case, the boss level is Mighty Chewy. It’s the same giant gorilla you’ve seen in places like the Construction Derby and now it’s time to take him down.
Mighty Chewy Area 1
Land the controller plane and get ready for plenty of action. After jumping up the small metal platforms, there will be monkeys and electric Bots that can be taken out with your standard thruster. They will all quickly go down and then you can pull the wire on the chest that’s just up ahead. This gives you the sane Dog Booster from the Construction Derby level.
Mighty Chewy Area 2
Now that you have the booster, smash through the glass by holding “R2” to activate the dog. On the other side of the glass is a gold bell that you can destroy by slamming into it with the booster. Just be quick so that the shockwave from the bell slam doesn’t kill you. Breaking the bell will spawn two spiky enemies that you need to hit before they get you first.
Continue going up the platform to find two more spiky enemies and an electric Bot. Simply throw some punches and use the standard thruster to melt your problems away.
Mighty Chewy Area 3

Utilize the standard thrusters to jump onto the moving purple platform for an easy gold coin boost to start the area. Then you can jump and set off the dog booster to smash through the monkey glass. Two monkey enemies will appear on the platform ahead but they are easy to take down. Get them out of the way and then boost into the trampoline.
When you reach the top, there will be a small bridge and a large purple platform in the dark. Going here will start the true encounter with the Gorilla Nebula boss.
Gorilla Nebula Mighty Chewy Boss Fight

The boss will rip down the wall and reveal some platforms ahead. Use the steel beams that he throws as a way to bridge the gaps and take down any Bots that get too close with a standard punch. You should be able to reach the boss arena in no time.
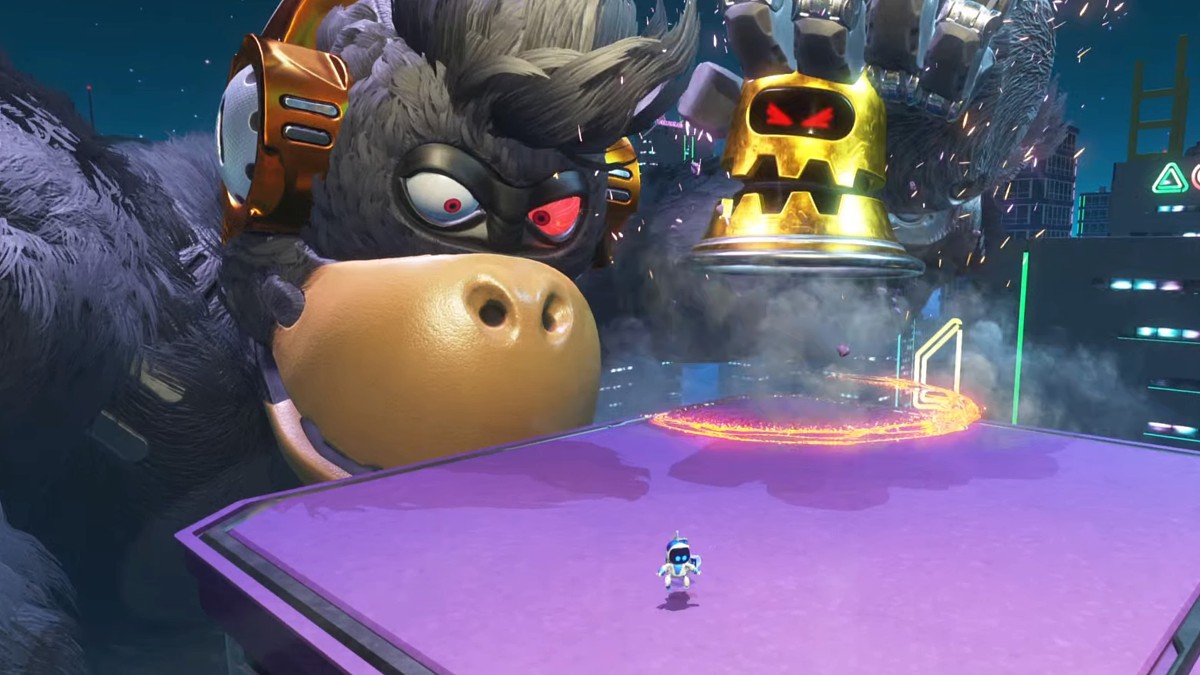
At the arena itself, Mighty Chewy will let out a roar and spawn five monkeys. Take them all out and then get ready to dodge. Chewy will pick up a sign with two pieces of glass. You need to boost through at least one glass section to avoid getting hit. If you successfully dodge, the boss will slam down a gold bell. Shockwaves will go across the arena, and they need to be jumped over to survive.
With an opening after the shockwaves, use the dog boost to hit the bell. This will knock the bell into Mighty Chewy’s head so it lands on the arena. You can then hit his eye until it’s red and he stands back up. All these steps need to be repeated for the second eye as well. But when both eyes are hit, all the mechanics ramp up. That means more enemies and more shockwaves. The boss even ends up breaking the arena and biting down to cause more waves. Keep dodging all the attacks until you are also able to break all of Chewy’s teeth. Soon enough the monkey will go down and you can claim another iconic Bot.
And that’s the Astro Bot Gorilla Nebula walkthrough.
If you’re looking for a guide for another level in Astro Bot, head on back to our hub page by clicking on that fancy blue text, as that’s where you’ll find our other walkthroughs for the game’s various levels and how to get every collectible.
Astro Bot is available now on PlayStation 5.


Published: Sep 7, 2024 12:16 am