
After getting the second satellite to unlock the Tentacle System in Astro Bot, it’s time for another set of levels that range from warm sands to ice-cold realms. In this guide, we will cover every single checkpoint within the levels and all of the collectibles you can pick up along the way.
This guide is a work in progress and will continue to be updated.
Jump To:
- Astro Bot Go-Go Archipelago! Walkthrough
- Astro Bot Trunk of Funk Walkthrough
- Trunk of Funk Area 1 (Puzzle Piece 1, Bot 1, Bot 2, Puzzle Piece 2)
- Trunk of Frunk Area 2
- Trunk of Funk Area 3 (Bot 3)
- Trunk of Funk Area 4
- Trunk of Funk Area 5
- Trunk of Funk Area 6 (Bot 4)
- Trunk of Funk Area 7 (Bot 5, Bot 6)
- Trunk of Funk Area 8
- Trunk of Funk Area 9
- Trunk of Funk Area 10 (Puzzle Piece 3)
- Trunk of Funk Area 11
- Trunk of Funk Area 12 (Bot 7)
- Downsize Surprise Astro Bot Walkthrough
- Astro Bot Wako Tako Walkthrough
Astro Bot Go-Go Archipelago! Walkthrough

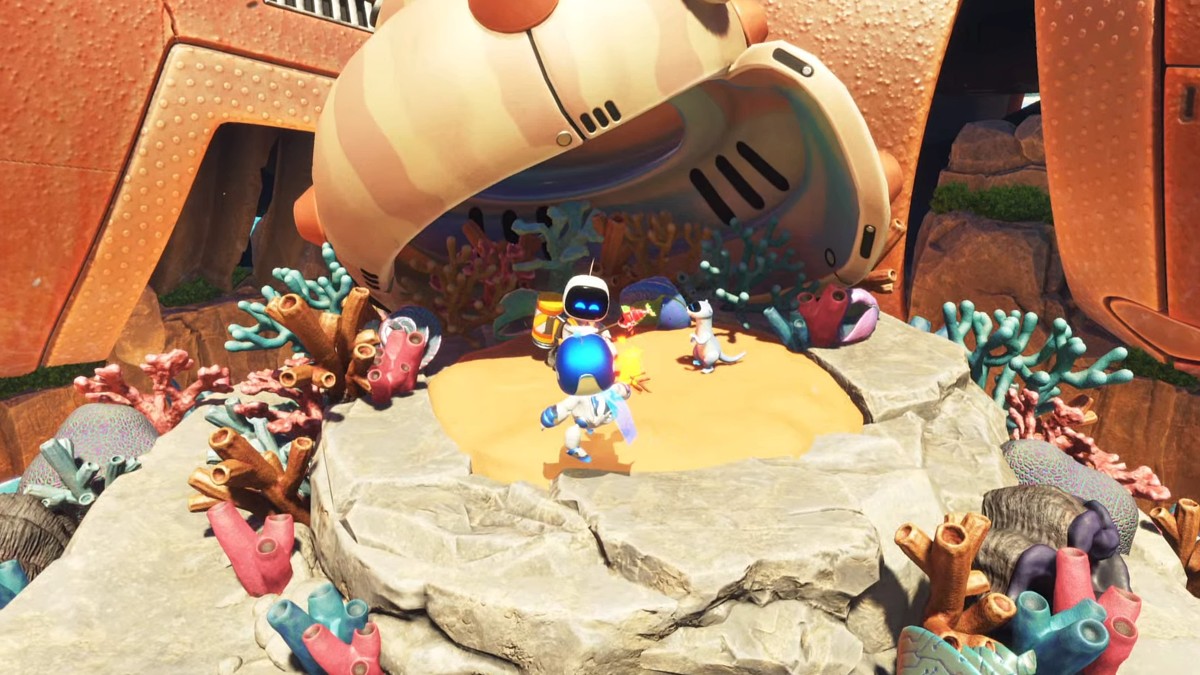
The Tentacle System begins with the Go-Go Archipelago, which is perfect because it’s a sunny beach with a massive pirate for a final boss. It’s a welcome change after the Gorilla Nebula came to a close. There is even a Lost Galaxy to collect in this level, so there is plenty to look for as you climb up and we’ll have it all covered here.
Go-Go Archipelago! Area 1 (Puzzle Piece 1, Bot 1, Bot 2)

As soon as the level starts, there is a puzzle piece you can collect with your controller ship. A bird will fly out from the right side of the water and you need to boost your controller if you want to reach the piece in time. If you miss it, I recommend just restarting the level and trying again. You should be good to land on the beach after the piece is yours.
On the beach, your first path should be to the left. Take down the enemies and then use your thrusters to reach the platform with the shell to the left. The first Bot in this level will be waiting for you as he roasts a fish. Smack the Bot and then head back to the main island.
Next, you should head to the right side of the level and climb the rocks. Take out the enemies on the top of the rocks with the thrusters so you don’t take damage from electricity. At the end of the path is a second Bot that is tied up on a tree. Get rid of the spiky enemies and then punch the Bot to release it from the bindings.
Now you can head back to the center of the beach. A skull-like enemy will appear that will throw a ball on a chain at you. Dodge the spiked ball and then punch the glass on the enemy twice to kill it. A blue glowing X will appear on the ground below it which means you can hold “Square” on it to dig into the ground. Open that chest that appears to use the monkey hands. These are integral for the rest of the level. The left and right hands can be controlled with the triggers. But you also need to physically move your controller to move the arms as well. Climb out of the beach to reach the next area.
Go-Go Archipelago! Area 2 (Bot 3, Bot 4, Bot 5, Puzzle Piece 2)

Up ahead there is an angry-looking chest with red eyes. Grab the chest with both monkey hands and hold the triggers to force it open. You will find a few rocks with hands on them which means they can be grabbed and thrown. Start by throwing a rock at the wooden face to the right. A platform will fall that can be climbed and the second Puzzle Piece is at the top.
After you get the piece, throw three rocks at the wooden faces on the platforms to the left. This allows you to move up and there are a couple more paths to follow. Head toward the left first. Another skeleton ball will appear and you can quickly take it out with a few punches. Below that enemy is a circle with a monkey on it which always means you should slam the ground with “R2+L2” at the same time. Flower platforms will appear due to the slam and you can reach the top. A chest with another Bot will be there.

Go back to the main path and you will encounter a flimsy blue bridge with yet another Bot in a cage. Use your thrusters or the hand slam to break the bridge around the cage and then head to the bottom of the cliff. You can punch the Bot you released to add it to the collection, but that’s not all for this area. Look for the giant stone with hands on it and grab it. Then look toward the cave to break the entrance and expose the green blocks. Pushing in the block will get you to the fifth Bot.
From there climb back to the top path by climbing on either side of the cliff. Your path won’t matter so don’t worry about the choice.
Go-Go Archipelago! Area 3 (Bot 6)

Knock the enemies out of your way and then climb up the ship. A few more pirates are waiting for you but you can quickly get rid of them. Before you keep climbing up after dealing with those enemies, turn around and jump to the other side of the ship. Another monkey image is on the ground and slamming it will cause the cannon to shoot a rope. Grind across to reach the ship all the way on the other side.
More enemies await but you can throw rocks at them or fist-fight the old-fashioned way. Regardless, there is a sparkly chest to grab from them and then you can keep climbing. Follow the path up the mast and use those monkey arms to move up the rungs carefully. Beating two more enemies at the top will unveil the sixth Bot from a tree. Pick them up and then slam the ground to unlock the trampoline back to the main ship.
Back at the main ship, slam down on the monkey image to unfurl a green bar. This marks the next section and requires even more physical use of the controller.
Go-Go Archipelago! Area 4

Utilizing the bars with the monkey arms means making a swooping motion with your controller. Momentum is created as you make the motion and then you can let go to launch yourself higher. After launching up high, more enemies appear on the next platform before you reach the next climbable wall. Take them out and slam the ground again to find the banana rungs.
Go-Go Archipelago! Area 5 (Bot 7)

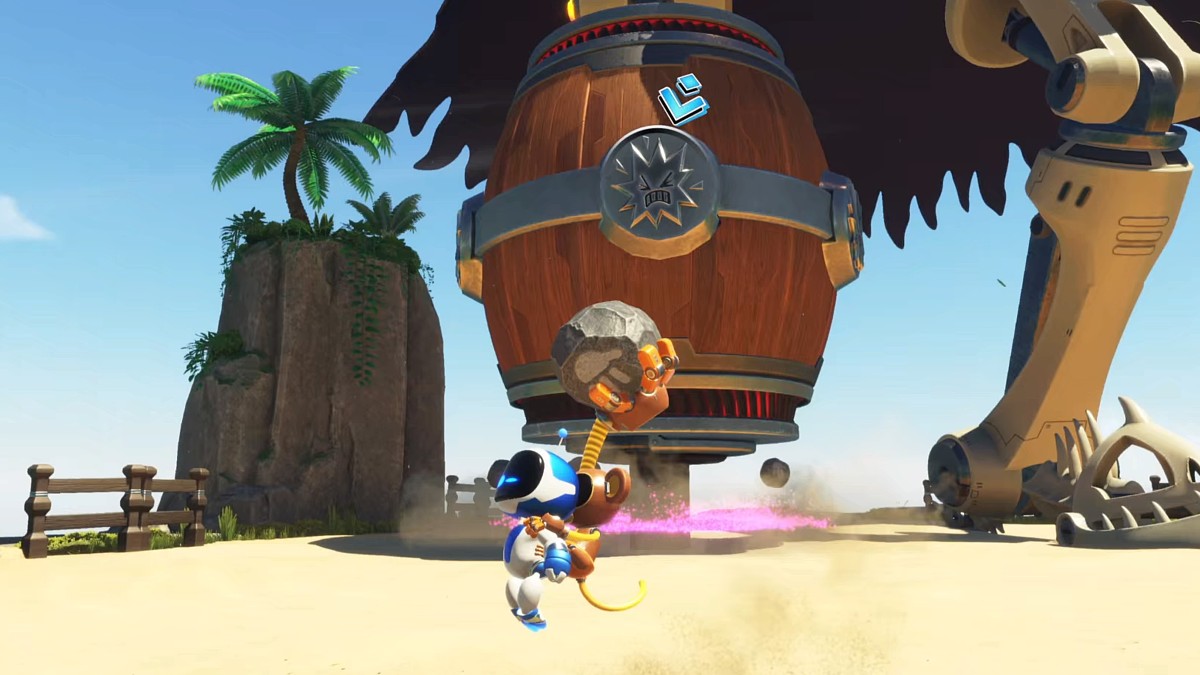
As soon as this section starts, you can look to the right to find a keg. On the other side of the keg is a wire that can be pulled by holding “Square” and pulling backward. The seventh and final Bot in this Astro Bot level is hiding within.
With the enemies gone as well, go to the left side of the ridge and slam the ground to open the flower platforms temporarily. Jump across them to reach the next spot where a skeleton ball will quickly start breaking the wall. Don’t wait too long to attack because the Bot is getting closer as it swings. Hop over the ball and then smash the glass to take it down.
Go-Go Archipelago! Area 6
The next part is almost all climbing. Jump across the anchors and begin the ascent up the cliff with the banana rungs. More enemies will appear and then the real climb begins. Remember that you can use both hands to grab one banana and reset where you are moving. Whatever you do, don’t turn back on the breaking planks.
Go-Go Archipelago! Area 7 (Puzzle Piece 3, Lost Galaxy)

At the top of the peak, there is a massive door. Head left before you enter to grab the giant boulder on the left side of the ridge. Throw the boulder directly ahead to unveil the third Puzzle Piece for the level. Grab the piece and then head back to the door.
Pulling the door will drop a bar you can use to swing to another bar that is carried by two birds. Timing is key here and it will allow you to scale the rest of the cliff. When you reach the top, you will see the usual ending platform which is surrounded by a buried hat. Approach the hat to spawn the Captain Pincher boss fight.
Luckily the fight is simple. Throw three stones at the marked parts on the Captain’s leg and climb up the side. Carefully climb his chest to reach the head and then tear it off with the monkey arms. The boss will fall and a piece of it will land back on the platform. If you look closely there is a blue cross under it that makes a Lost Galaxy. But remember that if you jump in it will take you out of the level without saving your progress. Either way, now you have all the collectibles in the archipelago.
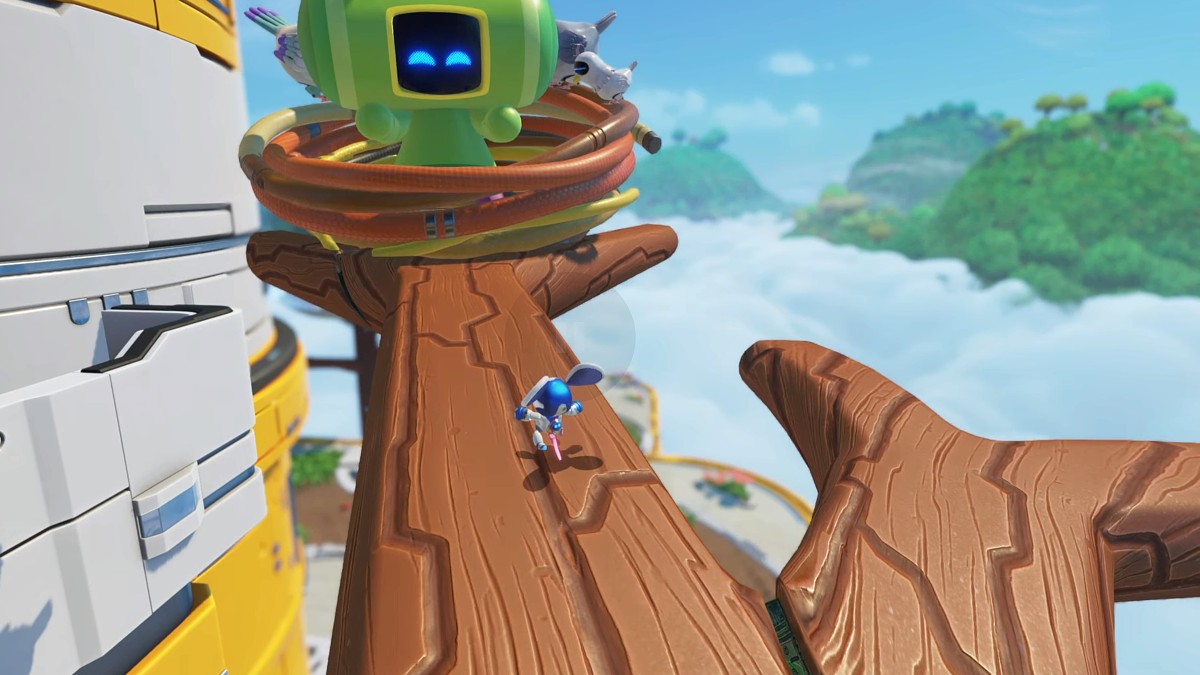
Astro Bot Trunk of Funk Walkthrough

The Trunk of Funk level starts out by looking like some flat grasslands and it quickly becomes a whackly climb up a singing tree. It’s easy to lose track of some of your progress along the way, so all the collectibles and checkpoints are detailed below.
Trunk of Funk Area 1 (Puzzle Piece 1, Bot 1, Bot 2, Puzzle Piece 2)

Like the previous area, the first puzzle piece can be grabbed as you fly into the level on your mini controller-shaped ship. Make sure to lean your controller to the right so that you can fly into the piece that is spinning inside the waterfall. If you happen to miss it, restart the level and attempt the turn again. When you have it you can land at the start of the level.
Move ahead and take out any of the spiky enemies that approach you. The only new enemy in the area is a mole that hangs out in the dirt. To defeat these, just wait for a couple of seconds before you stay suspended in the air. Shortly after the mole will miss the attack and you can pull it apart by grabbing the wire. Grab the coins that appear and then use the trampoline to jump up.

After reaching the main area, move to the edge of the map past the giant flower enemy and then follow the ridge to the right. A group of deer will appear and the first Bot in the level will be riding one of them. Smack the Bot and then continue up ahead. You can clearly see a pink mushroom with a second Bot waiting to be saved. Take down the mole enemy and then climb the mushroom to get your friend.
Keep following the left ridge until you find a green flag for golf. If you look ahead of the flag you can see where the golf tee is. Run to the tee and then line up your shot. Hit the ball so that you can easily sink it into the hole under the green flag. Puzzle piece number two will appear as a reward.
With all the collectibles out of the way, go to the left of the golf tee and hit all of the construction enemies. Hitting all five hard hats off their head will destroy the line and then the water will be clear. Wires will appear in the water that you can pull by holding “Square” to spawn a giant water gun. Aim the water at the sad-looking seed to grow a full tree. This singing tree then tells you to jump in, so follow the arrows.
Trunk of Frunk Area 2
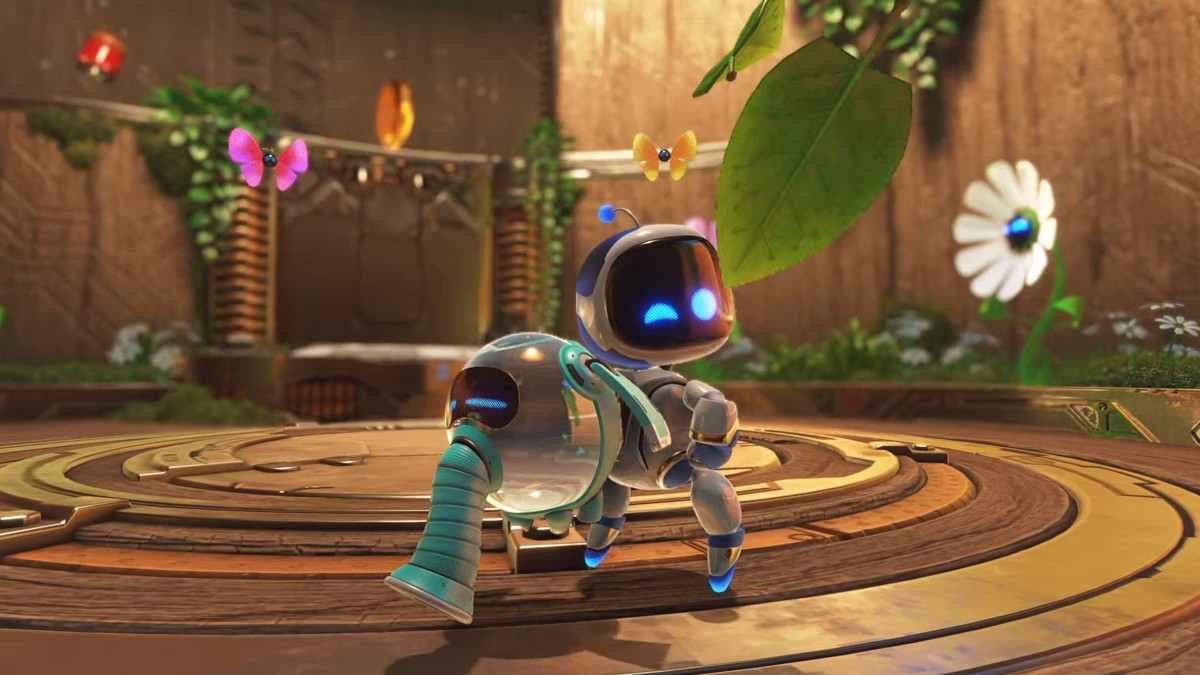
The next area introduces the level mechanic which is an elephant-looking suction tube. Hit “L2” over any green liquids to absorb them with the tube. Then you can hit “R2” to create a temporary hedge anywhere in the air for an easy platform. Use this mechanic to reach the next heights and to cross the spiky ground without taking damage.
Keep climbing up and practicing the floating hedges until you reach the giant door that marks the next section of the tree. Get ready for some more platforming at new heights.
Trunk of Funk Area 3 (Bot 3)
This section is relatively short. You can quickly use the hedges to cross and get to the next checkpoint. But if you head to the right first, you can get the third Bot. Spawn the hedges to bridge the gap and watch out for the fan that is spinning below the nest. In the nest, you can punch the egg and get Bot three. Make use of the green liquid below to get back to the start and traverse to the next area.
Trunk of Funk Area 4
Time your jumps on the platforms up ahead to avoid damage. There are three platforms that will alternate between spiky and flat. The first one has more green liquid to slurp up so you can make the hedge ground. After the first platform, just time your second hedge so you can land and glide the rest of the way
Trunk of Funk Area 5
Destroy the floating robot that charges you and then pull the wire in the wall. It will quickly shatter to reveal a room of four enemies. Three of them are standard but the fourth is new. It will throw the lid it has at range and you can dodge it before punching the enemy twice. Punches will shatter the glass and then you can slurp the green liquid that fell to completely kill the enemy and get some resources at the same time.
Run to the right side of the room and pull the wire that’s in the ground. This will spawn some steam that you can use for the next section.
Trunk of Funk Area 6 (Bot 4)

Jump over the steam and place down one of the grass platforms by holding “R2” with some liquid in your pack. The steam will push the platform further up and you can reach the next level. Up ahead is a big door with a branch path, but don’t go outside yet. Instead, turn around to see multiple mushroom platforms that lead to the ceiling.
Glide just enough to the mushrooms on the left side and use the grass platform to bridge the gap. Keep going up until you find a wire that you can pull from the ceiling. The fourth Bot will fall free along with a ton of acorns.
Trunk of Funk Area 7 (Bot 5, Bot 6)

Run outside onto the branch and keep knocking out robots as you go. You can climb the inflatable to the left for easy coins or continue to the worker robots. After dealing with the workers, jump over the steam and throw down a grass floor to glide further up. Do the same step at the next steam vent which brings you to the next branch.
Mines will be waiting for you and you can hold “Square” to spin them all off before they explode. Then you can go to the left of the caterpillar and jump across the gap to fight another liquid enemy. Beating it will spawn a wire in the trunk that you can pull. Behind the bark is a set of green cubes. Push the second one to the right to open a room with Bot five.
Before you continue on, take the new trampoline that appeared or go back to the start of the checkpoint. On a floating island is the sixth Bot and it’s incredibly easy to miss. After smacking the Bot a trampoline will spawn to easily send you back. Now just head back to the right when you return and use your grass platforms to get by the caterpillars.
Trunk of Funk Area 8
Another short area, the only goal here is to get up to the next section of the trunk. Start by jumping over the steam on the mushroom and place a grass platform. This needs to be done three times until you get to a new open with tons of bees waiting to greet you.
Trunk of Funk Area 9

Run inside and pull the wire in the center. Honey will fall out and you can slurp this up just like the green liquid. Place it down to create a honey platform directly ahead. Then you can jump on the honey blocks that are blocking the path ahead and slurp them up just like the puddles. You get more resources from this and you can easily break obstacles.
Trunk of Funk Area 10 (Puzzle Piece 3)

This is another quick section but you can get the third puzzle piece here. Run to the center of the area and take down the enemy bots. A flower enemy will appear in the center and you need to spawn a honey platform so you can punch the pink part of the flower. After it’s destroyed, kill the rest of the enemies to clear the spot.
When the flower is gone, the center of the area is uncovered and you can see honey. Slurp that up with the elephant to make way for the third puzzle piece for this level. From there, you can jump on the inflatable for an easy 30 coins or you can move to the next section.
Trunk of Funk Area 11
An acorn rope will drop down ahead of two more spiky platforms. Land on one of them to get a foothold before using more of the honey platforms. Watch out for the electric robots and grab the honey chests before getting through the next spiky platforms as well.
Trunk of Funk Area 12 (Bot 7)

Break both the honey enemies that are guarding the zipper and use them to get some honey resources. Grab the zipper to open the area and then jump all the way to the left with two more honey platforms. At the end of the path is the seventh Bot in the level. After you smack the Bot, the spikes will disappear and you can also grab all the coins.
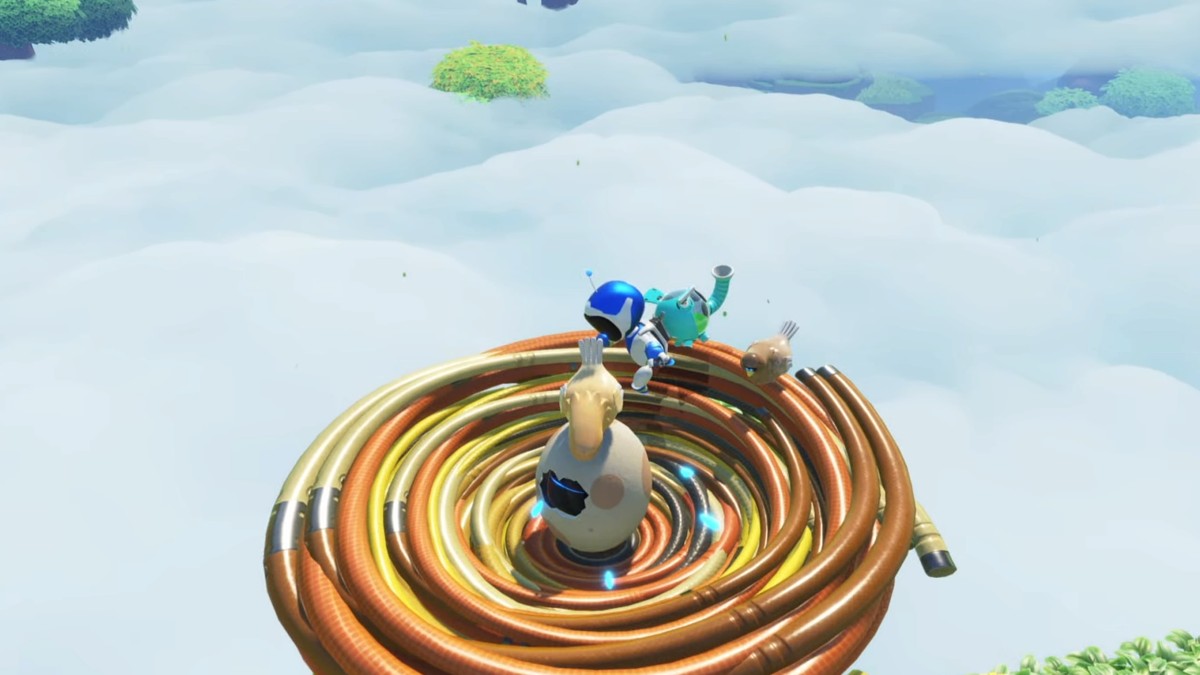
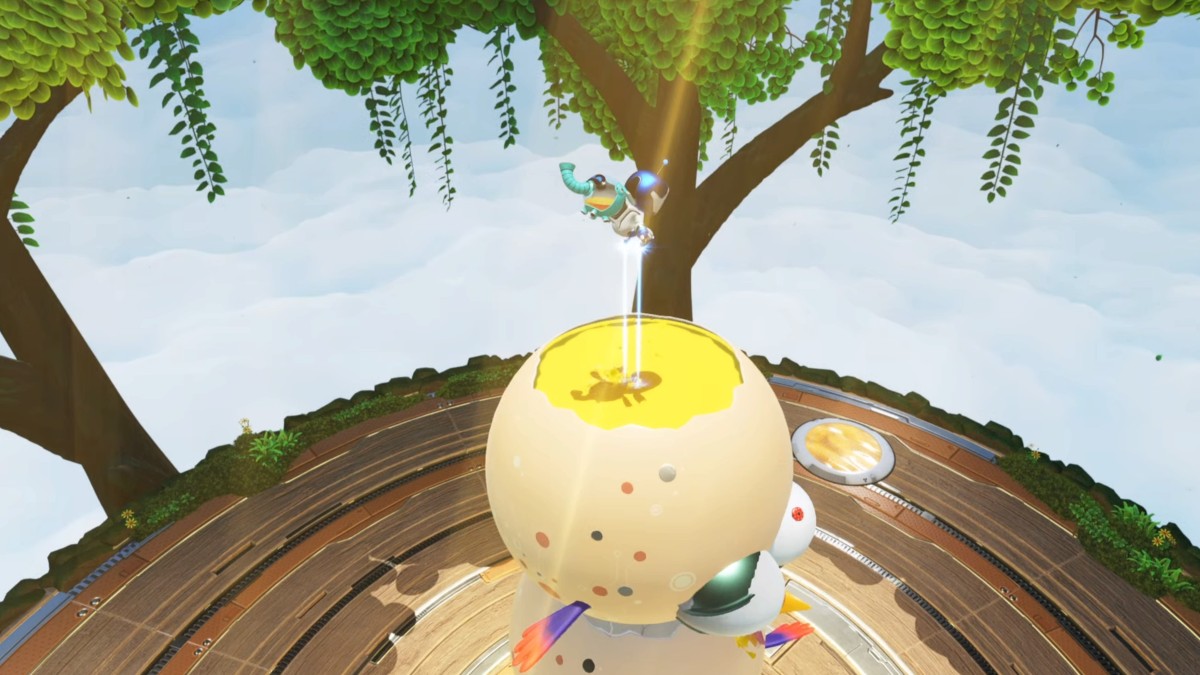
Move to the right side path after getting the Bot and move past the mines. Place down some honey platforms until you reach an egg with some cracking shell on top. Use your thrusters to melt the top and then land on the trampoline to reach the top of the trunk.
Three mini-boss birds will be waiting. All of them will stack up on each other and you need to use the honey platforms to land on the top one. Melt the shell and then slurp out the inside with the elephant. Do that for each one of the birds until the boss fight is over and the tree trunk is finally saved.
Downsize Surprise Astro Bot Walkthrough

If you’ve ever wanted to be like Ant-Man, this level is the perfect opportunity to alter you size at will. Whether it’s to reach some more Bots in the game or complete another puzzle, the mouse ability is your friend here and we have the full walkthrough for you to check out.
Downsize Surprise Area 1 (Bot 1, Bot 2, Puzzle Piece 1)
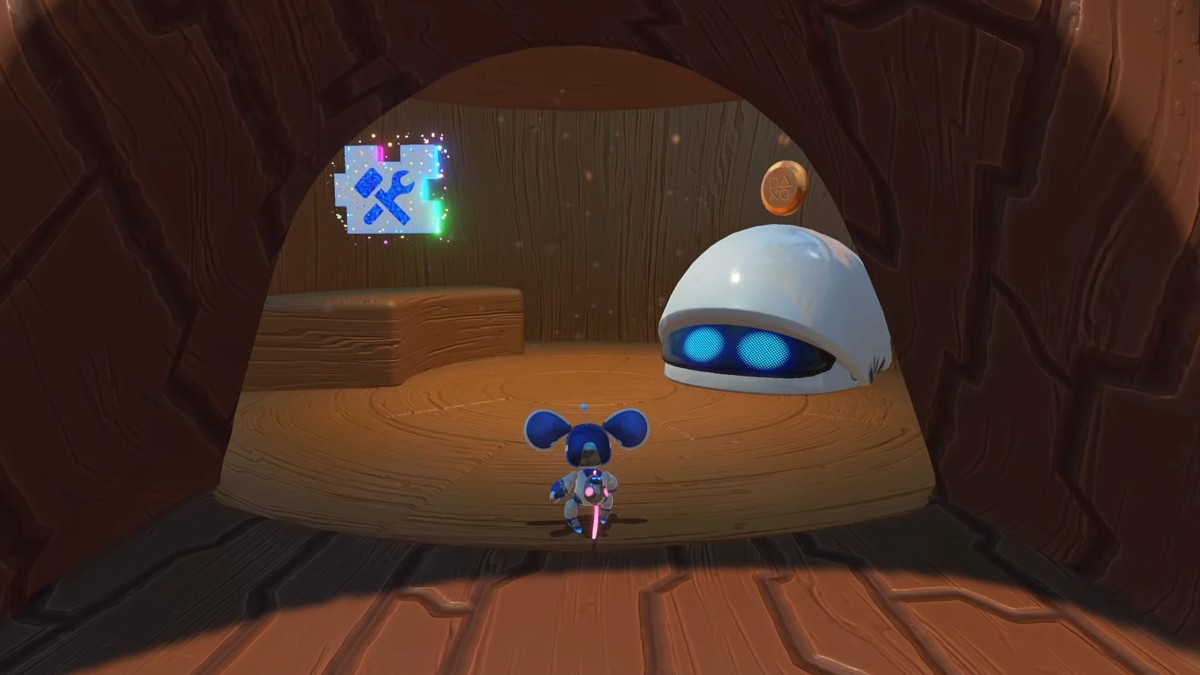
Cheese is the first thing you will notice as you land on the platform, and like so many other items in the game, you need to punch it. A chest will appear and you can open it to grab the new mouse ability. Hitting “R2” will downsize you so that you can interact with the level in new ways. Of course, leaving the cage you’re in is the first step. Then you can stay in the mouse form to climb up the leaves on the wall ahead. Remember that the smaller form is required for much of the level.
On the next platform, go to the left where some construction bots are circling a broken trunk. Punch the hardhat Bots and then pull the wire that appears at the bottom of the trunk. An opening will appear that you can enter with the mouse. Downsize to run inside the trunk and grab the first Puzzle Piece in this area.
Ahead of the tree trunk is a set of boxes covering the wall. Run over to the boxes and destroy them all before turning into the mouse. Scramble into the small opening at the lower level of the wall and return to normal size. There is an orange wall that you can smash to find the first Bot stuck on a spider web. Smack the Bot and head back outside to the center of the main platform.
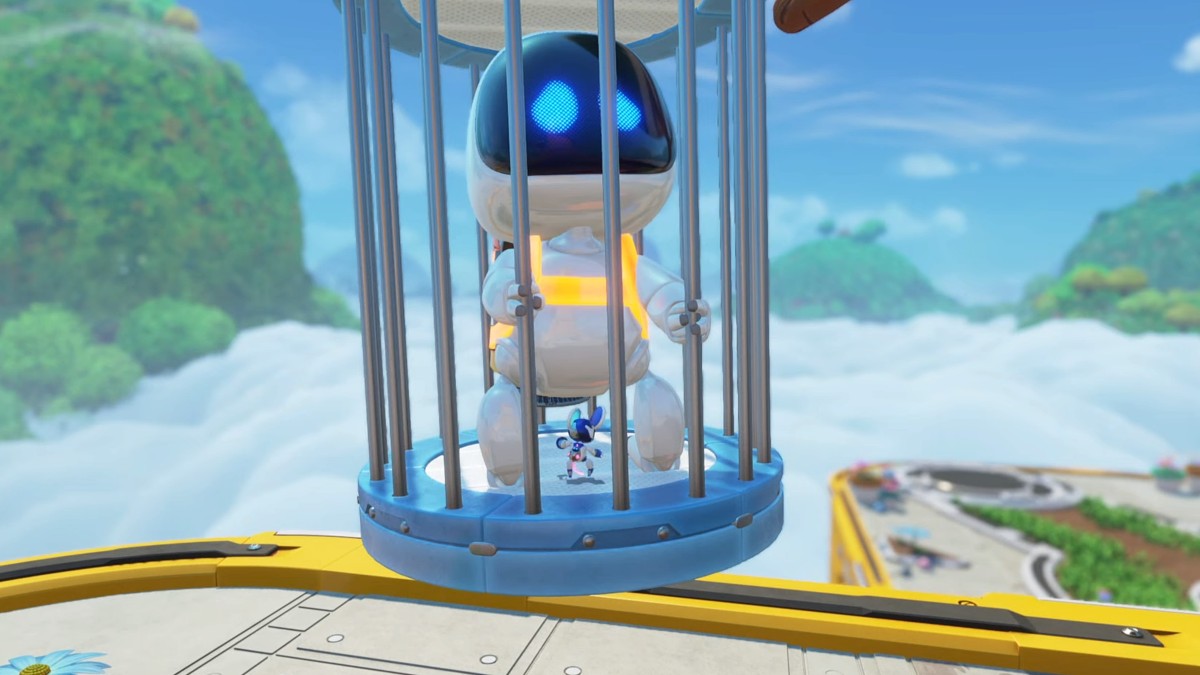
Bot number two is stuck in a cage. Turn into the mouse form and climb the mushrooms. If you are in the normal size, they will collapse, so remain small for the time being. Climb the mushrooms and then glide into the cage. As soon as you’re inside, transform so that the cage bursts and the second Bot is free to go back to the ship. With the Bot free, keep going to the right and pull the wire on the wall to open a vent.
Downsize Surprise Area 2 (Bot 3, Bot 4, Puzzle Piece 2)
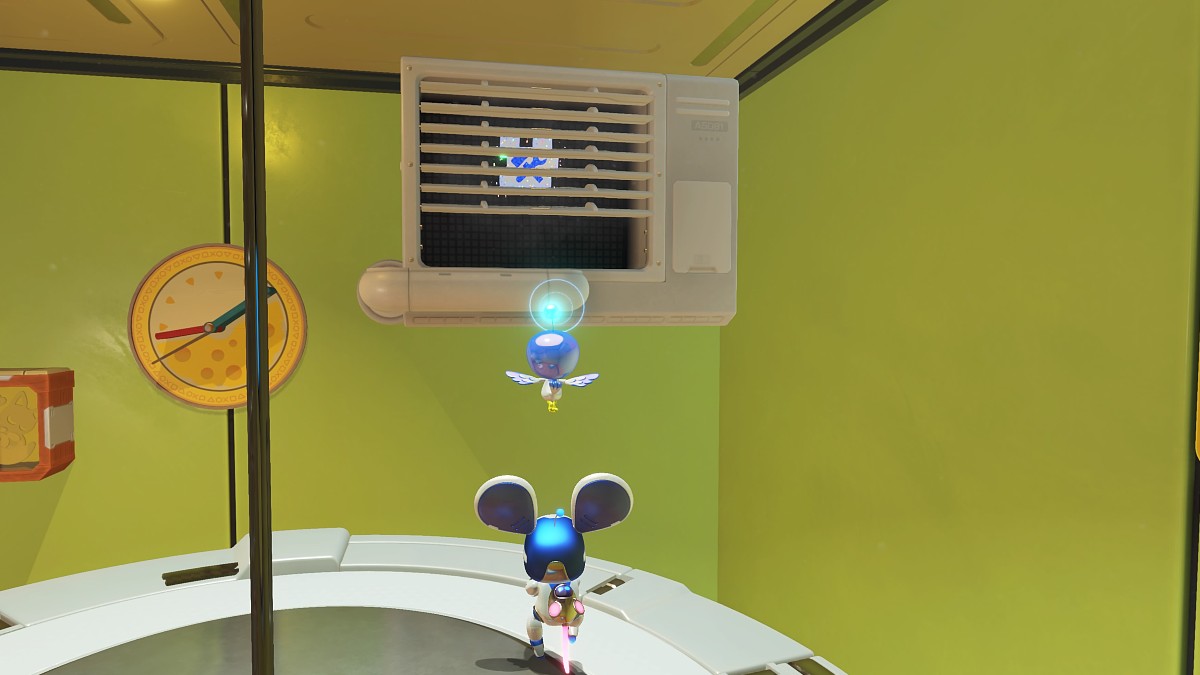
With the vent open, downsize yourself so that you can float to the next platform. You will find a wire on the ground there that can be pulled to unlock a spout. Like the vent, downsize so that you can float to the clotheslines. Grind on these So you can reach the pipes on that wall that lead to a window.
The window leads to a small bedroom that is packed with coins and collectibles to find. First, jump down and remain in the mouse form so that you can go under the blanket on the bed. Once you go back to the normal Astro Bot size, the blanket will fly off and you will find Bot three in this level. Give him a smack before turning to the right to see a small pot on the ground. Downsize and jump on this flowerpot so you can spin on the blue platform. This takes you to a series of trails on the wall that lead to the vent at the top corner of the room and the second puzzle piece.
Now just jump back on the bed and downize yourself so that you can use the headboard leading to the next window. You’ll see a Bot look down at you as you move through the window, and when you reach the other side, the Bot is hiding on the wall above you.
Downsize Surprise Area 3 (Bot 5)
You know the drill at this point. There is a tree to the left of the window you exited that has mushrooms and leaves to climb. Transform into the mouse and climb to the top. Before you go to the next platform, though, glide to the branches on the right to find a green Bot in a nest. This is the fifth Bot in the level and another easy find like the last one.
Grab any coins you want along the tree branches and then go to the designated platform to reach the next part of the level.
Downsize Surprise Area 4 (Bot 6, Bot 7, Lost Galaxy, Puzzle Piece 3)

When you jump off the tree, we recommend going to the left first so you can grab a couple of collectibles. Break the blue glass on the ground with your thrusters so you can reach the next level. On the next platform, there is a frog surrounded by small fans. You need to literally blow on your controller for a couple of seconds to provide the wind. This will cause bubbles to be blown by the frog.
Jump on a bubble and float until you find a cage with Bot number six. Jump inside the cage as the mouse form and return to normal size to break the cage. Smack the Bot and then jump on another bubble. Only this time you must wait longer to reach another tree branch. Glide off of the bubble at the top and you can see the flag for the Lost Galaxy on the other side.
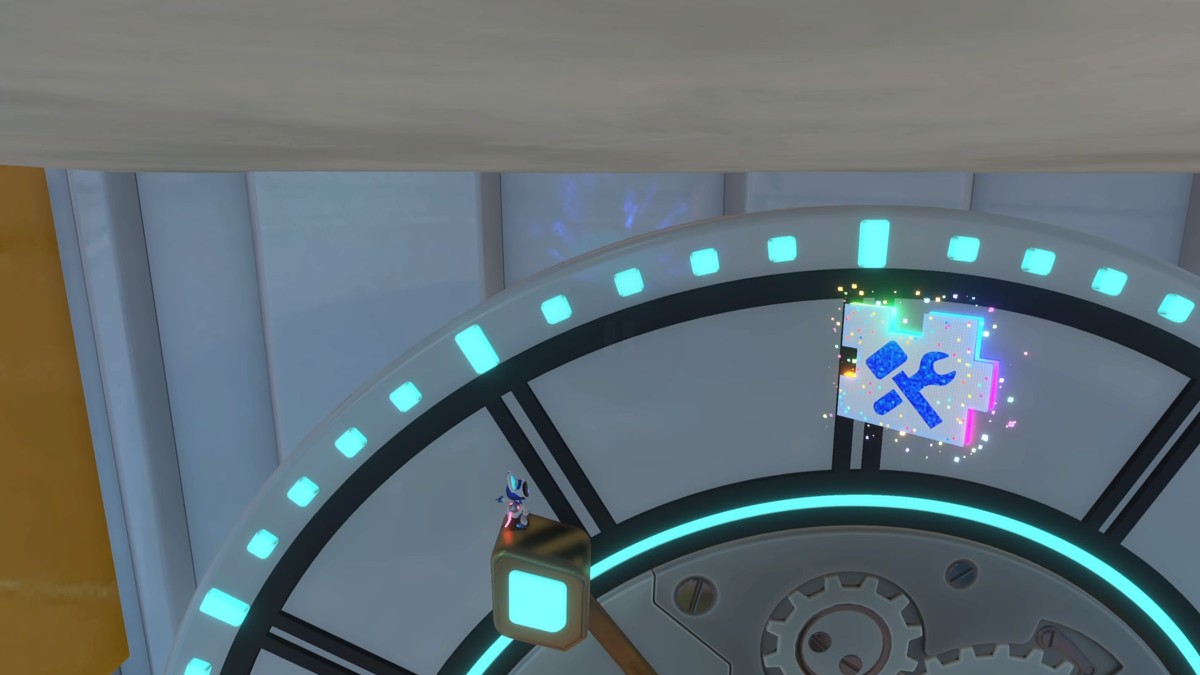
Head back down to the platform at the start of the level where a cat is looking at a blue hole. Downsize yourself so you can enter. The lock will smash so that another room opens. Punch the red button inside and use the mouse form so you can glide across all the gears on the wall. Eventually, you will reach a small balcony outside. Don’t miss the seventh Bot holding onto the edge.
Stay in mouse form so that you can use a blue spinning platform on the wall to reach the clock above. There are three hands on the clock, and if you wait for the one that moves, it can take you to the third and final puzzle piece in the level. Once you snatch it, keep going right until you get back outside and find a rope. Hang onto the rope and jump inside the box it takes you to in order to end the level.
Astro Bot Wako Tako Walkthrough
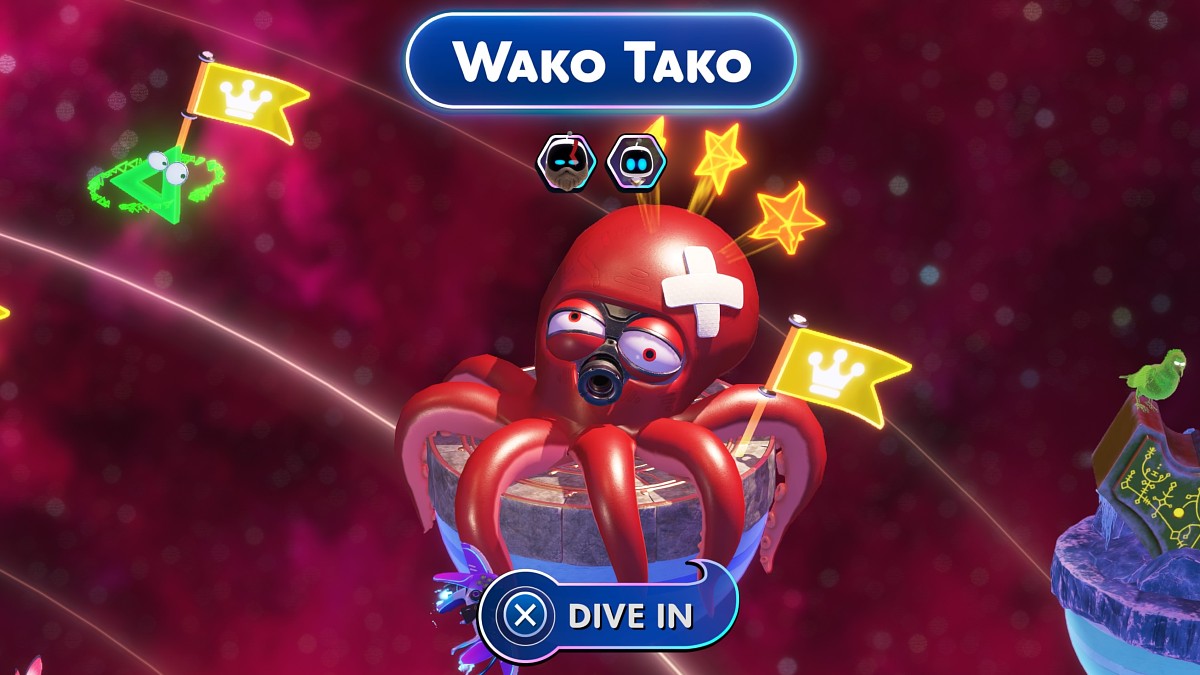
All of the major bosses in this game can be represented by the shape of their system, and in this case, it’s a giant octopus. You’ll be brought to an island with another set of gloves like the ones in the Gorilla Nebula to take down the beast. Below you can find the full outline of this locked level.
Wako Tako Area 1

Right after landing on the beach, there will be two octopus enemies that you need to take down. Grab the blue chest on the right and then head onto the ship up ahead. There is a barrel that has a wire on the end of it that you can pull to destroy it. A blue chest will pop out and you can open the chest to equip some frog gloves. Now you can punch with “L2” and “R2” for more range and strength.
Punch the barrels around you to smash an entrance. This is just a test to use the boxing gloves again before you move ahead to the next checkpoint.
Wako Tako Area 2

Hop onto the small grass platform and look ahead at the red cylinders. These can be punched with the frog gloves so that you stick to the cylinder. Then you can swing with momentum and grab the next red cylinder in the same way. Land on the opposite area and get ready to fight more robots that the octopus arms are throwing on the columns.
Continue along the path and swing across a few more red cylinders to reach one last stretch of grass on the stones. Glide to the left side for some easy coins and then take down all of the enemies in your way. At the end of the path is a slingshot. Punch both sides and then pull back to catapult yourself to the boss arena below.
Wako Tako Area 3 (Boss Fight)

On the beach, you can look at the water to see an octopus snorkeling. He will quickly find you and then swim over to the beach. When the fight begins, Wako Tako will start slamming the ground. Each attack will be marked with a yellow circle. Avoid these at all costs and keep dodging until all of the combos slow down.
At the end of the downward punches, one of the gloves for Wako will be stuck in the ground. Use the frog gloves to punch the purple symbol on the metal of the glove. With a few hits, the metal will break and the glove will fly off the tentacle. Wako will jump over the beach and spawn a few enemies before he starts throwing punches from below the sand. Beat the enemies and prepare to dodge some more.
Like before, one of the gloves will get stuck in the sand from a different direction. Punch the glove in the same purple spot to send it flying and remove yet another weapon for the octopus. The two free tentacles will go in front of Wako’s face and you can use them as a slingshot to slam yourself into its eyes. The boss will slump over and another purple symbol will appear on the goggles. Start punching these to remove one part.

Wako will swim away and then start launching spiky balls when he reappears. Use the gloves to punch the balls into pieces or keep dodging. Eventually, they will start and the octopus will start sending one slow punch directly at you. Run to the opposite end of the beach so that the glove slows down and you can punch the next purple symbol.
The last mechanic involves pools of ink on the ground. Wako will continue to try punching you from above and you need to bait the attack into the ink. This causes the last glove to get stuck so that you can destroy all its attacks. Then you can do one more slingshot attack to knock down Wako and destroy the goggles.
Wako Tako Area 4 (Boss Fight Part 2)

With no defenses left, the boss will flip away from the beach and completely split the ocean. Now you need to jump down and make your way across the chasm with some classic platforming. Most of the platforms consist of some small enemies, spiky platforms, and red cylinders. Dodge the spikes and use the cylinders to launch yourself to subsequent platforms.
When you jump across cylinders, make sure to watch out for waves sent by Wako. The boss will send the waves to knock you over and you need to be high enough to avoid being swept away. Get past all the obstacles until you’re back in front of the boss. Some more spiky balls will be tossed at you and then his eye will go to the ground. Punch the eye quickly before more spiky balls are shot out and do the same process for the second eye.
Both eyes will be swollen and you can grab the goo on both sides to slingshot yourself one last time into Wako’s head. The storm will clear and then a flipped boat will appear in the water. Punch the boat to flip it over and find Kratos with Atreus. This marks the end of the levels all the way up to the system boss.
And that’s the Astro Bot Tentacle System Walkthrough.
If you’re looking for a guide for another level in Astro Bot, head on back to our hub page by clicking on that fancy blue text, as that’s where you’ll find our other walkthroughs for the game’s various levels and how to get every collectible.
Astro Bot is available to play now on PlayStation 5.


Published: Sep 12, 2024 12:33 am