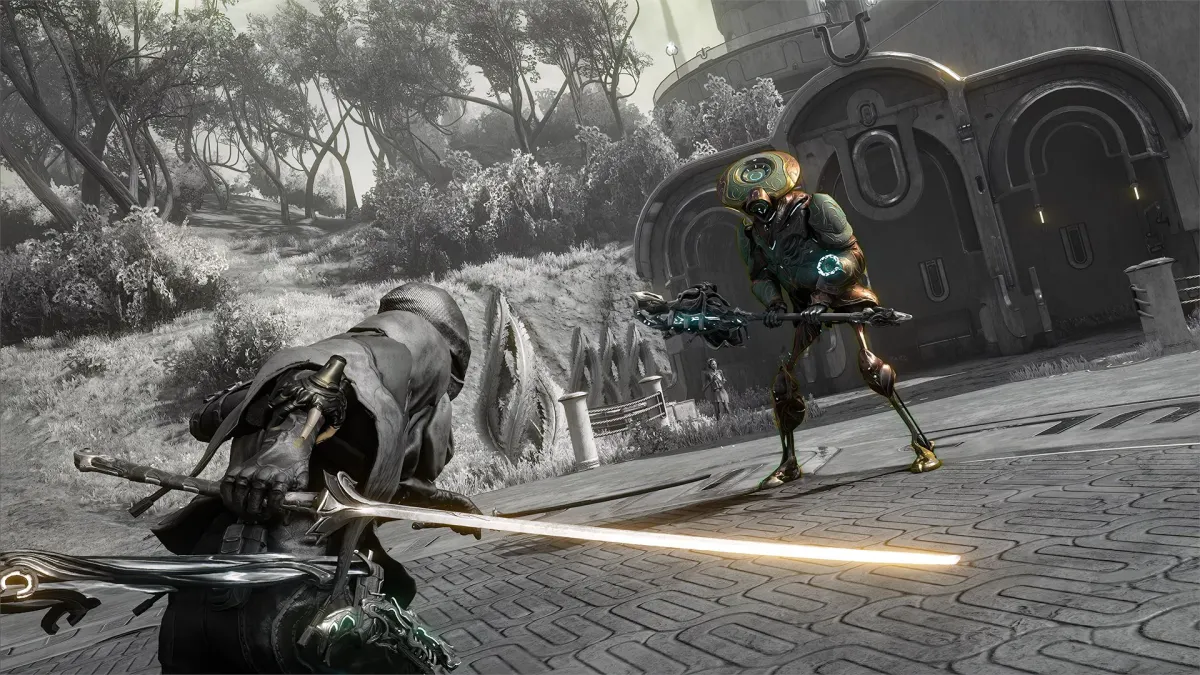
Warframe has come a long way since its release back in 2013. Not only does it have an insane amount of content these days, but it’s also gone through a series of graphical upgrades, adding more and more options to make your Warframes look as sleek as possible, plus the environments you dash around like an armored ninja look incredible to this day. In this guide we’ll be covering the graphics settings that you can use to get the best looking and performing version of Warframe possible!
Best Graphics Settings for Warframe in 2023
The first optimization takes place before you even start the game. Warframe uses a custom launcher, and we’ll make the first tweaks to improve the game’s graphics and performance in the launcher’s settings. On the launcher, find the very little cogwheel icon in the top right corner to open the launch options:
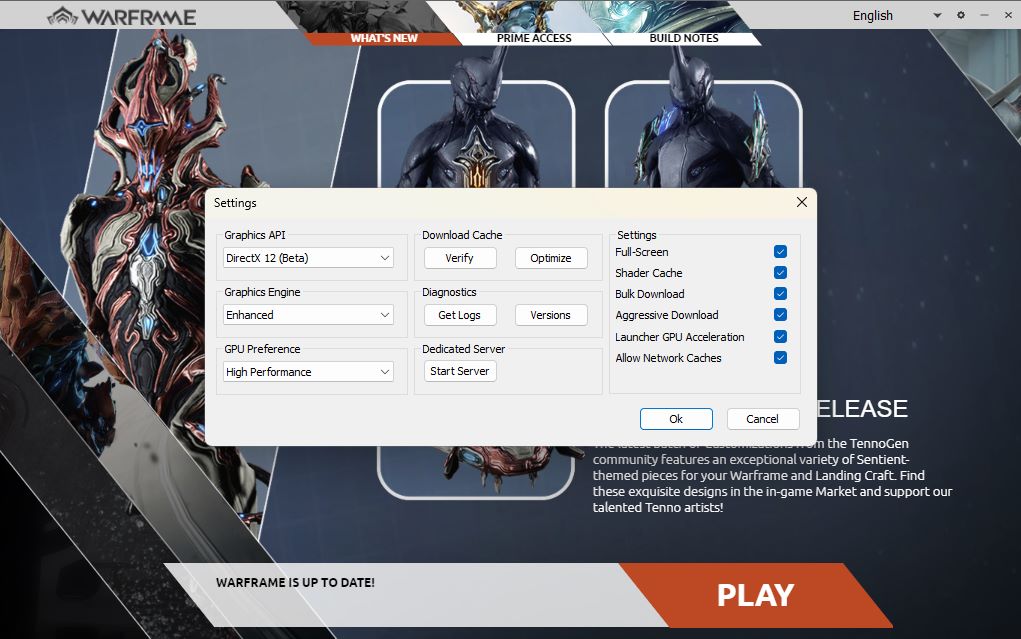
In this menu, change the Graphics API setting to DirectX 12 (Beta), the Graphics Engine to Enhanced (you’ll need a decent gaming PC to power this option), and GPU Preference to High Performance. With those changes made you can now launch the game.
The in-game menu of Warframe is where we will tweak the rest of the graphics settings using the Video tab. I’d recommend going with Fullscreen for the Display Mode, but you can use Borderless Fullscreen if you like to tab in and out a lot to make that smoother. In general, though, Fullscreen offers the best graphical fidelity and performance. Set your monitor’s native resolution in the Video Resolution tab and your monitor’s native refresh rate in the Refresh Rate tab. Set the Aspect Ratio to Auto, and it will be based on your set resolution. Turn Vertical Sync off and set the Max Framerate as the same as your monitor’s native refresh rate you set above. Leave Brightness and Contrast as they are and I’d recommend increasing the Field of View up to 80.
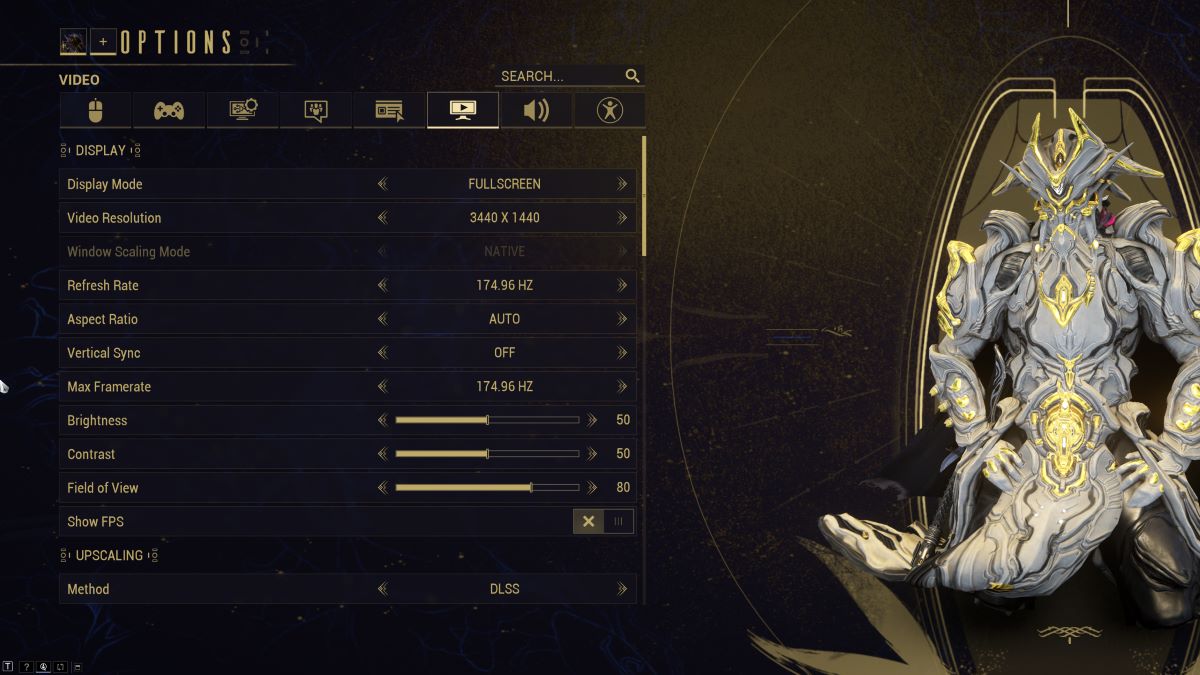
For Upscaling, use FSR if you’re running AMD or DLSS if you’re running a NVIDIA graphics card to upscale your resolution and improve your performance with a minimal decrease in graphical quality. I’d recommend most people use this, especially if you have a higher FPS target. You can choose either Quality or Performance as the target of the Upscaling method chosen; I would choose Quality as the option here unless your PC is crying and you really need the extra performance. If you want the best possible graphics quality, though, you can turn off upscaling entirely, which will give you the best visuals at the cost of the extra FPS.

Leave the Graphics Engine on Enhanced unless your PC is struggling. If you have a high-end PC, you can set Geometry Quality, Shadow Quality, Texture Memory, and Particle System Quality to High and GPU Particle Quality to Ludicrous for the best possible graphics. If you have a mid-range PC that can’t quite handle those settings, you can drop them back one level to Medium and High for the GPU Particle Quality. If you’re using upscaling, you won’t need to worry about the Anti-Aliasing settings as they will be handled by the Upscaling engine. If not, select TAA 8X (High) for Anti-Aliasing, leave TAA Sharpen at 50 and Sharpen Temporal VFX on. Set Anisotropic Filtering to 8X and turn Trilinear Filtering on.
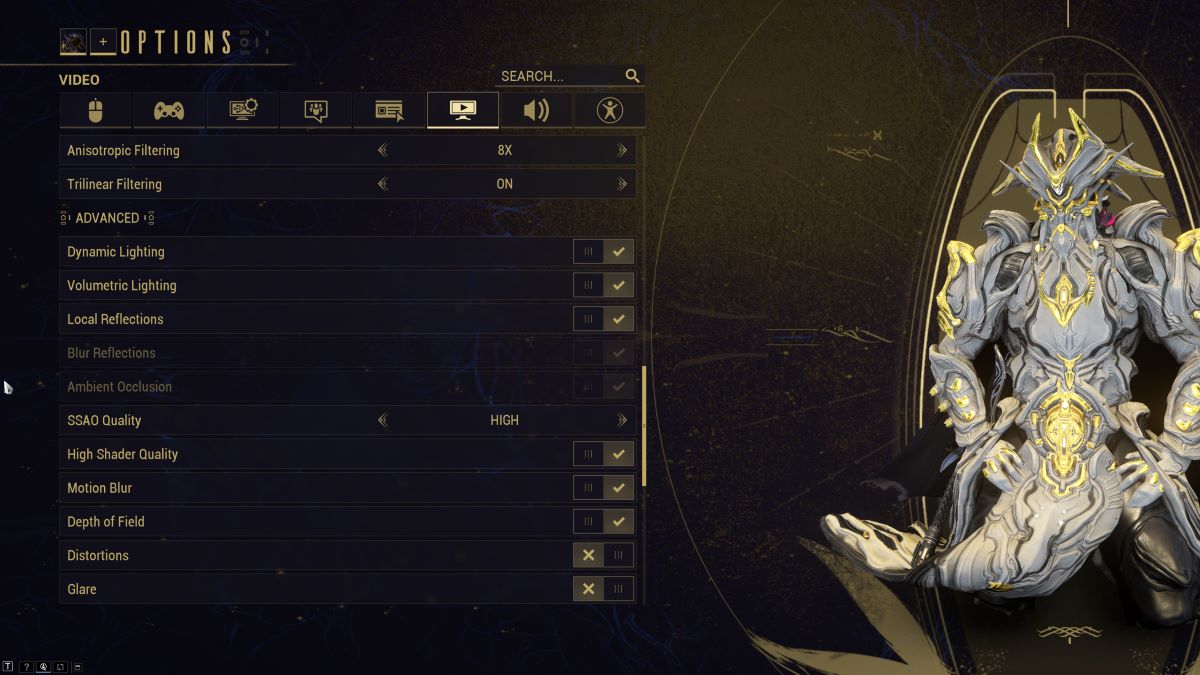
For the advanced options, turn on Dynamic Lighting, Volumetric Lighting, Local Reflections, Blur Reflections, and Ambient Occlusion. Set SSAO Quality to High (or Medium if your PC isn’t as powerful). Turn on High Shader Quality. You can leave on or turn off motion blur; that’s a personal preference. Enable Depth of Field, turn off Distortions, Glare, and Film Grain but enable Bloom and set the intensity to 30. Enable Weapon Elemental FX, disable Color Correction, enable Contact Shadows, Character Shadows, Sun Shadows, and Enhanced Decals.
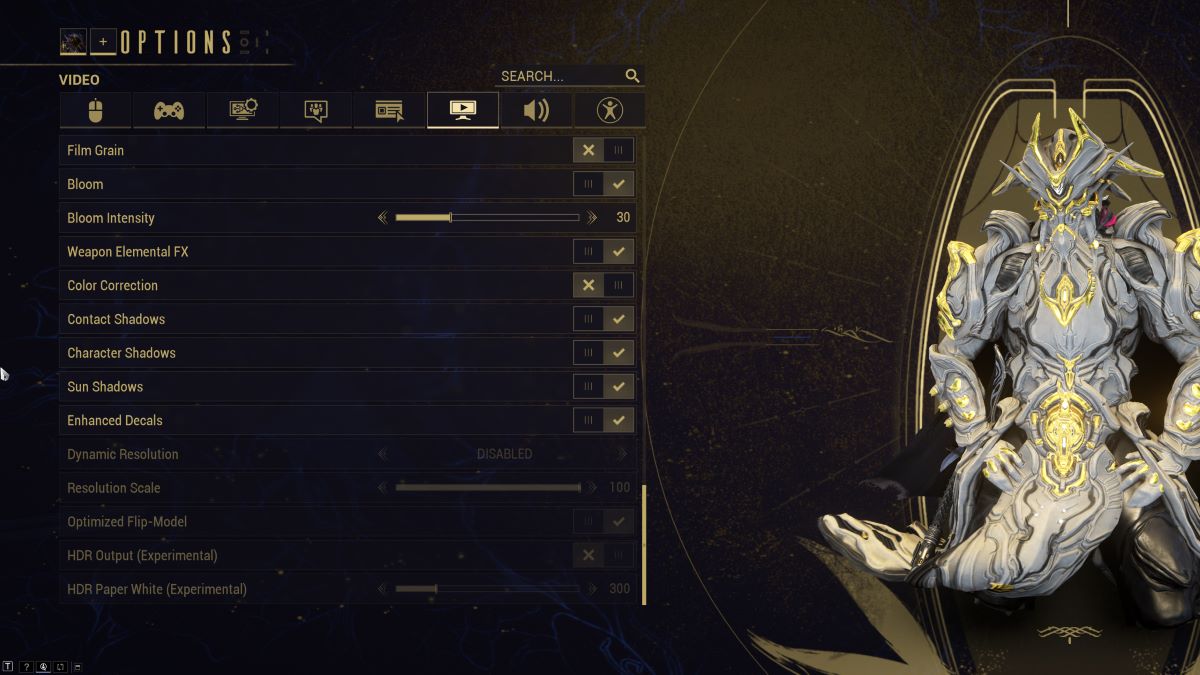
Dynamic resolution should be disabled and if you have HDR, I’d recommend not using it as it doesn’t work very well just yet and that’s it!
With those graphics settings, you’ll have the best looking possible version of Warframe that your PC can handle. Now, you can glide around the maps in style and take in the spectacular visuals that this 10 year old game can still muster thanks to the effort of a very dedicated team behind its continual improvements!
Related: How to play the Warframe 1999 demo on Destructoid.







Published: Jul 18, 2023 09:54 pm