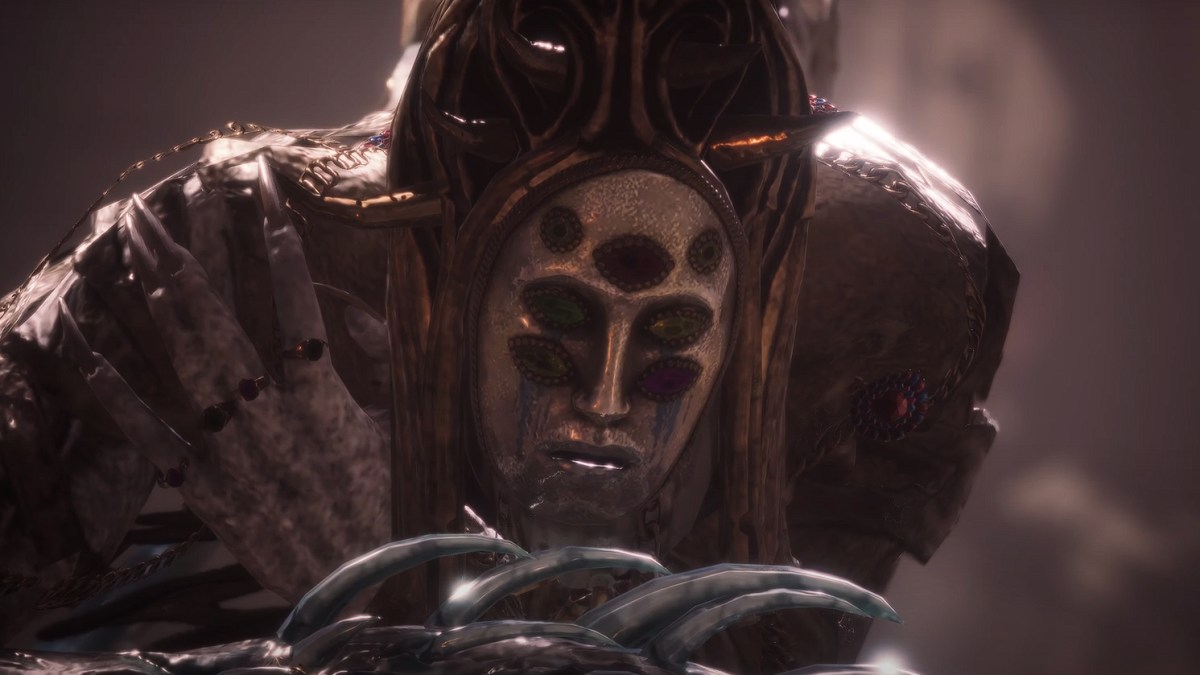
Are you having a tough time trying to beat the Fallen Archbishop Andreus in Lies of P? The second of four major bosses Geppetto sends players to deal with, Andreus is a grotesque, half-rotting beast with an upside down face and split-open jaw attached to a shell made of ribs. Imagine a snail with alligator arms. He’s also the first boss with two distinct stages, meaning after defeating the first get ready for a refreshed battle with a whole new health bar and a much meaner version of the Fallen Archbishop. If you’re struggling with the boss, here’s how to beat the Fallen Archbishop Andreus in Lies of P.
How to Prepare for the Fallen Archbishop Andreus in Lies of P
Andreus is a Carcass, and like the smaller monstrosities you’ve had to deal with on the way to him, he’s weak to fire damage, though he also seems susceptible to electricity as well. You should equip the Flamberge Legion Arm as well as the Flame Grindstone you received from defeating the King’s Flame, Fuoco. Additionally, you can make use of throwables like Pulse Cells, Fire Canisters or Thermite, but they may not be easy to come by, so save such items for the very end of the fight if needed. Carcass creatures can also affect you with Decay, so bring along some Purification Ampules if it becomes a problem.
Andreus isn’t especially fast, so you should be able to make use of any high damage, hard-hitting weapons you have on hand. Combining the Big Pipe Wrench Head with something that has a medium range, like the Electric Coil Stick handle or Fire Ax handle, can give you a good balance of damage and speed. High damage mitigation for blocking will also come in handy, so unless you are a parry god leave the small blades at home.
How to Get Past Phase 1 of Fallen Archbishop Andreus
Speaking of parrying, you may need to do a fair bit of it in the fight to beat Fallen Archbishop Andreus in Lies of P. Andreus has big wind ups for many of his attacks, so you should watch and learn his timings for the first few attempts. He’ll use these attacks in the first phase of the fight:
- A tongue lash.
- A two-hit tongue lash (from above then from the right).
- A two-hit slow overhead, followed by a swipe from the right.
- A two-hit swing from the left, followed by an overhead smash, followed by a delayed swipe from the right.
- A double=armed slam with a big windup, followed by a swipe from the left with the far hand.
His red unblockable is a slow to start butt stomp where Andreus raises his body off the ground with his arms and crashes back down. It’s not too difficult to parry, but you can also easily avoid it by sprinting backwards or even running straight under to the other side if you’re close when he starts the animation. Afterwards, he’ll slide across the ground to reposition himself, so watch out for that.
If you’re still finding it difficult to parry what’s coming, you can take advantage of the regain mechanic in Lies of P. When Andreus starts to wind up, just block the first couple of attacks and wait for the finishers, which tend to have even slower and easier to read wind ups. Successfully parrying with health to regain will instantly fill your health back. Andreus won’t leave much down time between his attacks, so your openings will be in the moments right when he finishes an attack and winds up another.
If you are managing to parry regularly, you will weaken the enemy’s stance, which you’ll know by the flashing white border around the health bar. Landing a fully charged heavy attack will stun the boss. Don’t be afraid to sneak in one more charged heavy attack before getting in place for the fatal attack (normal attack in the red circle.) Follow that up with another charged attack or Fable Art right after. This is how you’ll need to deal the bulk of your damage. Conversely, if you get the health bar to flash white and don’t have an opening for the charged attack (Andreus will fall to the floor for a short bit), then only attempt it after fending off his next series of attacks if the bar is still flashing. It’s usually not worth the risk of being interrupted, because the boss can still attack freely.
Be careful not to let Andreus push you too far into the corners. His large body can completely trap you, and the camera won’t help you see any incoming attacks in that state.
Related: All Record Locations in Lies of P
How to Get Past Phase 2 of Fallen Archbishop Andreus
Once you’ve defeated the first phase, the boss will crack open his ribcage shell to reveal a one-winged humanoid centipede protruding from its back. It’s the Archbishop wearing his mitre and holding his pastoral staff. The fight will now continue on two fronts, with the Beast from the first phase on one side and the Archbishop on the other.
The Archbishop side will use the following attacks:
- A lunge forward with the staff. This attack has a big windup and travels a considerable distance. Side stepping to the left should be safe, but a parry is the better option if you get the timing down.
- A swipe across from the right, followed by an overhead attack.
- A smash at the ground, followed by a dragging swipe from the right, then a stab with the staff at the ground, and finally a launcher attack when pulling the staff back up.
- A two-hit swipe from side to side.
Andreus can also swipe from the left, turning completely to have the Beast side face you.
His red unblockable is a butt stomp that takes a couple of large steps forward, usually positioning the Beast side to face you. You should generally run under him to safely get clear of the attack.
While facing the Beast side in phase two, it will have new and alternate versions of its previous attacks:
- The double-armed slam from phase one is now much faster and followed by a faster swipe from the left with the far hand.
- A tongue lash that now combines both versions (single attack from the left followed by overhead then lash from the right).
- A run-up swipe from the right.
- A single stomp from the left (can be followed up with a swipe from the right).
- A four-hit combo starting with a stomp on the left, right, and left, followed by a swipe from the right.
- A five-hit combo starting with a stomp to the left and right, followed by a swipe from the left, a delayed overhead attack on the left, then a delayed swipe from the right.
- A six-hit multistomp. The Beast will stomp starting from the left and alternate between the right and left. After five stomps, it will swipe from the right. You should run to create distance if you clock this attack starting up. Otherwise, attempt to block first and start to parry as soon as you have the timing.
- A head swing from the left, this is rare but try to look out for the beast positioning both arms to the left he’ll then swing his head at you quickly afterwards.
When the second phase starts, use your Fire Grindstone before The Archbishop reaches you. He generally opens up with the lunge attack, leaving himself open to two or three good hits after he misses. It won’t be long before he switches over.
The Beast side actually does most of the fighting in phase two; it will very rarely switch back to the Archbishop side, generally with a big swipe from the right that turns them around, or the same red unblockable multi-step butt stomp. If you can get accustomed to the Archbishop’s smaller move set, it may be worth forcing him to fight you by constantly running around to his side. There’s the added benefit that the Archbishop may be docile as the Beast side is still throwing out attacks and will take a moment to switch his focus, but he is faster and often elevated off of the ground, making him more difficult to hit consistently. He’ll also be quick to attempt to switch back to the Beast side.
Once you get Andreas down to 50 percent health, get as far away as possible, as he will unleash a devastating Ergo attack from both sides in the form of a beam of energy from the Beast and a large area of effect from the Archbishop. Once that has cleared, either close the distance quickly to attack, as he’ll be down and exhausted for a short while, or use the time to sharpen your weapon and apply the Flame Grindstone if you didn’t use it earlier.
Related: How to Expand Hotel Krat’s Stores in Lies of P
Both sides will gain a new attack:
- The Archbishop can spew toxic bile all over the arena. This can very quickly give you the Decay status effect, so use your ampule if you get caught.
- The Beast will charge you wildly. This is the most difficult attack to dodge from this boss in my opinion. After a short roar, the Beast will storm towards you, attacking twice. He’ll then storm at you again for another two attacks, followed by a red unblockable attack from the right. Parrying is quite difficult because of the multiple hits. However, if you block the first two charges, parrying the final unblockable attack is your best shot. Unless you’re a significant distance away, sprinting clear of this attack is near impossible because of its speed. This attack is most likely to show up during the last 25 percent of the boss’ health, but it can also rarely show up before that.
If you’re going to use the Specter AI partner, be sure to attempt to fight alongside him in front of Andreus, as hitting his ribbed shell will deflect your weapon. It’s also much harder to see some of his sweeping attacks from the sides or back due to his size, so try to hog as much of the boss’ attention as you can in the first phase. If the Specter makes it to phase two with you, unleash your Flamberge Legion Arm anytime Andreas is distracted by the Specter. It will apply a massive amount of damage if you get him to overheat and then continue to light him up.
Don’t forget to make use of your throwable items in those final moments. Throwing out damage at a safe distance may very well get the job done in those final moments.
What Drops Do You Get for Beating Fallen Archbishop Andreus in Lies of P
When you beat the Fallen Archbishop Andreus in Lies of P, you’ll get the following items:
- Twisted Angel’s Ergo
Fallen Archbishop Andreus is a grueling boss fight that will force you to utilize all of the mechanics to which Lies of P has introduced you up until that point. Once he’s defeated, though, your journey is far from done, as next you’re headed to the Malum district to deal with the Eldest of the Black Rabbit Brotherhood.
If you’re looking for more on the game, check out where to find all the Legion Calibers in Lies of P.


Published: Sep 27, 2023 3:10 PM UTC