The Forsaken Giant is easily the most challenging boss in Once Human and a swift way to determine whether your equipment is up to snuff. Here’s how to beat the Forsaken Giant in Once Human.
Table of Contents
How To Beat the Forsaken Giant in Once Human
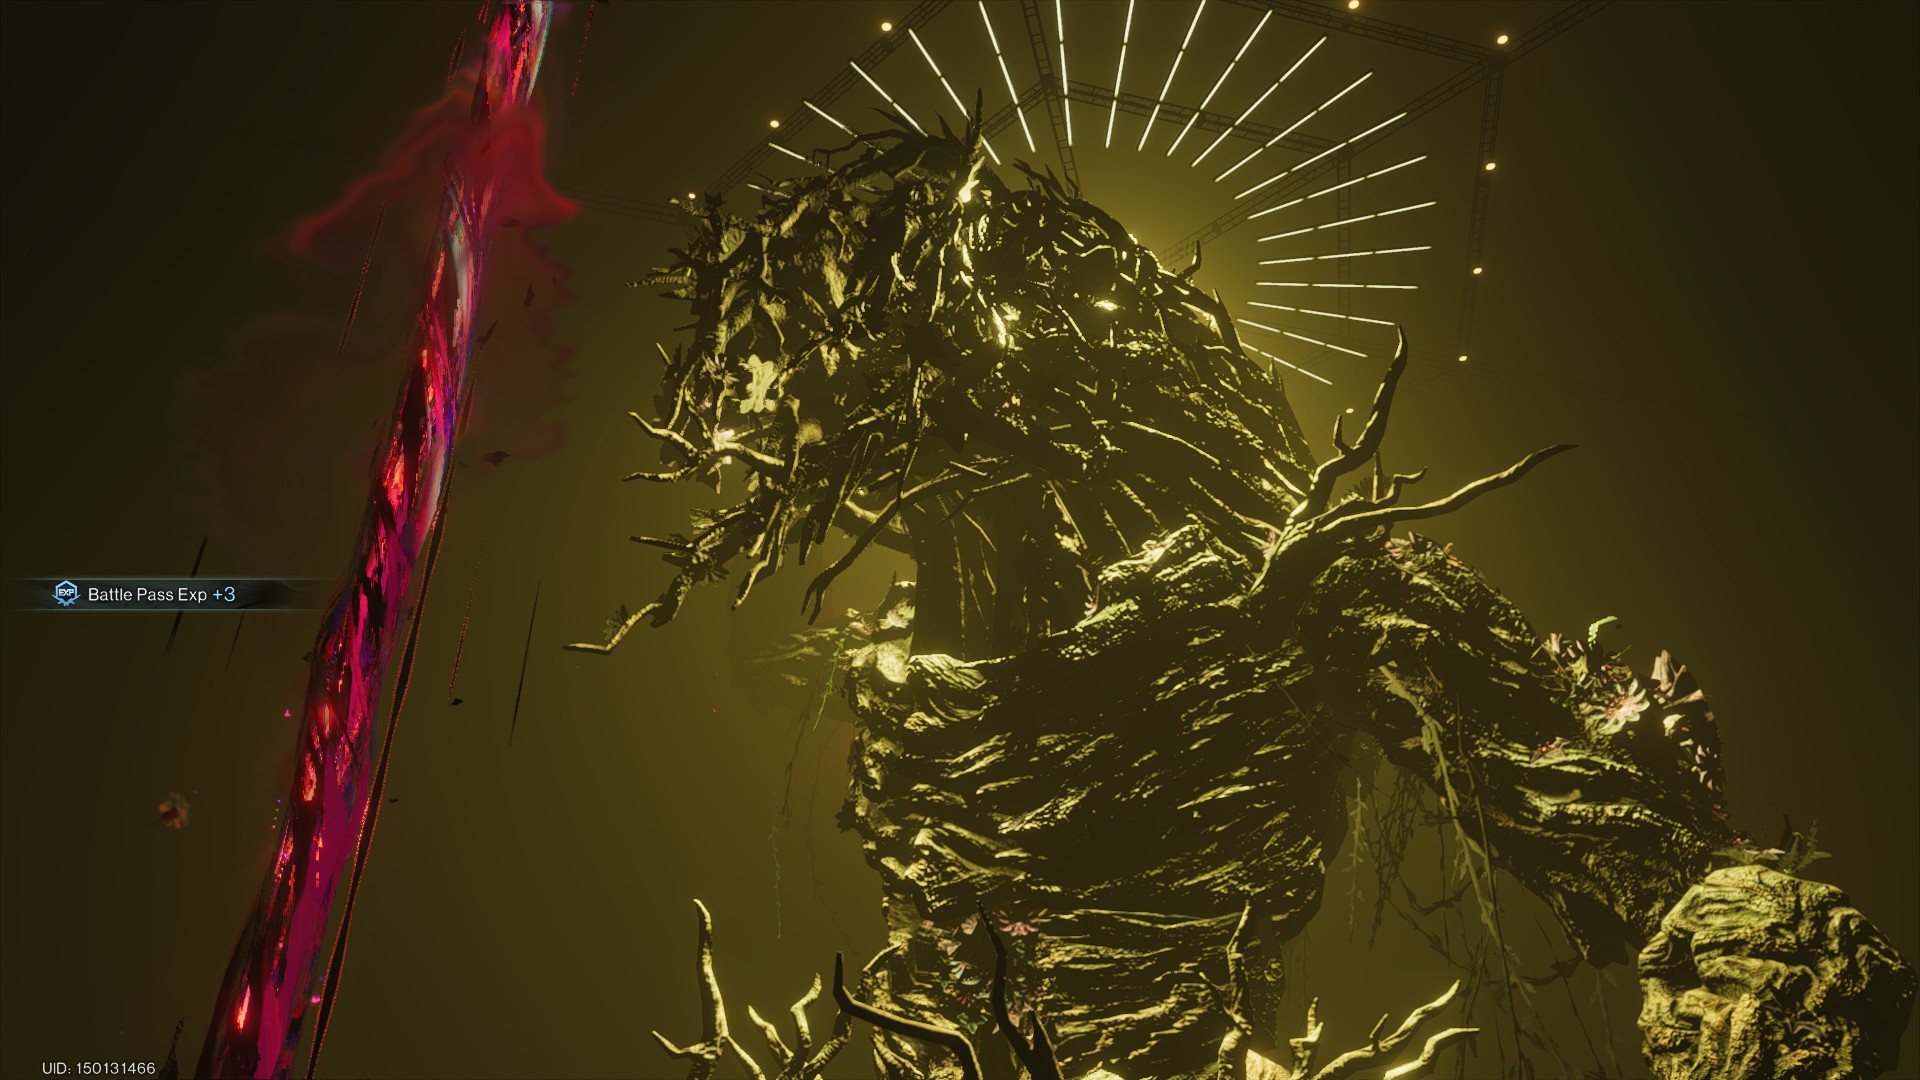
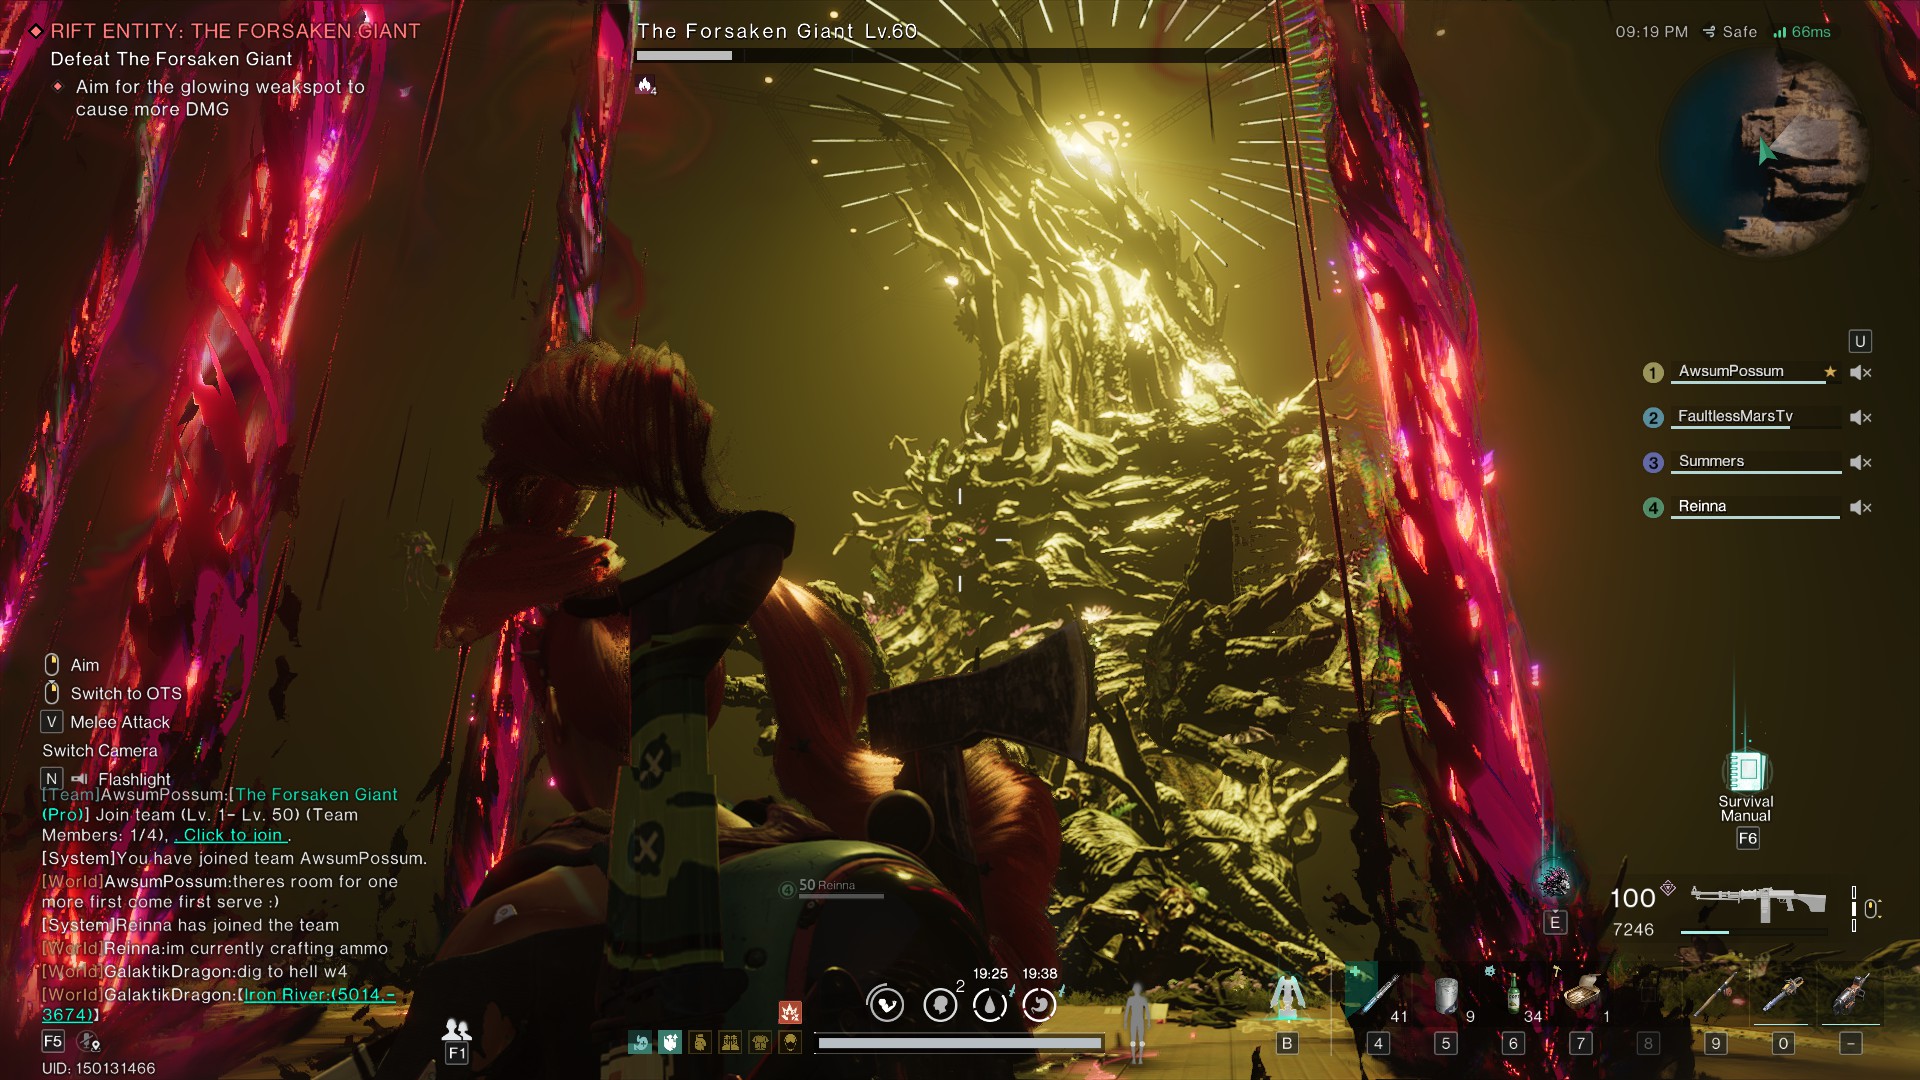
The Forsaken Giant is the last Monolith boss you’ll need to tackle in the Manibus season in Once Human. This massive Deviant dominates a long stage, where it will attack you with a series of sweeping attacks, fist slams, mobs, and eventually pillars of Deviant energy.
How To Prepare for the Forsaken Giant Fight
If you intend to solo the Forsaken Giant, or just want to go into the fight prepared, there are certain basics you should have covered, along with buffs you can use to help you close any gaps.
First, this is a level 60 encounter, meaning the closer you are to the Once Human level cap of 50, the better. Your weapons and armor should be fully calibrated, or at least as close as possible, and outfitted with upgraded mods. I highly recommend farming the Blackfell crates to get the Mods, as these crates will refresh every four hours. Dismantling mods that aren’t ideal for your build is also a great way to cash in on some mods. Getting blueprints to further upgrade your gear is also recommended.
Tier V fully calibrated armor will allow you to tank at least one hit from the Forsaken Giant without being forced into an incapacitated state. Because you only get three incapacitations in the fight, you’ll want to ensure you have as many as possible for the later stages.
Next, you’ll want to craft buffs. Here are the ones I recommend:
| Buff | How to Obtain | Effect |
|---|---|---|
| Living Armor | Harveseed Deviant, received from completing the second Monolith mission. Craft at bench. | Activates when HP drops below 30%. Recovers 100% HP within 5s, before losing Chloro-armor. For the next 10 min, Chloro-armor will not take effect. |
| Spring Legs | Obtained from Frog the Leaper Deviant, found south of Gaia Research Center Ruins along the north shore of the nearby lake. | Jump height +3.5 meters but will cost 15 Stamina. |
| The Weaver | Dreamcatcher Deviant, received from completing the third Monolith mission. Craft at bench. | Rolling while a hostile unit is nearby will leave a spider web on the ground, changing approaching enemies. |
| Stargazy Pie | Recipe obtained in the Highlands in Iron River. Cook on an electric stove. | Use to increase your Crit DMG by 25% when your energy is full. |
The three Deviants noted above can all be found early in the game, and you’re guaranteed to have Harveseed and Dreamcatcher. And while there are other damage boosting recipes, Stargazy is ideal, as you’ll always be shooting at Forsaken Giant’s crit spot. Now, onto the actual strategy.
How To Beat the Forsaken Giant
You’ll face the Forsaken Giant on a long three-part stage that has the potential to collapse. You can also run off the end and kill yourself, which new and unaware players are apt to do.
Phase One
The Forsaken Giant has an extremely large health pool and a critical hit spot that will move to one of six locations:
- Left shoulder
- Right shoulder
- Left palm
- Right palm
- Chest
- Face
Whatever his critical hit spot is at the moment, it will be glowing red. Ideally, you’ll stand in the middle of the stage, so you have the best ability to see both shoulders when the match begins, as one of his shoulders is guaranteed to be the first crit spot.
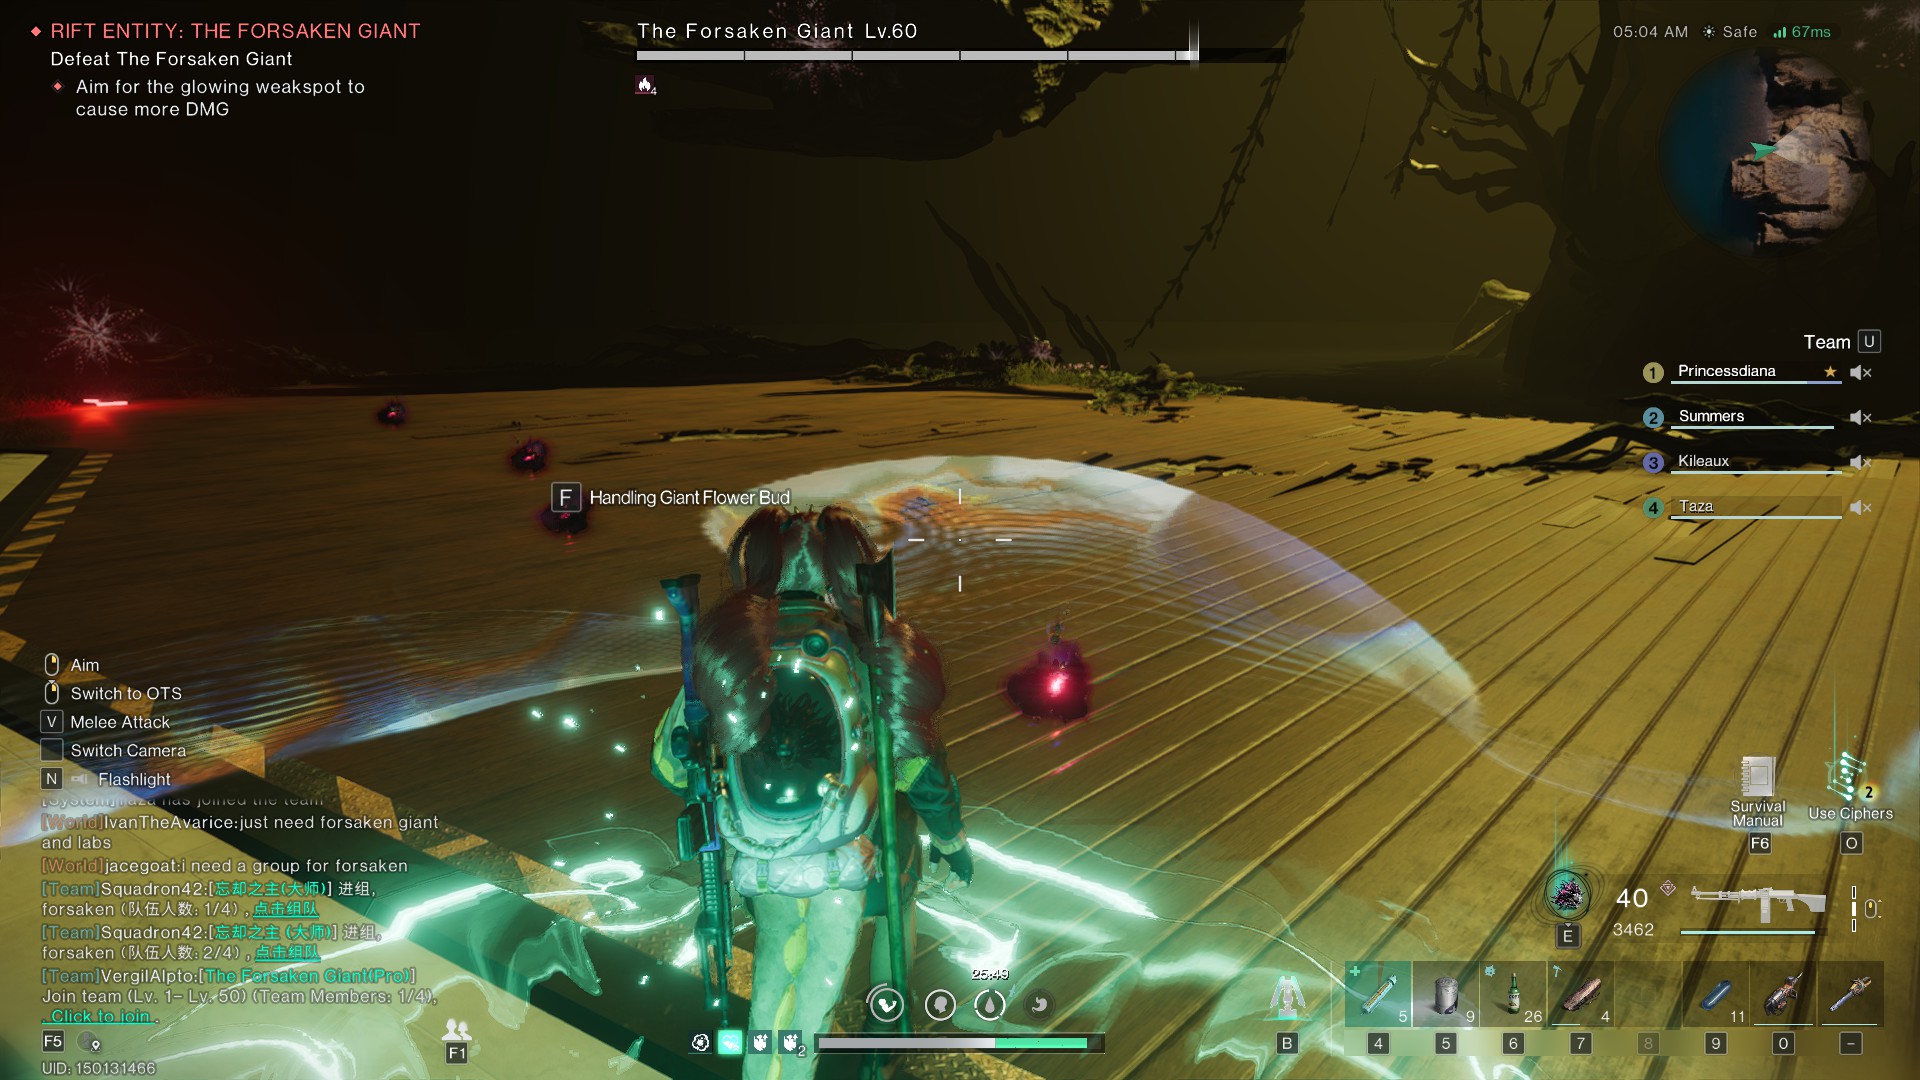
After you hit his crit spot and do enough damage, the boss will begin to cry or guard his next crit spot, which might be the palms, face, or chest. When this happens, a portal will open above the stage that will send flower buds pelting down on you. Take one of these balls by pressing ‘F’ and then throw it at the crit spot that he’s guarding to cause him to drop his hands. This will open a new window for damage. Though it’s possible to shoot between his fingers and do damage as well.
During this early phase, the Forsaken Giant will have one primary attack: an arm sweep that goes almost across the entire stage. It’s well advertised, and you’ll see him left the arm he’ll use to sweep the stage with. You can roll through the sweep and abuse I-Frames, though Once Human doesn’t have the pixel-perfect timing that a FromSoft game has. If you don’t feel confident about rolling through the sweep, you can also run in the opposite direction of the sweep, as it won’t reach the very end.
The secondary attack is a slam. You’ll have less time to dodge this one, but so long as it doesn’t land precisely on top of you, you only need to worry about the area-of-effect ripple that will radiate from the strike zone. You’ll need to jump over this ripple to avoid damage. That’s where Spring Legs come in. Players, especially new players, find that this makes the timing easier.
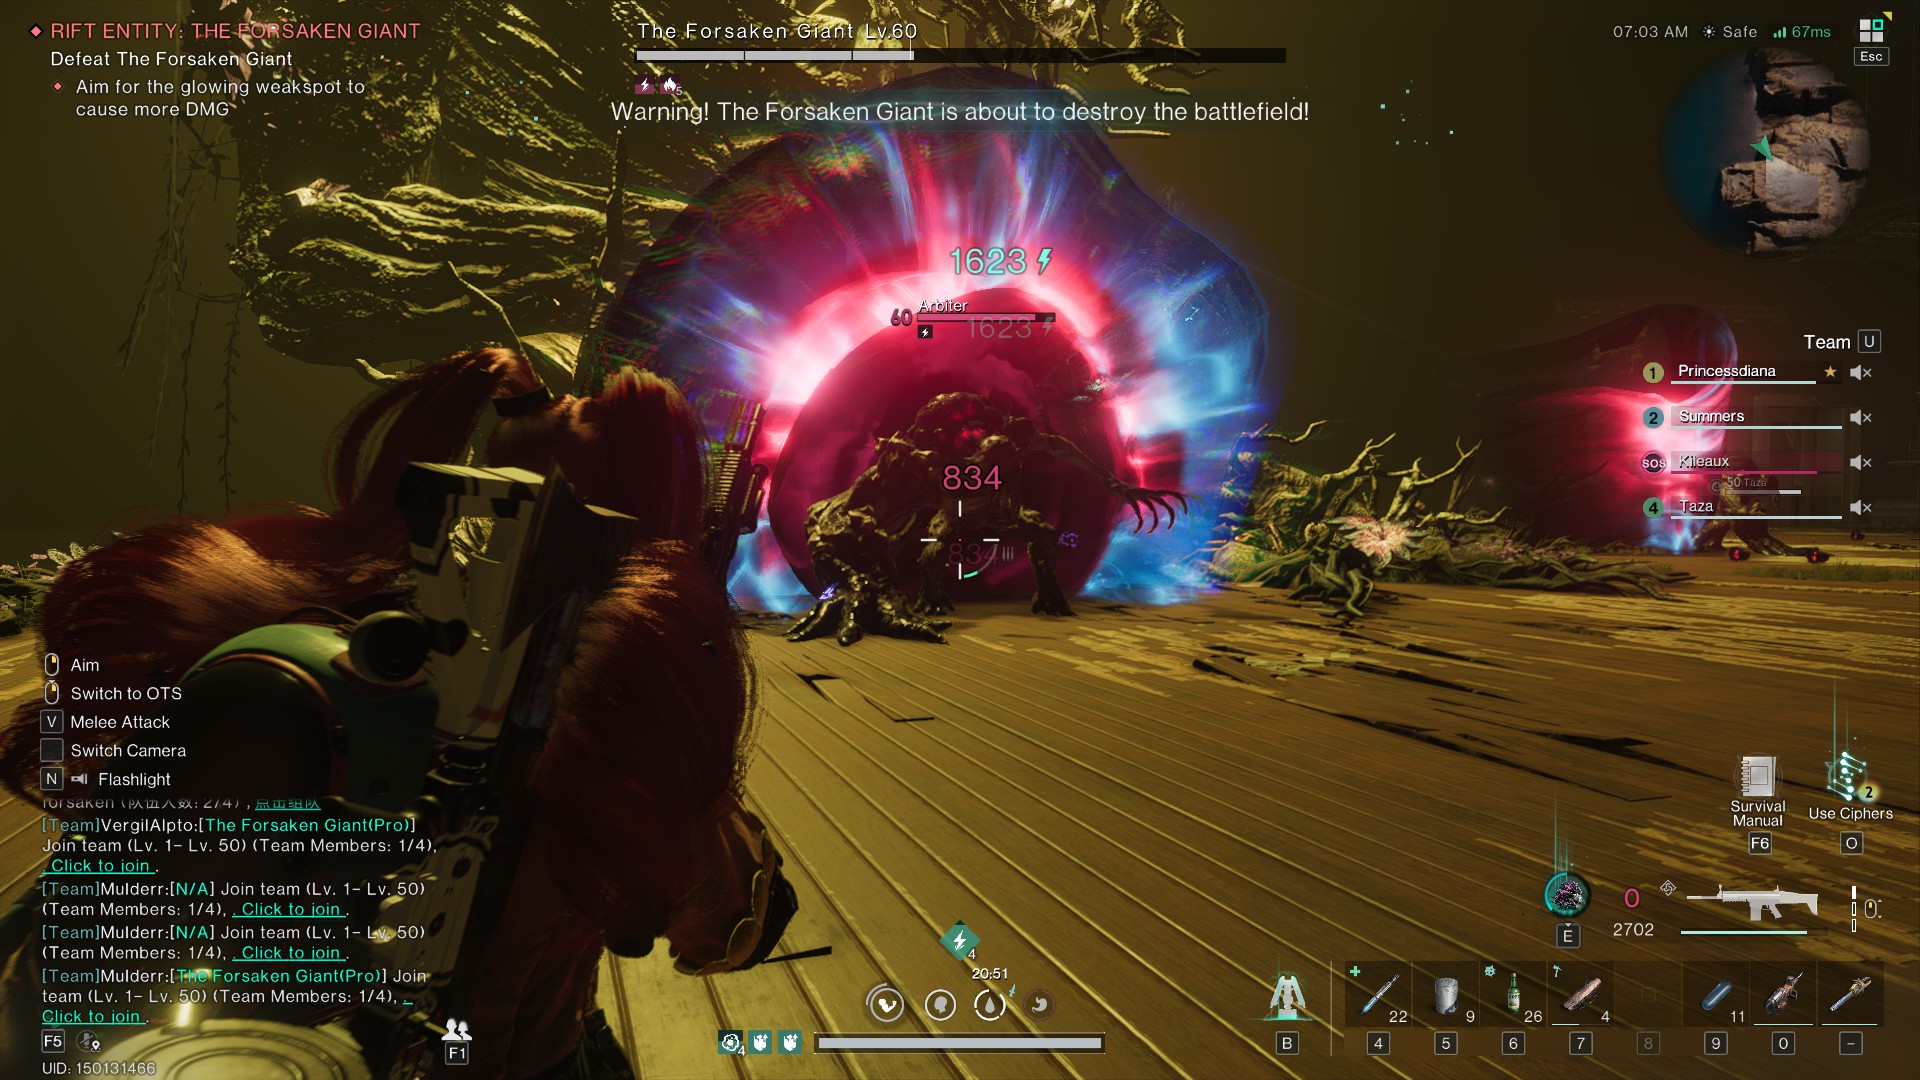
The third attack will be to open several portals along the stage, which will cause mobs of enemies to appear. Periodically, these mobs will include Arbiters, and the Forsaken Giant will vanish. You’ll need to kill the Arbiters to cause the Forsaken Giant to return.
If you’re just fighting standard mobs, or you’re getting chased, The Weaver can slow enemies down and give you some breathing room.
Phase Two
So, there really aren’t proper phases in this fight. But the Forsaken Giant will pull out a new trick after its taken damage. This trick will be putting a red light and arrow over one player. This player will decide which area of the stage will be hit with a slam.
Periodically, you’ll get notifications at the top of the screen saying that parts of the stage are starting to weaken. If the Forsaken Giant hits that part of the stage with his slam attack, the stage will collapse. Thus, the player who gets the red light should choose a location that isn’t collapsing. But if you haven’t been paying attention, select a part of the stage that no other player is at or doesn’t have wear and tear on it. If the stage collapses and a player is on it, they’re permanently dead for the rest of the fight.
The red light will also fade, and you’ll have ten to fifteen seconds to get away from where it last was, so don’t worry about being attacked.
Finally, the last attack of the Forsaken Giant is a Deviant Geyser. Circles will appear around the ground. These circles will then spout damaging red geysers. You just need to avoid standing on them and wait for them to stop before resuming your attack on the boss. This might happen once or twice an encounter, and it takes quite some time to subside. It’s a good time to heal up and check your e-mails.
All Rewards from the Forsaken Giant
The Forsaken Giant encounter offers an assortment of fantastic rewards. At Pro level, you’ll get guaranteed gold mods for your gloves, armor mods, Star Dust, Energy Links, and a level three Cortex. You can also pick up the Nutcracker Deviant, which will patrol your territory and take out any threats.
Once Human is available to play now.


Published: Aug 8, 2024 10:31 am