
The Khvostov is a classic Exotic weapon that’s back in Destiny 2‘s The Final Shape expansion, but getting it won’t be easy. That’s where we come in, though. Here’s how to get the Khvostov Auto Rifle in Destiny 2.
Getting the Legendary Khvostov Auto Rifle in Destiny 2
First off, we’ll go over the process of getting the Legendary version of the Khvostov in Destiny 2, as this is almost certainly required for getting the Exotic version. Basically, you need to play through the Final Shape campaign until you’ve completed the seven missions, collect nine Lost Encryption Bits in the open-world, then do a quest for Micah-10 called Alone in the Dark to collect six more Encryption Bits.
After completing these steps, you’ll then be able to open a chest at The Divide, which houses the Legendary Khvostov. If that sounds like a lot of work, don’t worry. I’ll walk you through it step-by-step.
Finish the Campaign
If you haven’t already finished the story campaign of The Final Shape, do that first. Only the first seven missions are available right now, and the eighth will unlock after the world’s first completion of the Salvation’s Edge Raid.
Collect Nine Lost Encryption Bits
After completing the campaign, you’ll then want to scan the different open-world zones for golden chests that contain Lost Encryption Bits. There are nine to be found, and the good news is that they’re all indicated on your map as little + sign icons with double strokes.
Keep Doing Quests Until You Unlock Alone in the Dark

After that, you’ll want to continue doing your post-game quests in Destiny 2 and taking part in world events and activities until you unlock a new quest from Micah-10. Specifically, you’ll need to complete the first step of the Ergo Sum quest, which will then unlock the Convalescence quest line from Micah-10. Keep focusing on doing Convalescence missions until the story progresses.
The quest you’re looking for is called Alone in the Dark, which will require you to complete six Cyst missions, as listed below:
- Sword Dance
- Searing Light
- Arial Ace
- Moth-Infested Cavern
- Slayer
- Smothering Darkness
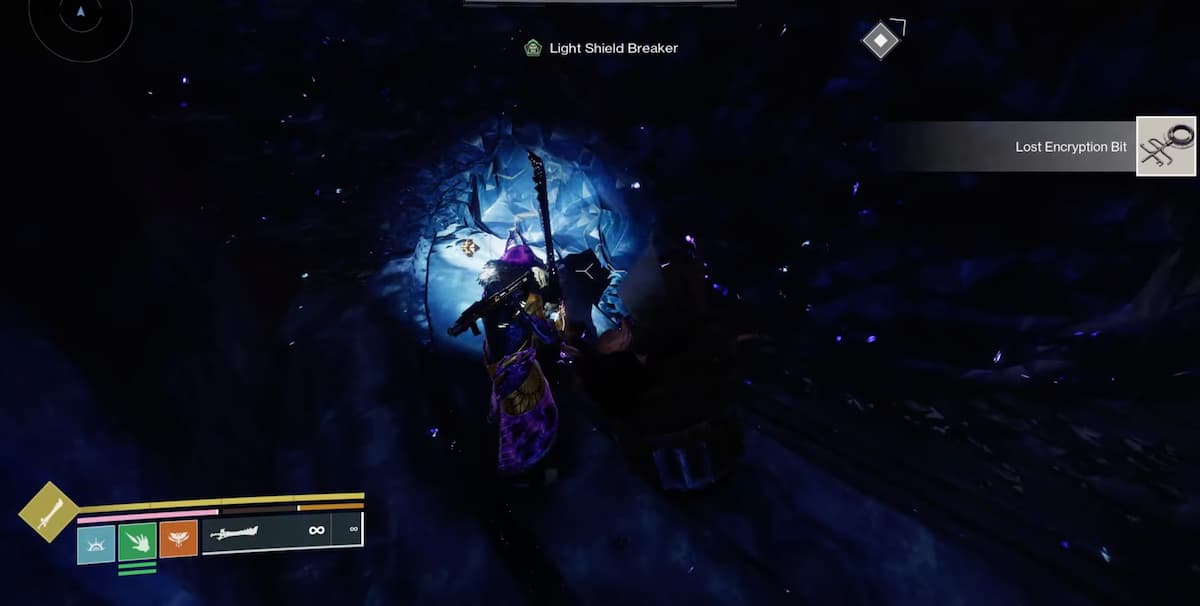
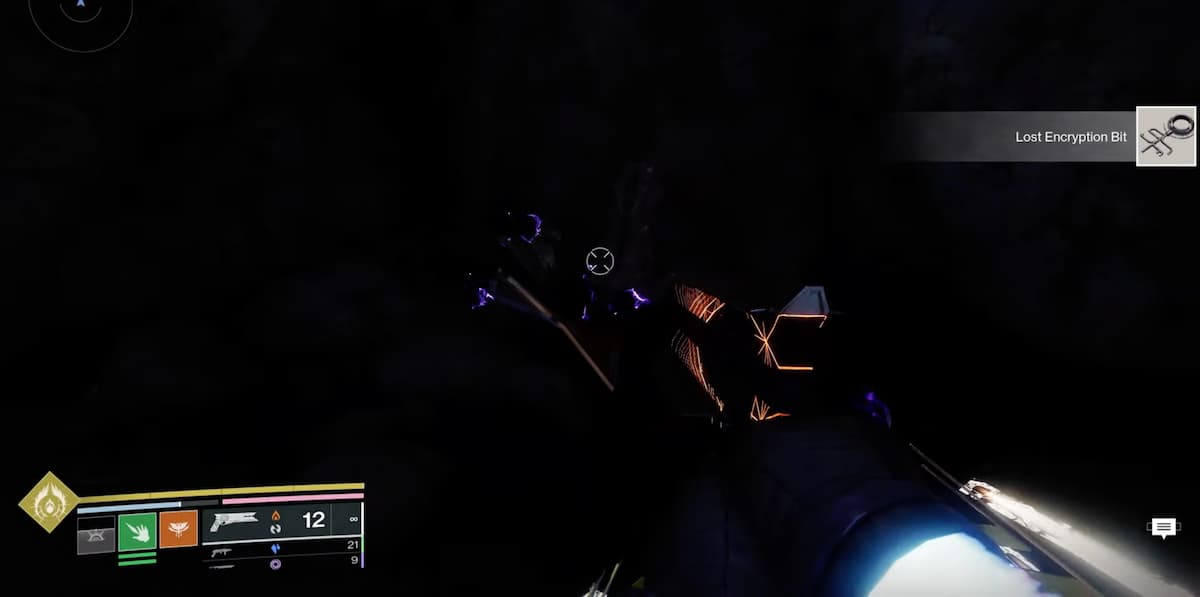
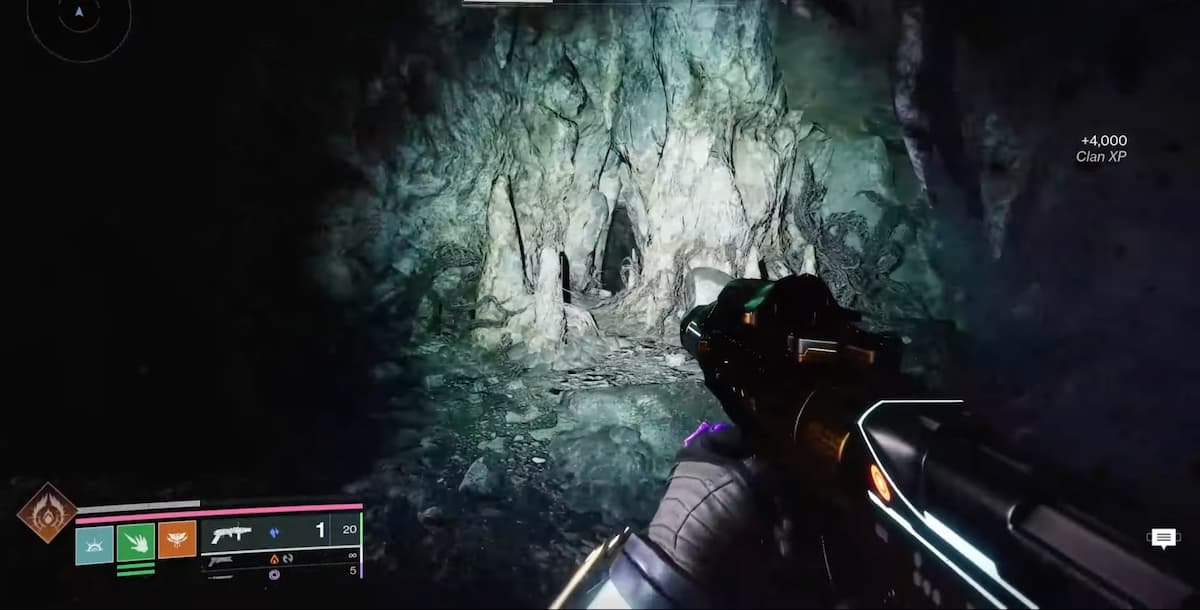
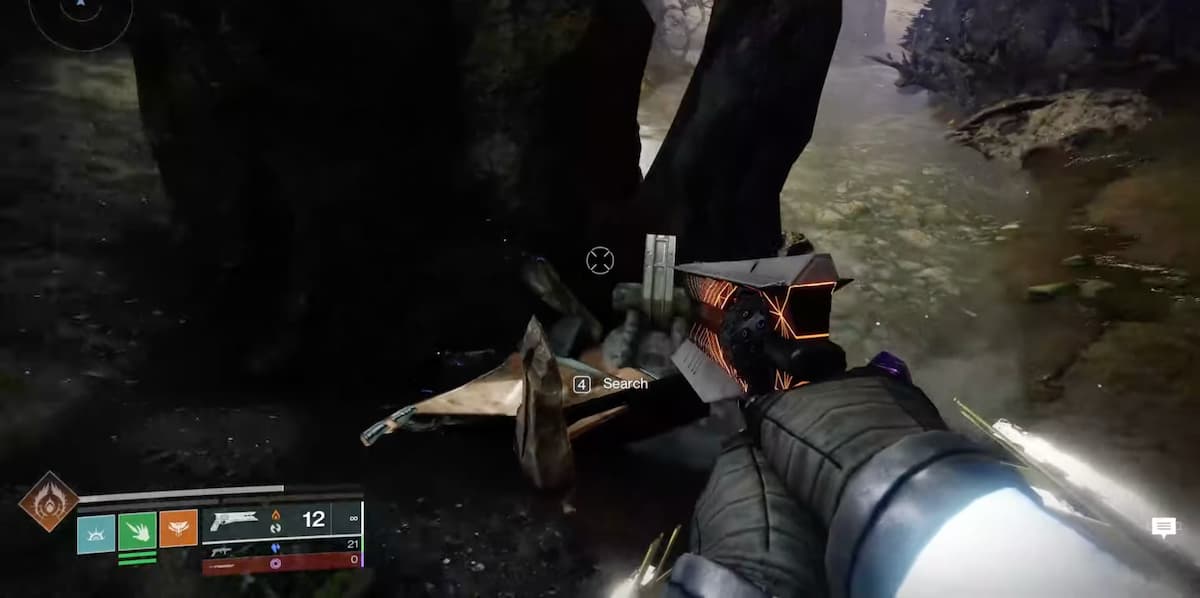
The key thing about each of these Cyst missions is that there is a Lost Encryption Bit in each area that you need to find. This means that you’ll need a total of 15 Lost Encryption Bits by the end of this quest line in order to get the Khvostov. I’ve included screenshots of their locations down below:
Sword Dance
During the Sword Dance mission, once you get to the area with platforms and a large drop-down area, you’ll want to look down for more platforms and tree trunks you can drop down to. Keep going down while following the white bubbles, and you’ll eventually find a small doorway housing some rubble which contains the Encryption Bit.
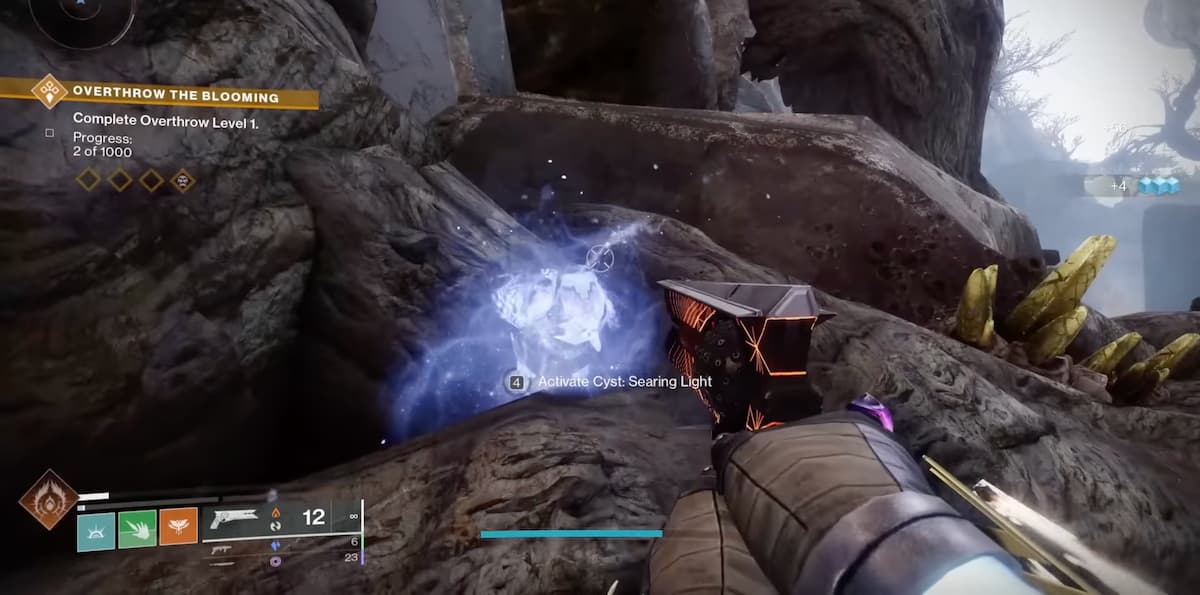
Searing Light
Immediately after clearing the mission, turn around to find a hallway lit up in purple. Hug the left wall to find a little cranny housing the Lost Encryption Bit.
Arial Ace
While going through the lava sections, you’ll eventually hit a break between two lava areas. Look at the wall on the right side of the tunnel to find a small hole you can go through. Head through to find the next Lost Encryption Bit.
Moth-Infested Cavern

Look out for the circular crystal room, then drop all the way down to the very bottom. Search the wall for a little alcove with some rubble that contains the Lost Encryption Bit.
Slayer
After clearing this mission, turn around and walk straight. Search the little pillar of ruins for the rubble with the next Lost Encryption Bit.
Smothering Darkness

After defeating Kelkris, don’t leave just yet. Look for a little opening with the large rectangular crystal above it, then go through. Drop down to the bottom and go all the way to the end to find the last Encryption Bit.
Collect the Legendary Khvostov

Finally, with all 15 Lost Encryption Bits collected, you’ll get the Encryption Code. Head back to the Pale Heart and make your way to The Divide. You’ll want to fast travel to the Impasse and head to the right to get to the Cosmodrome wall and find a chest sitting there, which you can now open with the Code to get the Legendary Khvostov.
How to Get the Exotic Khvostov
The Exotic Khvostov has finally been discovered as well, so here’s what you need to do next. You’ll need to collect a total of 17 Motes of Light around the Pale Heart. Eight of them can be gotten from collecting Traveler’s Statures, while the other nine are gotten from Overthrow.
Exotic Khvostov Location
First, the chest containing the Exotic Khvostov itself can be found at the Lost City landing zone, where the Speaker used to reside in the first Destiny. Before the chest itself spawns, you’ll need to gather eight Traveler’s Statues that can be placed around the room. We’ll go over each Statue location down below.
Traveler’s Statue #1

The First Traveler’s Statue can be found in the Lost City itself. From Micah-10’s terminal, turn right and drop down, then turn right again and go straight till you come across a gap. Keep to the left and jump to the red platform and keep going straight down a narrow path with red banners overhead.
You’ll find a waterfall at the end, with the first Statue at the base of the waterfall.
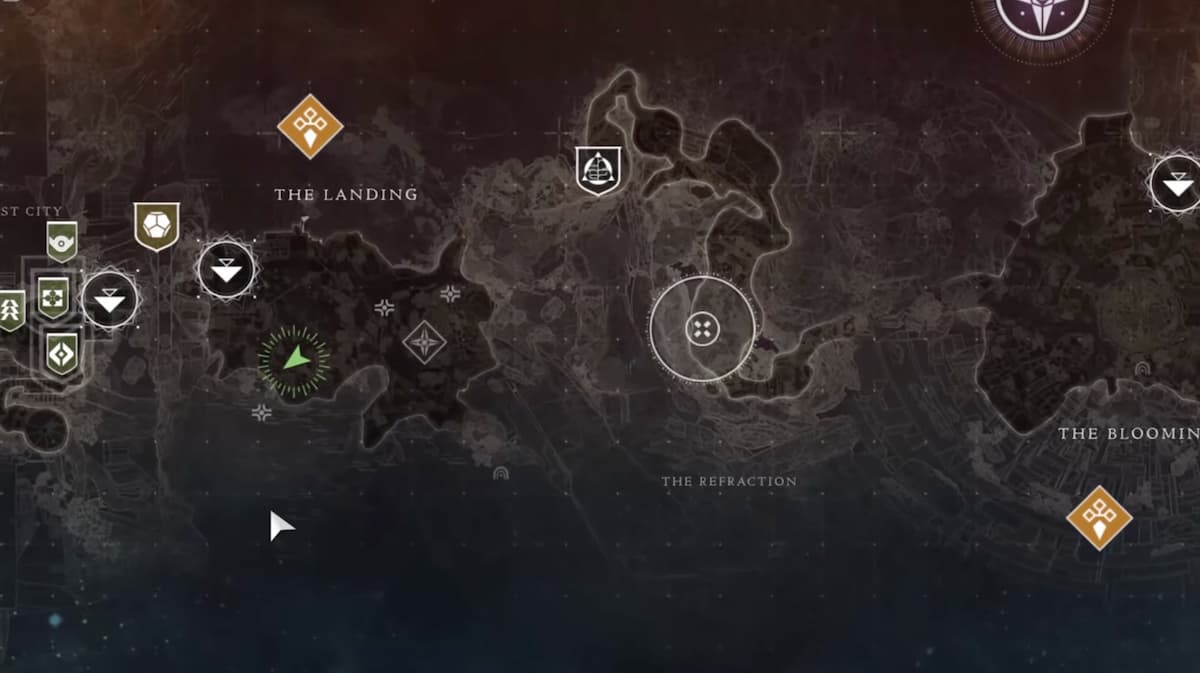
Traveler’s Statue #2

Fast travel to the Landing, then turn left to find another waterfall. You’ll find the second Statue in the water.
Traveler’s Statue #3

Go to the northern part of the Refraction and face south. Head straight ahead and drop down some cliffs to find a small cavern filled with water, where the Statue sits.
Traveler’s Statue #4

Head to the bottom right corner of the Blooming map and look for the giant tree just next to the opening of the hallway. You’ll need to parkour your way up to the top of the tree to find the next Statue.
Traveler’s Statue #5
Head to the Seclusion and activate the Searing Light Cyst mission by interacting with the white glowing bird. Once the mission starts, turn right inside the cave to find a small opening with the Statue.
Traveler’s Statue #6

The next Statue can be found in The Divide, at the very top of the mountain behind a satellite dish. Do note that you need to spawn at the Impasse and backtrack all the way up to the mountain as there isn’t a closer fast travel point to take you there.
Traveler’s Statue #7

Fast travel to the Impasse, and immediately turn left and go straight towards the white-colored stone structures. You’ll find the Statue sitting on top of one of the structures.
Traveler’s Statue #8
Fast travel to the Impasse, then head all the way east to the Transgression. This is a pretty long trek, but once you get to the end, look behind the giant tree for the final Statue.
Defeat the Overthrow Bosses
The remaining nine Motes of Light can be acquired by killing bosses in Overthrow. You’ll need to fight all nine Overthrow bosses in the following areas:
- The Landing
- The Blooming
- The Impasse
There are three different bosses in each of these areas, and you need to defeat all nine unique bosses to get your Motes of Light. Repeating a boss will not reward you with any Motes. Upon defeating the ninth boss, you’ll get the Mote of Primordial Light.
After placing all the Traveler’s Statues and collecting all the Motes, head back to the Lost City to open the chest to get the Exotic Khvostov.
Destiny 2 Exotic Khvostov Perks and Rolls
Finally, this is what you’ve been working so hard to get. Here are the perks you can get with the Exotic Khvostov Auto Rifle:
| Perk | Effect |
|---|---|
| The Right Choice | Every seventh bullet from this weapon deals additional damage and ricochets to nearby targets. |
| Shoot to Loot | Shooting an Orb of Power picks it up. Shooting an ammo brick picks it up and automatically reloads all of your equipped weapons from reserves. |
And that’s how you can unlock the Khvostov in Destiny 2.


Published: Jun 6, 2024 10:51 pm