
Whether you’re playing Skyrim for the first or the 100th time, the dungeon puzzles can prove incredibly frustrating. This is especially true for the second pillar puzzle in Saarthal, which continues to stump Skyrim players.
Contents
What is Saarthal in Skyrim?
Saarthal is a location linked to the initial quest associated with the College of Winterhold. It’s just a short journey from Winterhold and will be marked on your map after speaking with Tolfdir to complete your initial lessons at the college.
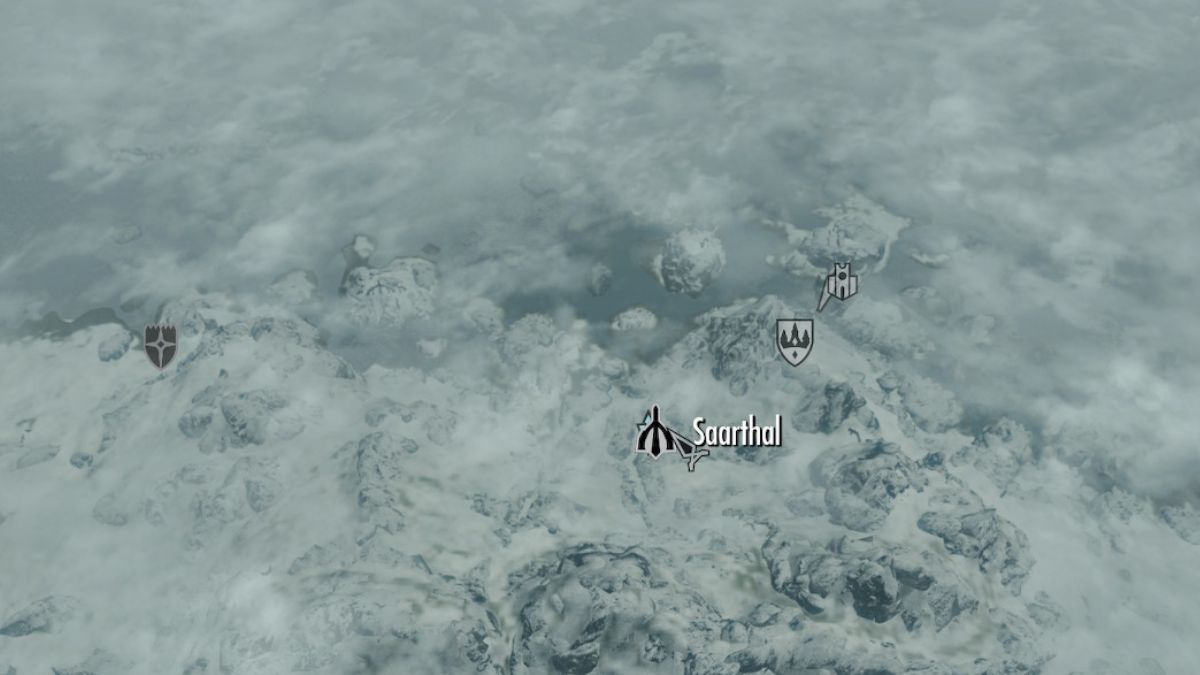
For the Under Saarthal quest, you’ll need to explore these “definitely safe” ruins with your new magic teacher.
What to Do if Tolfdir Isn’t Showing Up at Saarthal

Before you can worry about the pillar puzzles within Saarthal, you’ll need to get inside. The doors are locked and you’ll need Tolfdir’s key to enter.
Unfortunately, Tolfdir has a bit of a tendency to disappear on his way there. The best way to avoid this issue is to follow Tolfdir to the ruins from Winterhold. Otherwise, he’ll likely get caught up battling the wildlife with your fellow students.
If he isn’t there when you arrive, you have a couple of options for a potential fix:
- Head back towards Winterhold to see if you can find him and help him defeat whatever creature he’s battling (or push him out from the rock he may be stuck behind)
- Wait a bit to see if he eventually completes the journey
- Reload an earlier save point and start over from the College of Winterhold
How to Solve The First Saarthal Pillar Puzzle
Saarthal’s first pillar puzzle is pretty straightforward if you know where to look.
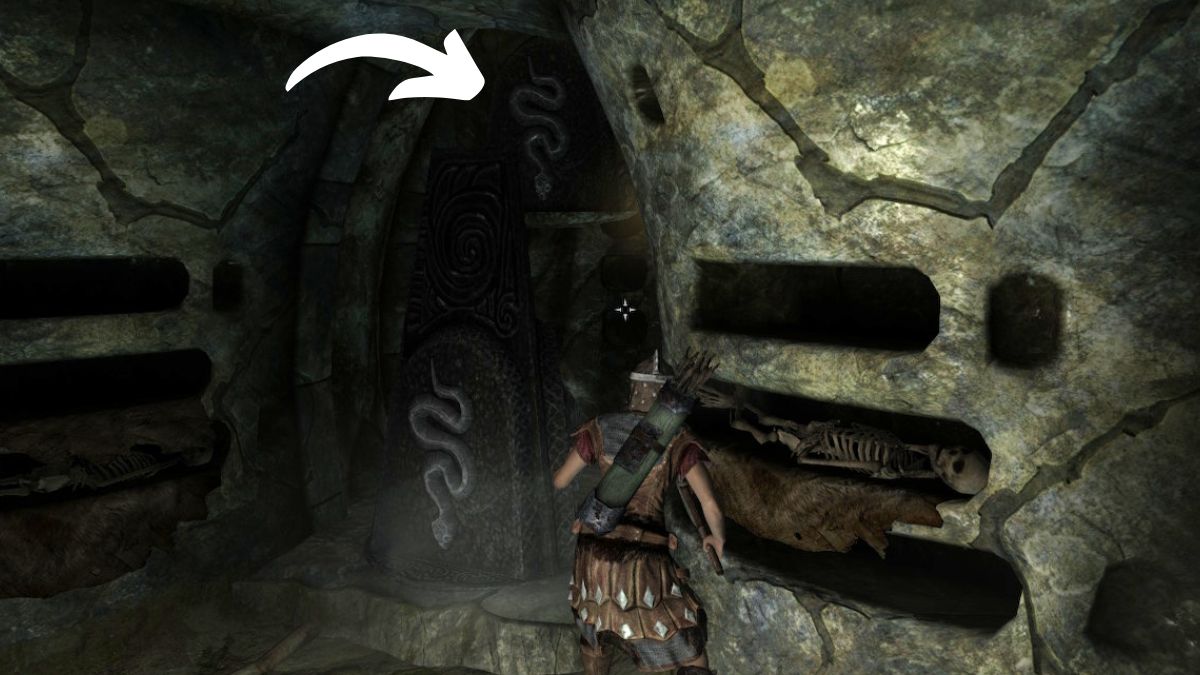
Behind each of the six pillars, hidden back in the recess of the wall, you’ll see an animal image. Simply turn that pillar until it matches the image depicted behind it, and you’ll be able to open the gate without fear. They can be a bit tough to see, so a light source like a torch or your fire spell can help.
The solutions for each pillar are:
- 1st pillar on the left, facing the lever: Eagle
- 1st Pillar on the right, facing the lever: Whale
- 2nd Pillar on the left, facing the lever: Snake
- 2nd Pillar on the right, facing the lever: Eagle
- 3rd Pillar, directly to the left of the lever: Whale
- 3rd Pillar, directly to the right of the lever: Whale
How to Solve the Second Pillar Puzzle

Saarthal’s second pillar puzzle is the one that’s caused quite a few players to throw their controllers across the room.
While there are once again helpful engravings that show you which image should be displayed, these pillars are connected. Meaning, when you turn one pillar, others will shift, so that you need to turn them in the right order to get all of the pillars lined up with the correct animals.
There’s a trick to this that works best if you’ve just arrived at the second pillar puzzle and haven’t touched anything yet. However, even if you arrived at this guide after messing around with the pillars for quite some time, trying them in this rough order should make it easier to get them to the right positions.
- Start with the back left pillar, setting it correctly to the Whale symbol. It will rotate all of the other pillars, so it’s best to set this one in position first
- Next, move the front left pillar which rotates two other pillars. Set it correctly to the snake symbol.
- At this point, check your work. Depending on how many other pillars you’ve messed with, they may be in the right positions already. If not, proceed.
- Turn the back right pillar, which also moves the front right pillar, to the Eagle symbol. Check your work again.
- If it still needs to be rotated, you should now be able to move the front right pillar to the Whale symbol. For me, it was already there by this point in the process.
Once you confirm that all of the pillars are set to the correct symbol, you can pull the lever and proceed through the dungeon to the danger that lurks beneath Saarthal.


Published: Jun 28, 2024 08:05 pm