
One of the last major dungeons you’ll come across in The Legend of Zelda: Echoes of Wisdom is Lanaryu Temple. Here’s how to complete it and grab every treasure along the way!
Table of contents
Lanaryu Temple Walkthrough

Upon entering Lanaryu Temple, activate the waypoint then head in. The first room will have a stone pathway leading to a large fan, but you can’t use it yet. For now, go left and defeat the Ice Octos in the room, earning you five portions of rock salt. Retrace your footsteps, then head right. You’ll find a pedestal with a red orb in the distance. Jump across the gap, making sure not to fall into the ice water, then Bind the red gem and bring it to the pedestal. The heat will activate the fan, melting the ice in the main room and allowing you to go down to the next level.
After taking the ladder down, defeat the Snomauls and look up. You should see two jets of cold air blocking your path to a chest. Generate a cloud underneath them, then when the jets stop blowing, hop over and summon a Strandtula, allowing you to climb up, open the chest, and get the three monster fangs inside. Jump back down, then continue down the ladder. Push the boulder into the first icy jet of air, then summon another to block the second jet. Head into the next room to find another fan and several streams of air, some hot and some cold. Go to the left and use the boulder to block the gust, allowing you to head into the next room.
Here, you’ll have to carefully transport the red gem to the pedestal without it getting hit by the cold gust of air. If it does, it will turn blue and you’ll have to try again. This is the central gimmick of The Legend of Zelda: Echoes of Wisdom’s Lanaryu Temple.
Summon some ice blocks in the area in front of the gust, then Bind to the gem. Hop on top of the blocks, walk over to the pedestal and drop the gem. The last room will melt, so exit and jump into the newly thawed water to get the small key. Return to the previous room. This time, you want to turn the gem blue, so make sure it comes in contact with the cold air, which will refreeze the last room. Head back and generate blocks so that you can move the two boulders into the path of the hot air then scale the wall. Use your small key on the door and go down the ladder.
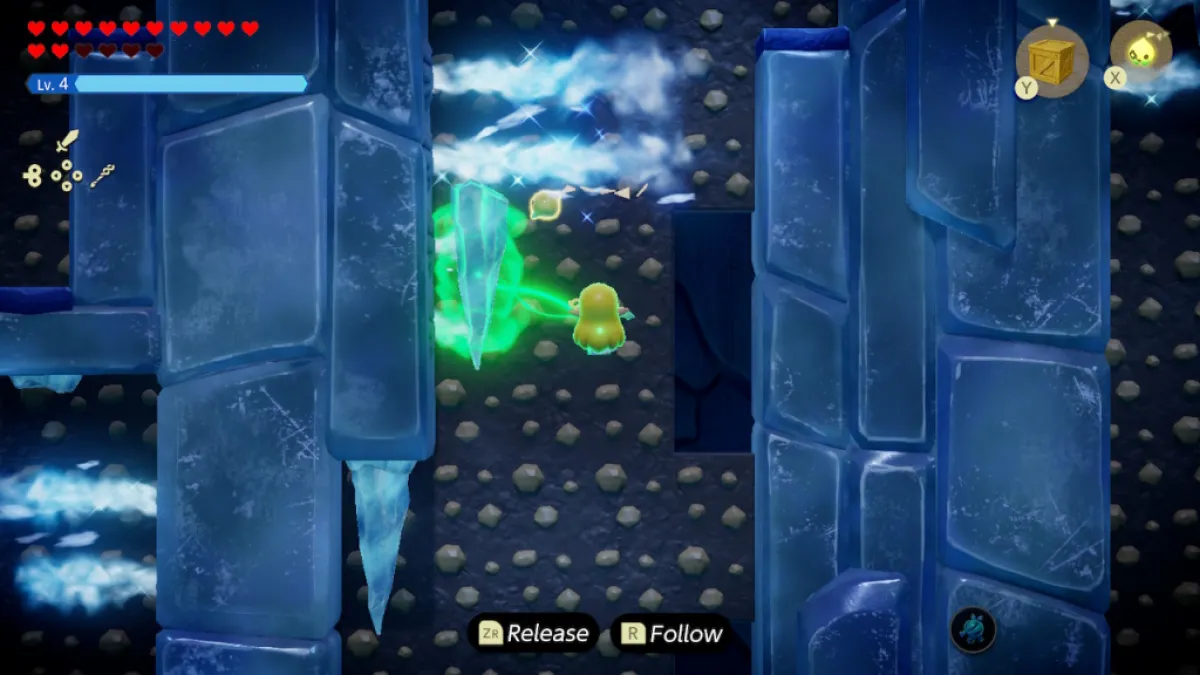
In this room, you have to carefully climb down while avoiding both cold gusts of air and falling icicles. If you get hit by either, you’ll most likely fall into a bottomless pit and have to start over. Use Bind on an icicle, then move with it to block the streams of air. When you need to switch sides, simply release the icicle you have, grab another one, and keep the process going until you have reached the next ladder, taking you to the second basement.
You’ll have to use clouds to cross the bottomless pits with the gusts of wind. When the wind dissipates, summon some clouds and jump across. You have to be quick, though, as the cold air will destroy your Echoes. Before the second gap, generate cloud platforms until you reach the space above the first set of jets, revealing a small passageway that will take you to a chest with a golden egg. Exit the nook, then use your clouds once more to cross the gap.
Here, you’ll find several ice blocks and a locked door. Melt the ice block opposite the Brazier on the other side of the room, which will reveal a staircase. Head down it to find another climbable path. At the bottom, you’ll find another red gem. Bind with it, then start climbing up the passage, avoiding the cold jets. When you reach the section with two unending cold blasts of air, head to the left and generate some ice blocks to reach the climbable wall on the ceiling. Then simply head to the top right of the room to place the gem on the pedestal, warming the room filled with ice blocks.
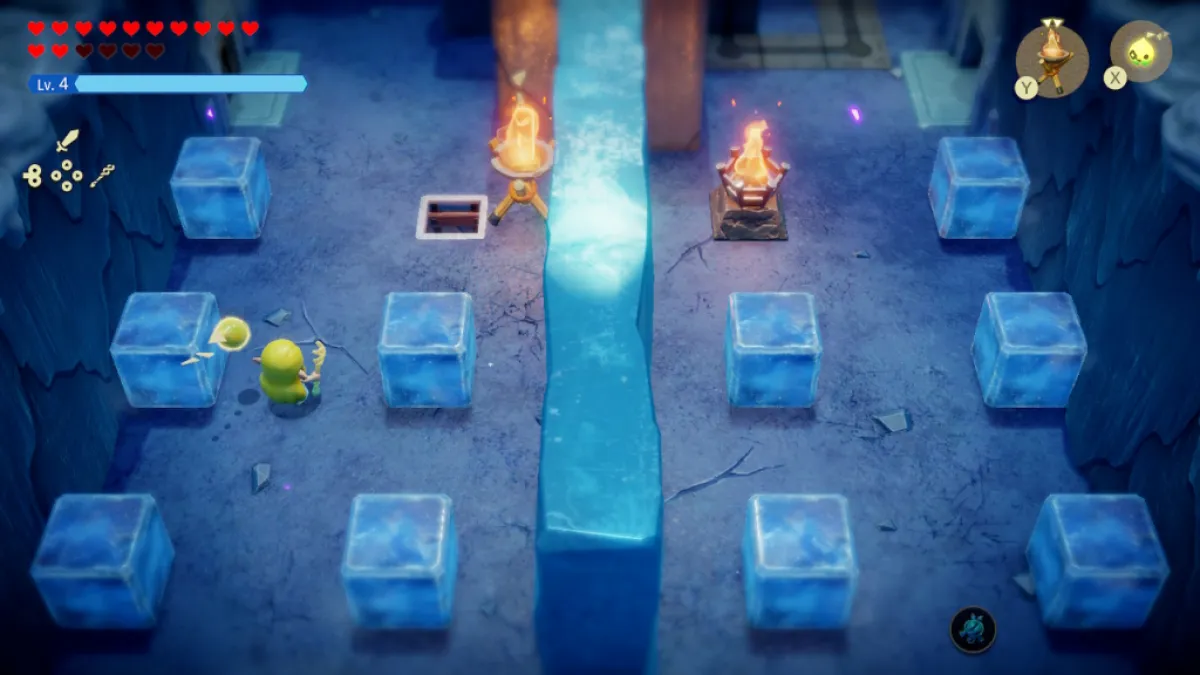
Go back up and cross over to the right side of the ice block room. Here there will be two switches and several ice blocks. To get the small key hidden in this room, you’ll need to activate both switches at the same time. Jump over the closest ice block and head to the isolated block by the furthest switch. Use Bind to move it to the direct right of the switch, then return to the ice block you initially jumped over. Push it, then step onto the switch when the ice block lands on the switch opposite you. If you’re too early or too late, you’ll have to leave and restart the puzzle. If not, the small key is yours. Go out and unlock the door.
In the next room will be four Temper Tweeluses, numerous patches of ice, and icy jets. Defeat the Tweelus in the middle first, then focus your attention on the other three. You’ll be safe on your elevated stronghold and can also heal if you stand in the hot spring. Once the Tweeluses are dead, the door will open and you’ll get the Dungeon Map. Activate the waypoint in the next room, then get ready for Lanaryu Temple’s miniboss fight.
How To Fight Slime Eye
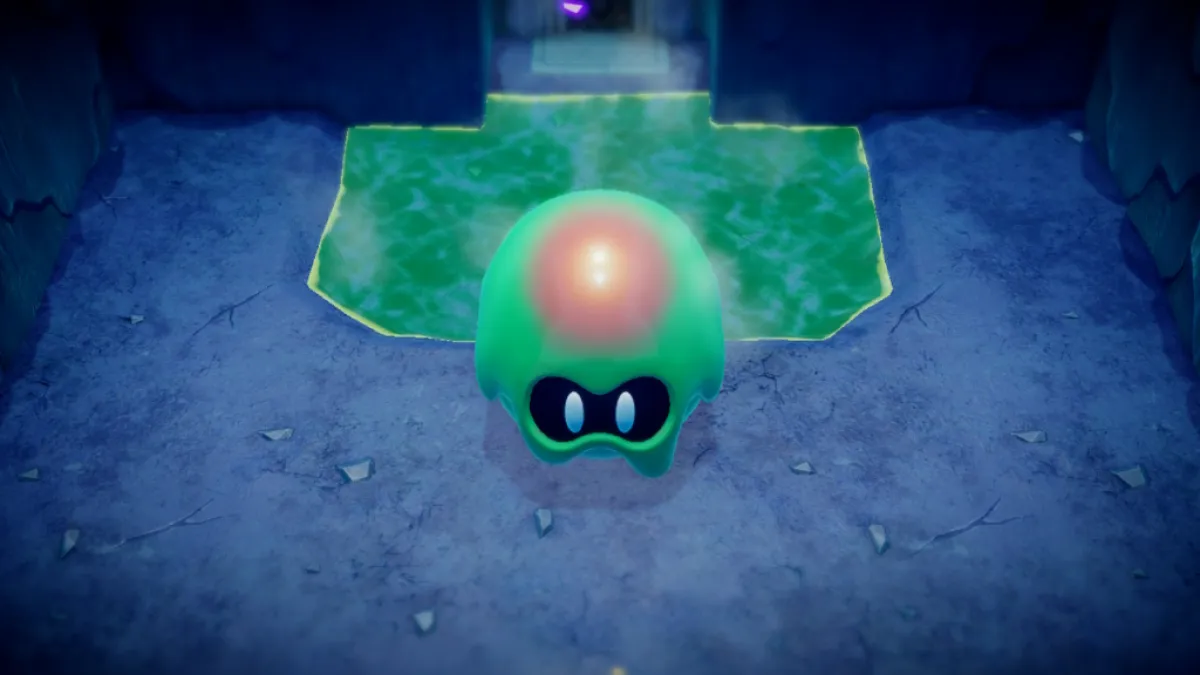
Slime Eye is one of few dungeon minibosses in The Legend of Zelda: Echoes of Wisdom that isn’t Echo Link. Be prepared because this fight requires different tactics as it goes on. Initially, you can’t harm the Slime Eye, and its only attack will be to jump in the air and come crashing down. Keep an eye on its shadow to see where it will land, and also be aware that when it lands, you’ll be briefly stunned unless you jump. That and rocks will fall from the ceiling.
Before you can deal damage to the Slime Eye, you’ll have to freeze it. Summon an Ice Wizzrobe to do so, then switch to Swordfighter Mode and hit it until it divides. Each time it divides, it will become a little bit faster. After the first division, each jump will still cause rocks to fall. Repeat the process to divide them again. At this size that they’ll stop causing rocks to fall; instead, they’ll shoot water from the hot spring in the back of the room.
Once there are too many Slime Eyes bouncing around for your Ice Wizzrobe to keep up, summon Ice Octos. If you summon six at a time, they’ll freeze the smaller Slime Eyes, meaning you can easily track them down. When they freeze, use Swordfighter Mode once more until they divide for the last time. Now they’ll only require one hit from an Ice Octo to freeze them, making them easy targets. It can be somewhat chaotic prioritizing which sized Slime Eye to defeat next, but if you just tackle them from largest to smallest, they’ll be defeated quickly enough.
Lanaryu Temple Walkthrough Part 2
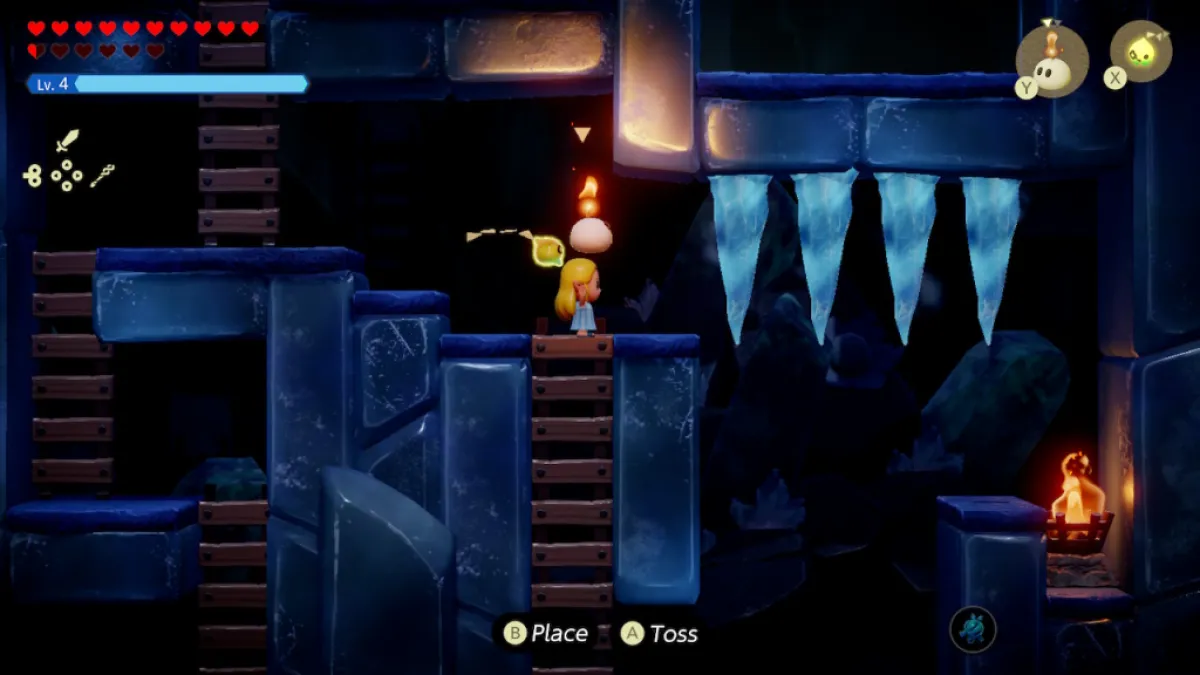
After going down the ladder, you’ll find yourself in a dimly lit vertical passage. The goal here is to light all of the torches to open the door. The first torch is on the slope going down from where you enter the room. The next one will be towards the right, in a small nook above icy water and below a fiery gust of air. Use ice blocks to reach the small platform, then generate water blocks to reach the nook, summoning a Brazier to light it. Then head to the bottom right of the room and summon an Ignizol. Throw it at the unlit torch there once the icicles have fallen. Cross over to the left and summon a Fire Wizzrobe away from you above the ceiling you can’t bypass. Target the unlit torch, and the Fire Wizzrobe should ignite it, opening the door. Before you head down the newly accessible ladder though, move the torch and summon some Strandulas to reach a chest with 100 rupees.
In the next, large room, ignore the yellow switch and head into the room directly beneath it. Defeat the enemies, then head south. Here, you’ll find numerous pathways for temperature orbs, a locked door to the west, and an open door to the east. Go into the open room and head north to find a red orb. Walk across the icy pathway, carefully dodging the enemies while transporting the red orb. If you’re getting frustrated by the enemies, you can go ahead first to clear the way. Once the gem is placed, head back into the previous room to see that the ice has all melted.
Dive under the water and defeat the three Tektite Lv. 2 enemies that are hopping around. Summon a platform to reach the chest, which will get you a monster stone. Head back into the large room with the multiple temperature paths and dive into the now-thawed water. Drop the nearby boulder onto the switch to open the door, then head in. This room will have two time-sensitive switches on opposite sides, but you can’t do anything with them yet. Go into the next room and you’ll once again have to move a red gem past several gusts of wind. This time you’ll have to turn the gem blue to freeze the last room, so generate platforms in front of the gusts of hot air so you can hop onto them, thereby causing the gem to miss the gusts. Once the room has become icy, return to it.

From where you enter, generate an ice block and push it towards the switch in the top right corner. As it’s sliding, jump over the iron fence and step on the switch at the same time the ice block reaches the opposite one. If done correctly, the door will open, putting you into a room with a White Wolfos. Defeat it and the two Wolfoses it summons, then head into the next room. Here, you’ll again have to guide a red orb to warm another room. Go ahead first and use a Fire Wizzrobe to defeat the Freezards and melt some of the ice blocks. Then slowly guide the red gem to the platform, pausing whenever a cold gust of wind is going to blow from the wall. Once placed, head up the ladder and activate the switch to take you back into the room with the boss key. Go south.
In the room with the lone gem and pedestal, use a Brazier to light the torch in the corner. Bring the gem over to it, turning it red, then place it on the pedestal, melting the ice pillars by the boss key. However, don’t leave the room yet. Place a blue gem on the platform now to freeze the water solid. Now leave the room and step on the yellow switch, causing a snowball to roll onto a larger switch and remove the gate blocking the boss key. Pick it up and approach the stairs to the right. Generate some water blocks to get to the pathway above the door, which will take you to a cool 50 rupees. Now, go down the stairs. Use the hot spring to heal up, then get ready for the next boss on Echoes of Wisdom’s Lanaryu Temple.
How To Fight Skorchill

Skorchill, like the dungeon itself, will constantly change his attacks and abilities based on the temperature of his helmet. To make matters worse, when his helmet is active, he’s invulnerable. When the fight begins, Skorchill will have an ice helmet that will cause the floor to become icy. He’ll also jump around and cause icicles to fall from the ceiling, embedding themselves in the ground. He’ll then start to slide around, bouncing off the walls and icicles. Finally, he has a pounding attack, where he slams both of his hands down in front of him, stunning you if you get hit.
When he’s in this phase, summon a Fire Wizzrobe and have it launch a ranged attack at Skorchill. Skorchill isn’t all that fast (unless he’s sliding) and will often just stay in one place, allowing the Wizzrobe to hit his helmet. Hitting the helmet three times with a fire-based attack will cause him to become vulnerable, and you can then wail on him with Swordfighter Mode. He won’t be stunned though, so be aware he can and will still attack you. After enough damage is dealt, Skorchill will swap helmets and attack with fire-based moves.
The good news is that in this phase, there are no icy floors. He’ll still do his pounding attack, but instead of dropping icicles, he’ll shoot fireballs. Switch to an Ice Wizzrobe and keep up the same pattern as the first phase. It should be a bit easier given the terrain, but don’t forget that Skorchill will still attack viciously after his helmet is destroyed.
Once you break his helmet, he’ll enter his third and final phase and don a helmet with both fire and ice properties. His attacks and the terrain will now switch based on which element is active. Keep up the same format, though, and summon Ice or Fire Wizzrobes to counter the element he’s using at any given time. Just keep having your Wizzrobes nail him from a distance, then massacre him when he’s vulnerable. Eventually, he will go down, earning you Nayru’s Sanction!
And that’s everything you need to know to clear Lanaryu Temple in The Legend of Zelda: Echoes of Wisdom.
The Legend of Zelda: Echoes of Wisdom is available now on Nintendo Switch.


Published: Oct 7, 2024 12:42 AM UTC